Support
This feature is intended to provide a one-stop hub in OSIS for sending all issues and requests. It allows the OSIS team to have a central location for issue tracking.
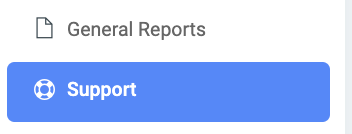
✑ From the OSIS sidebar, click on Support.
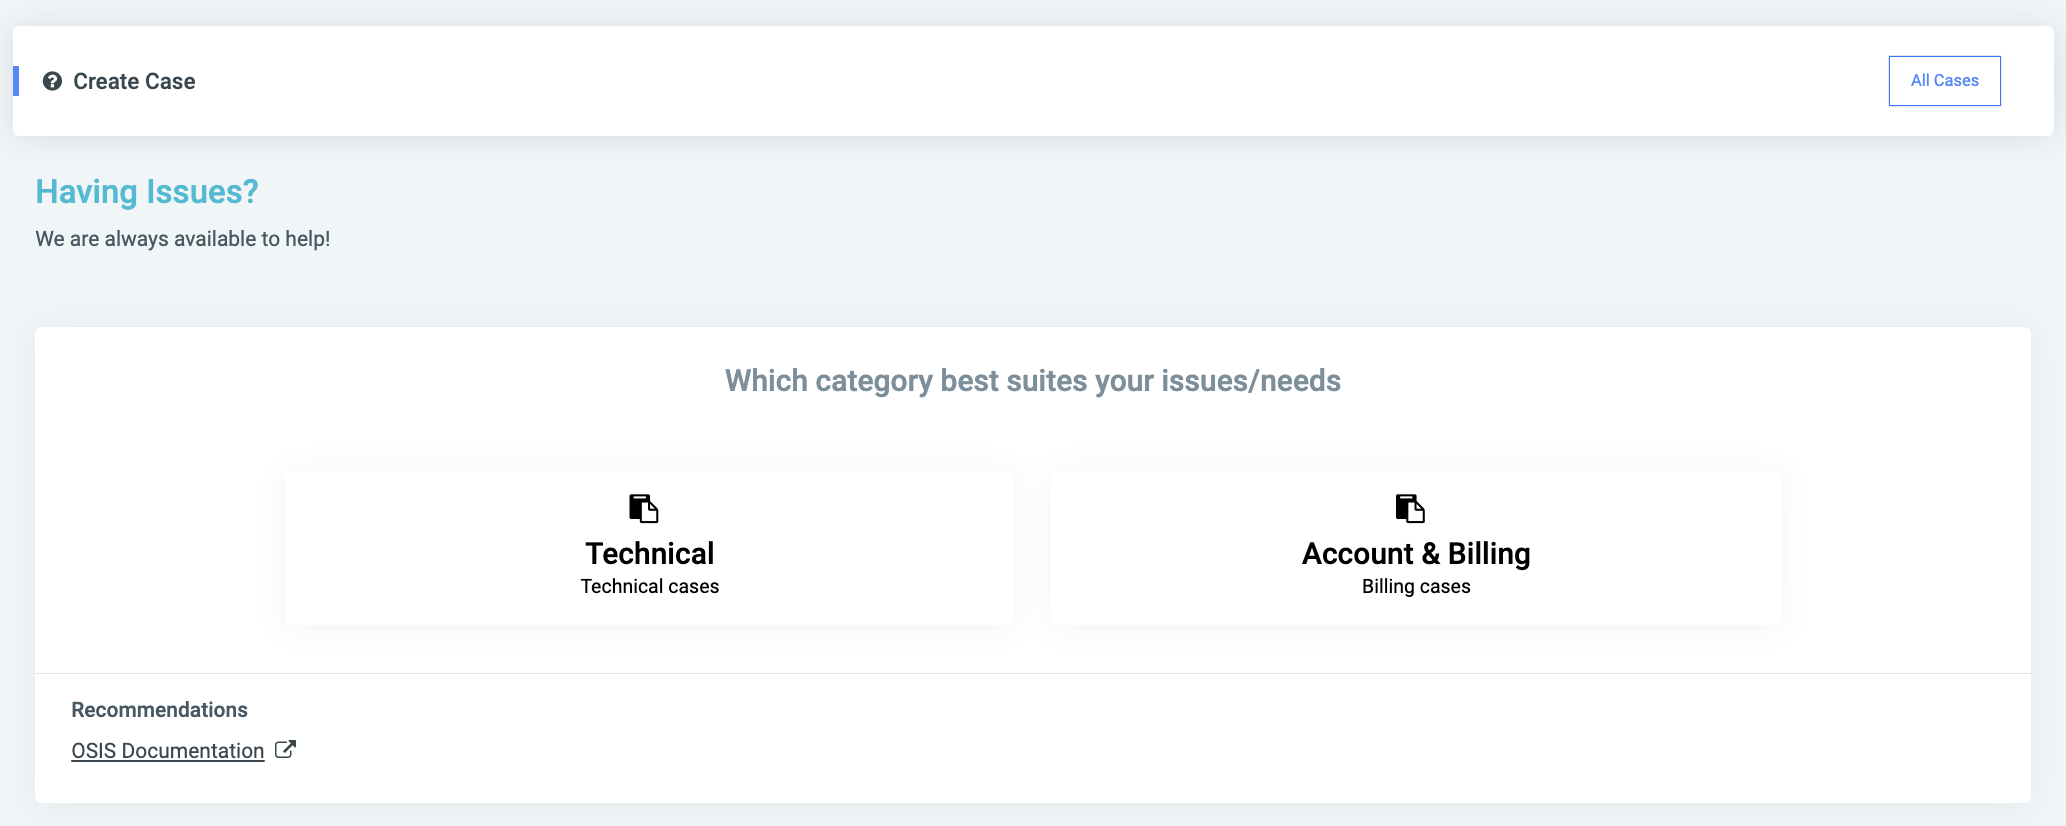
On the Support page, there is a Create button

✑ To create/raise a support case click on the Create Case button. This provides two routes to use to address your support need(s). There is the Technical option and the Account & Billing option.
The Technical option.
This presents the user with categories to base their cases on. They are: the Module and Severity options.
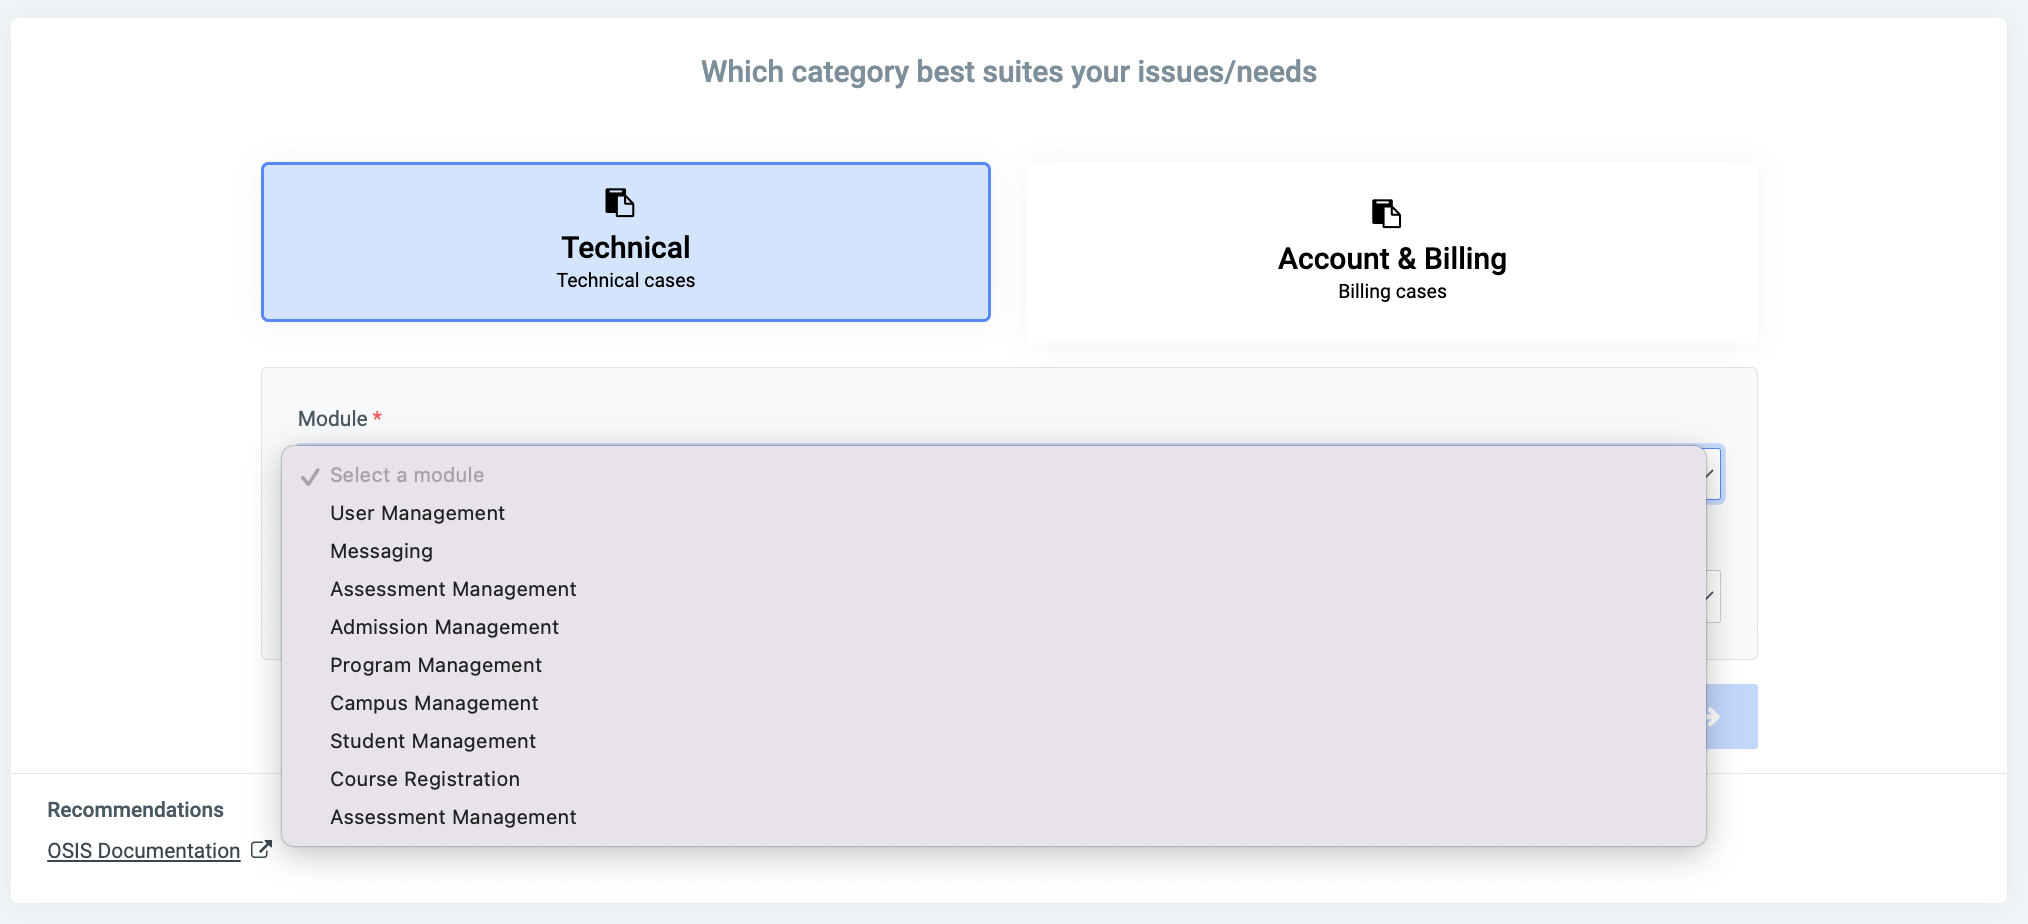
The Module option:
This brings up all modules aside from Finance. This gives the user the option to choose the module the issue is coming from.
They are:
- User Management
- Messaging
- Assessment Management
- Admission Management
- Program Management
- Campus Management
- Student Management
- Course Registration
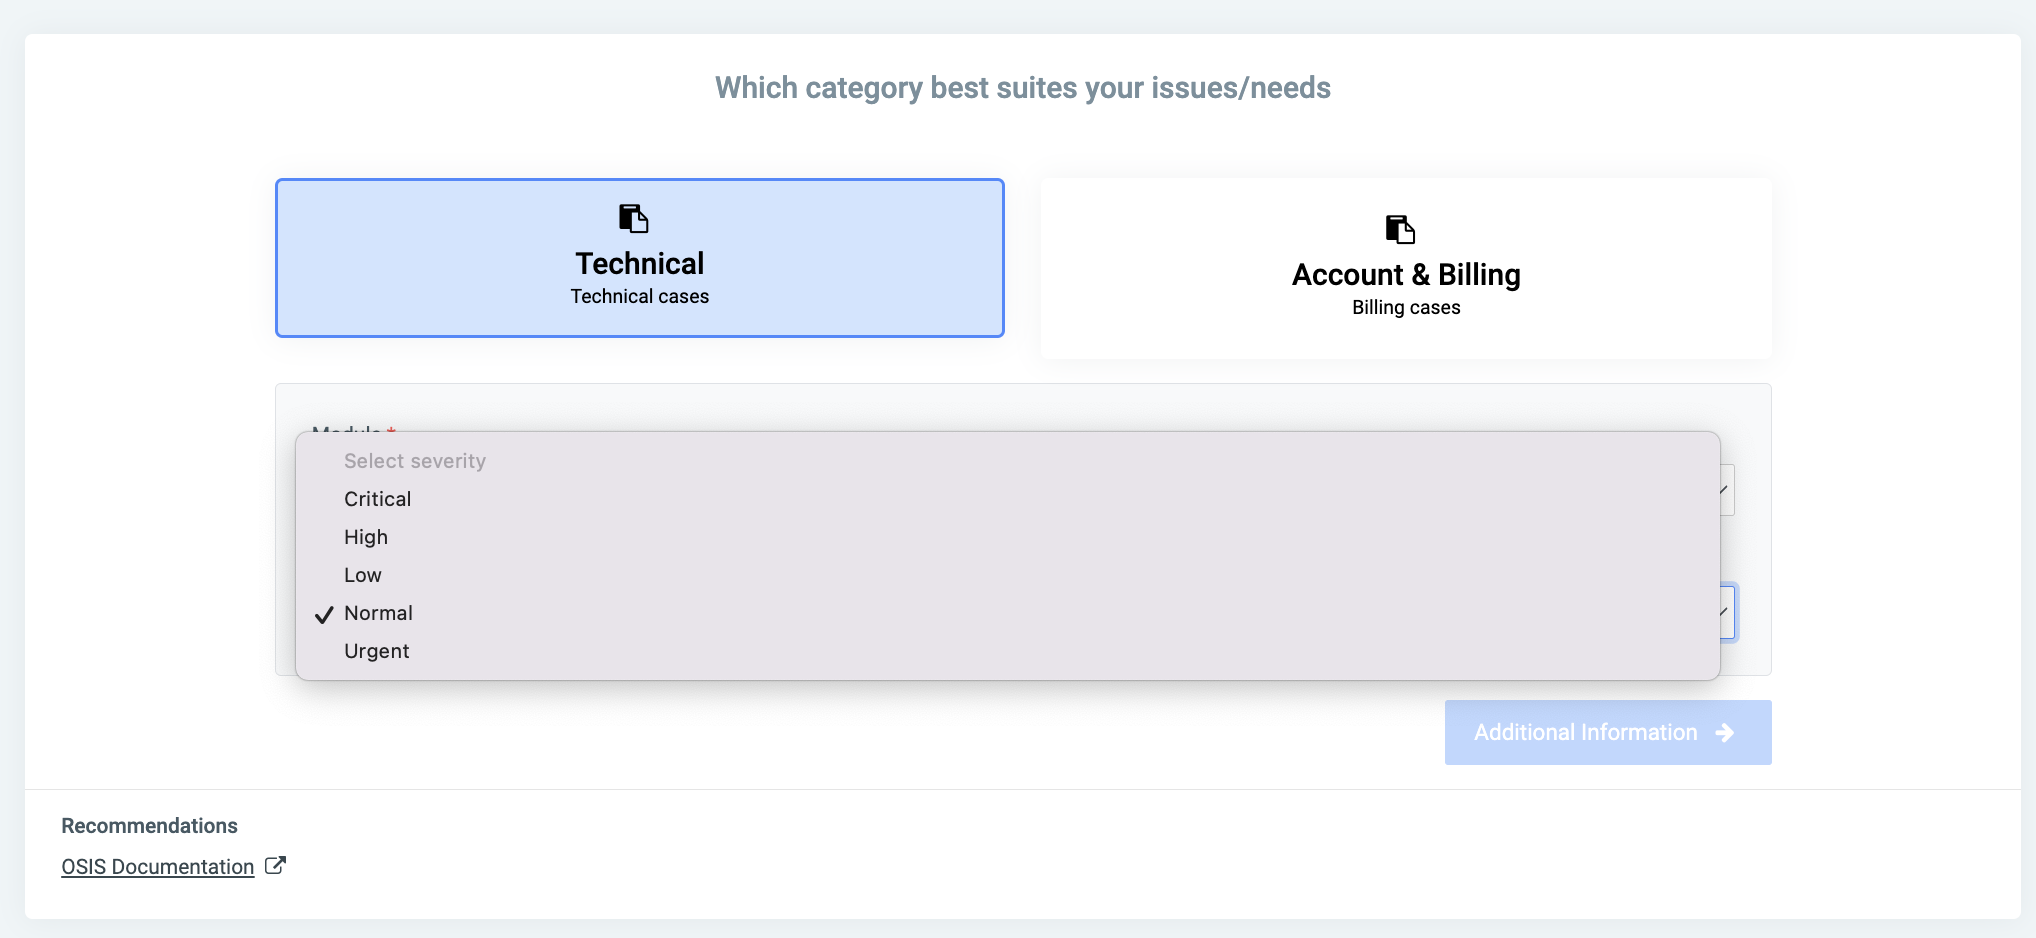
The Severity option:
This allows the user to specify the intensity of the issue.
The options are:
- Critical
- High
- Low
- Normal
- Urgent
Once the options are selected from both categories, the Additional Information button is made active. Click on it to proceed to the next step.
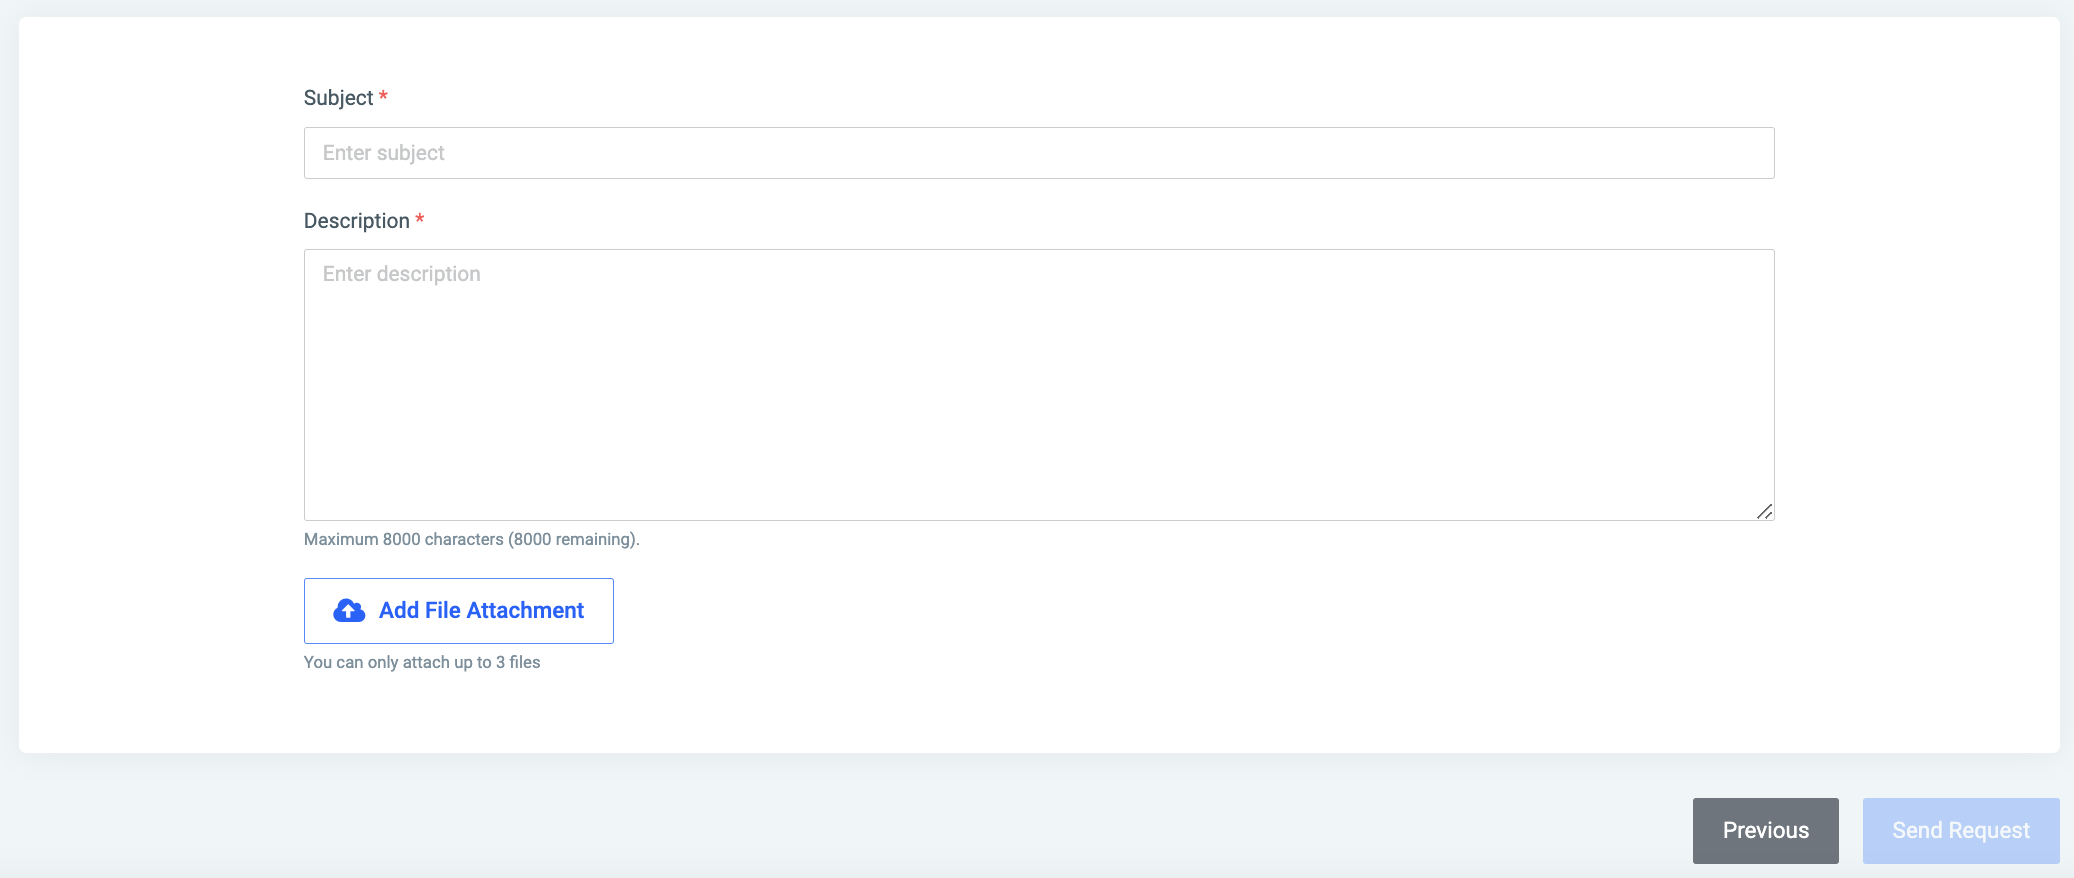
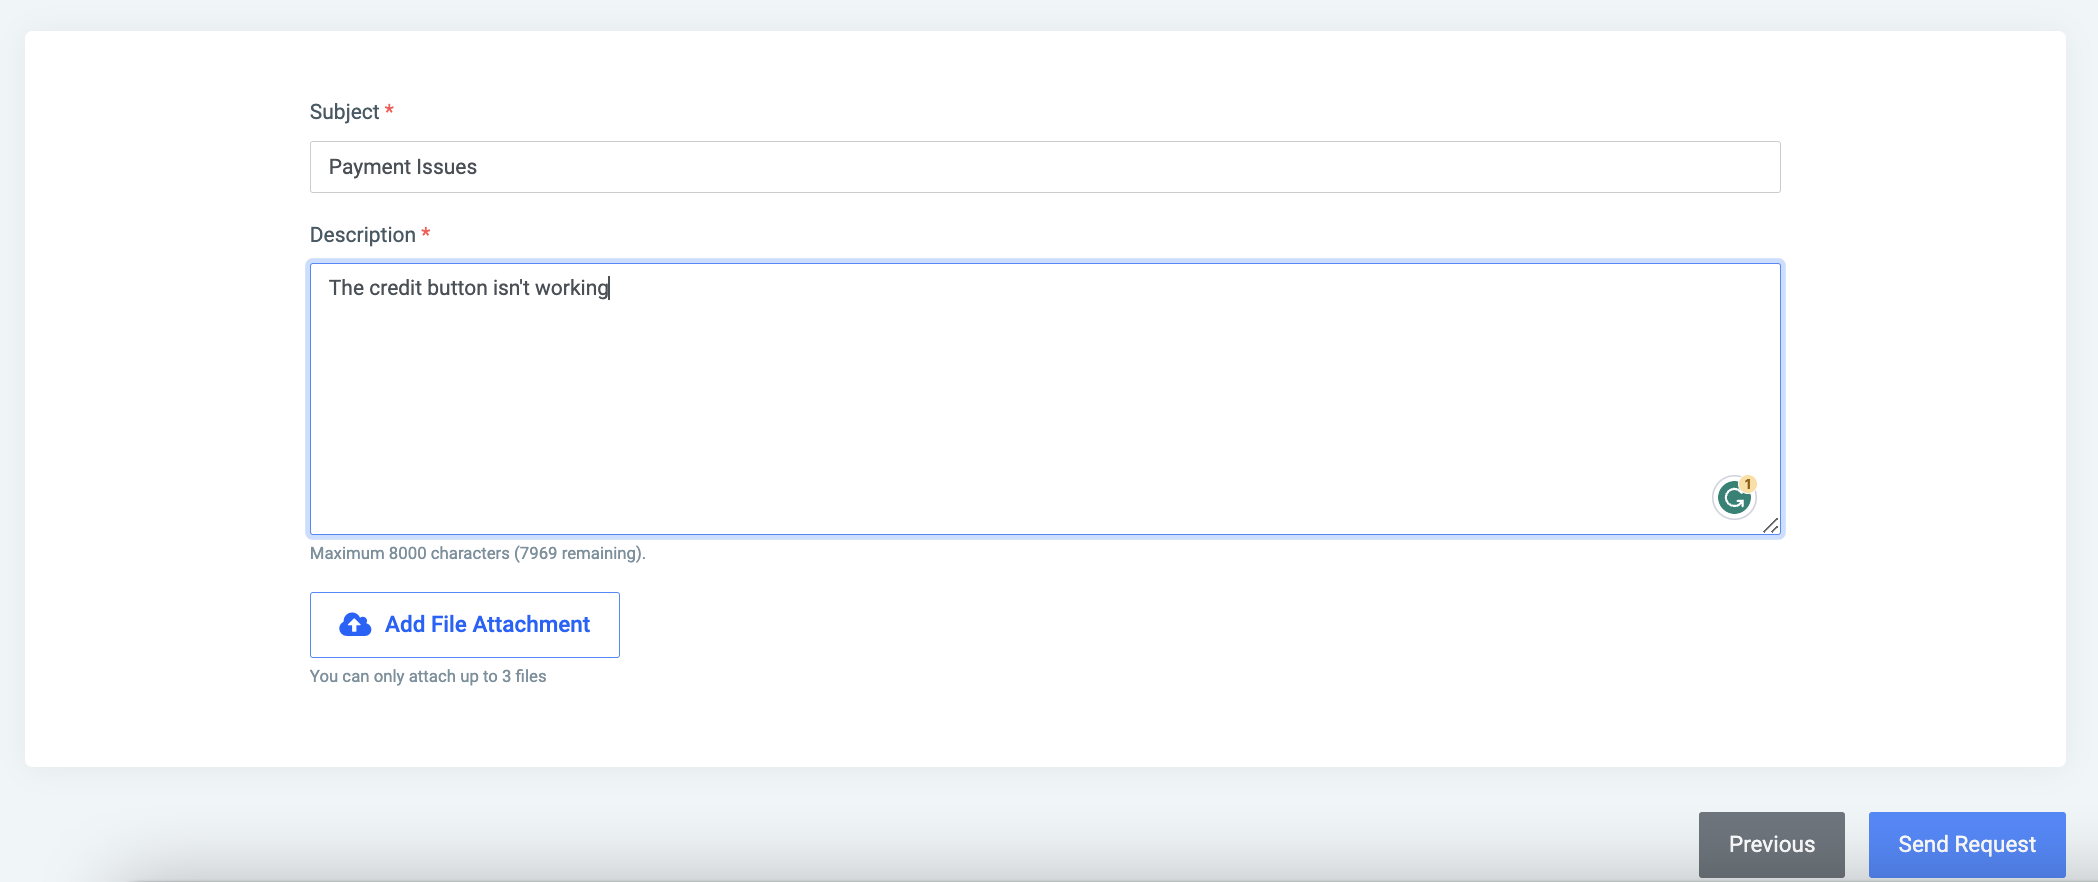
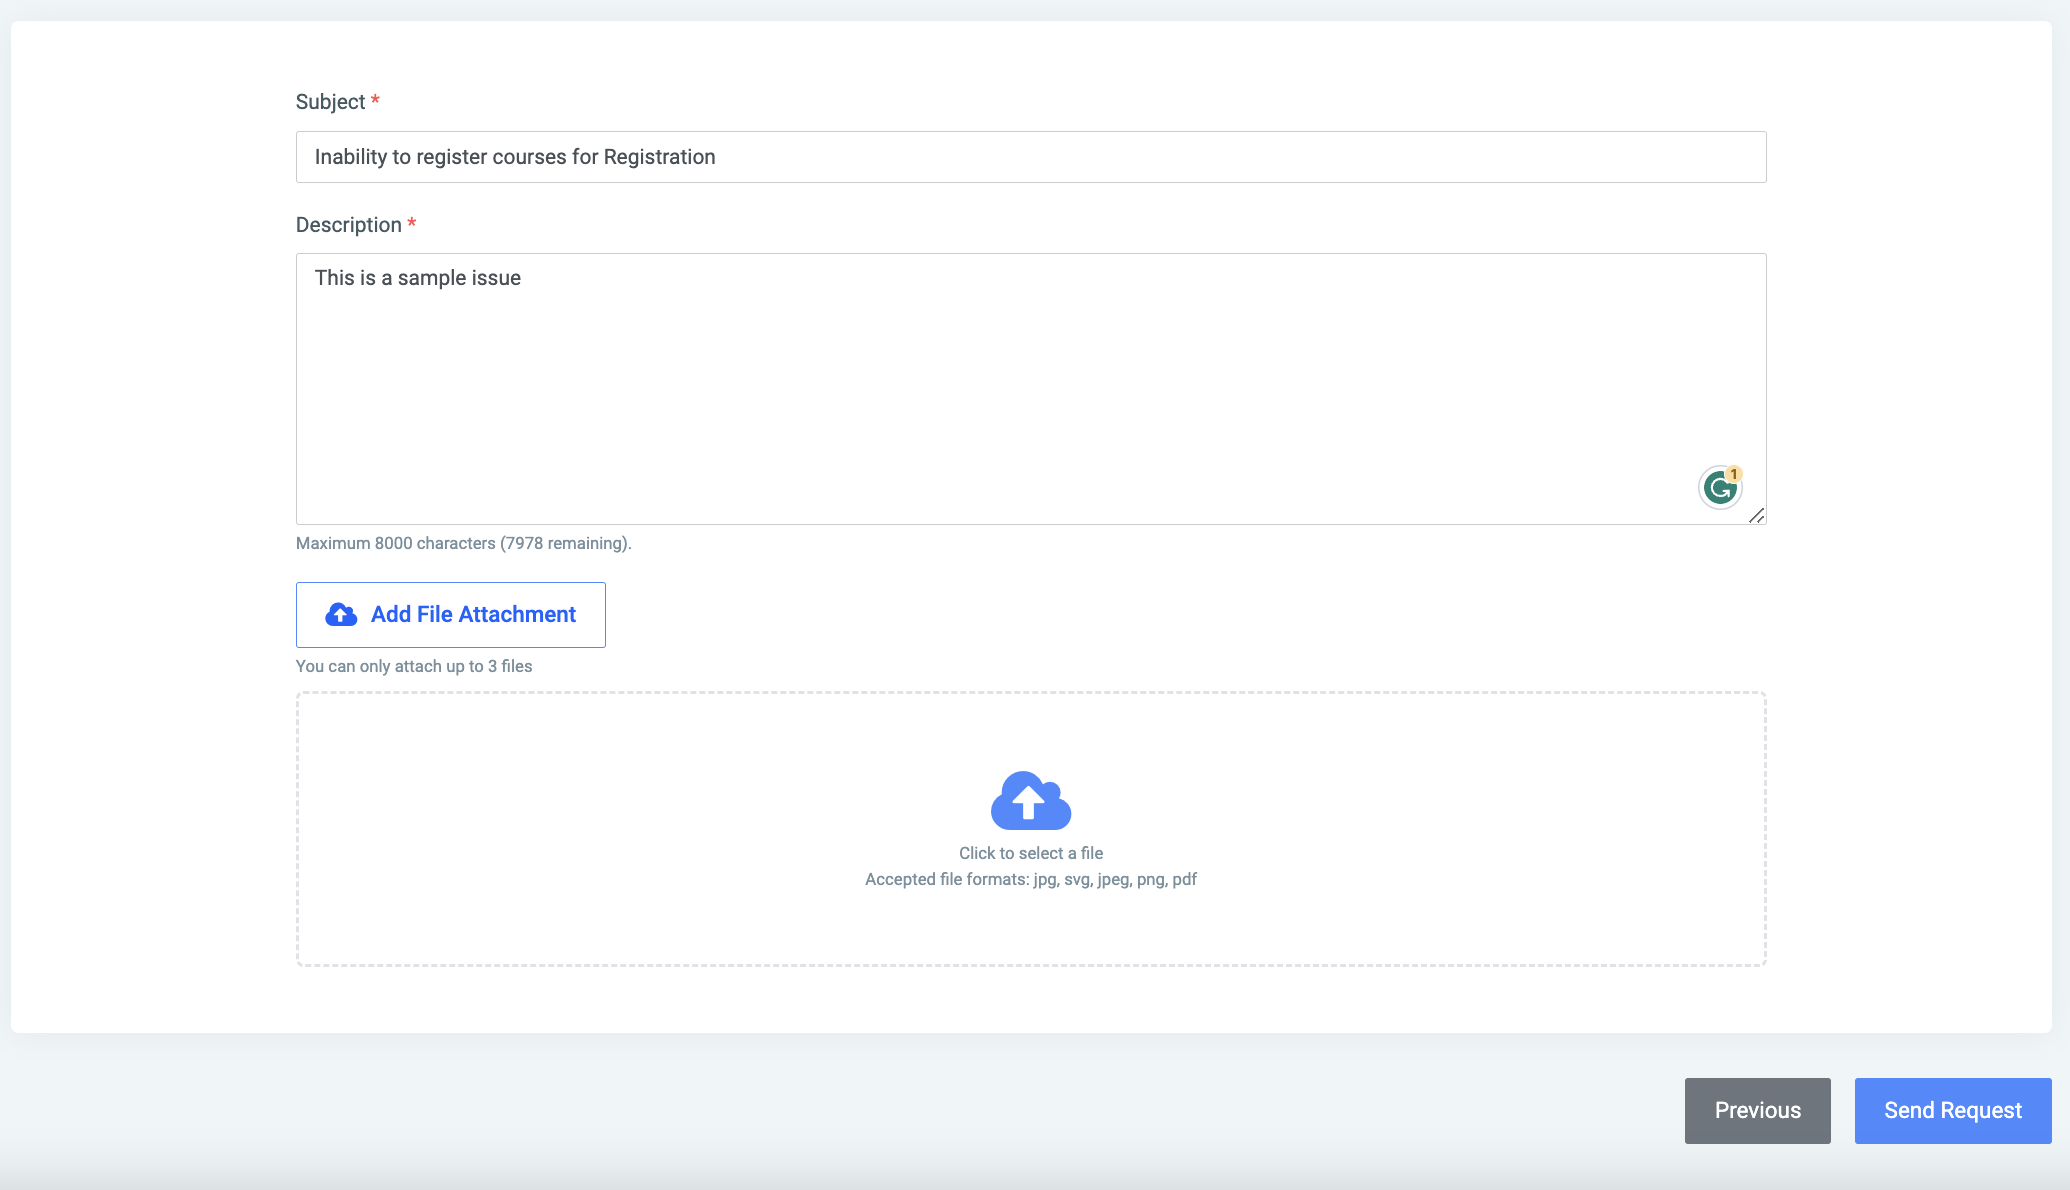
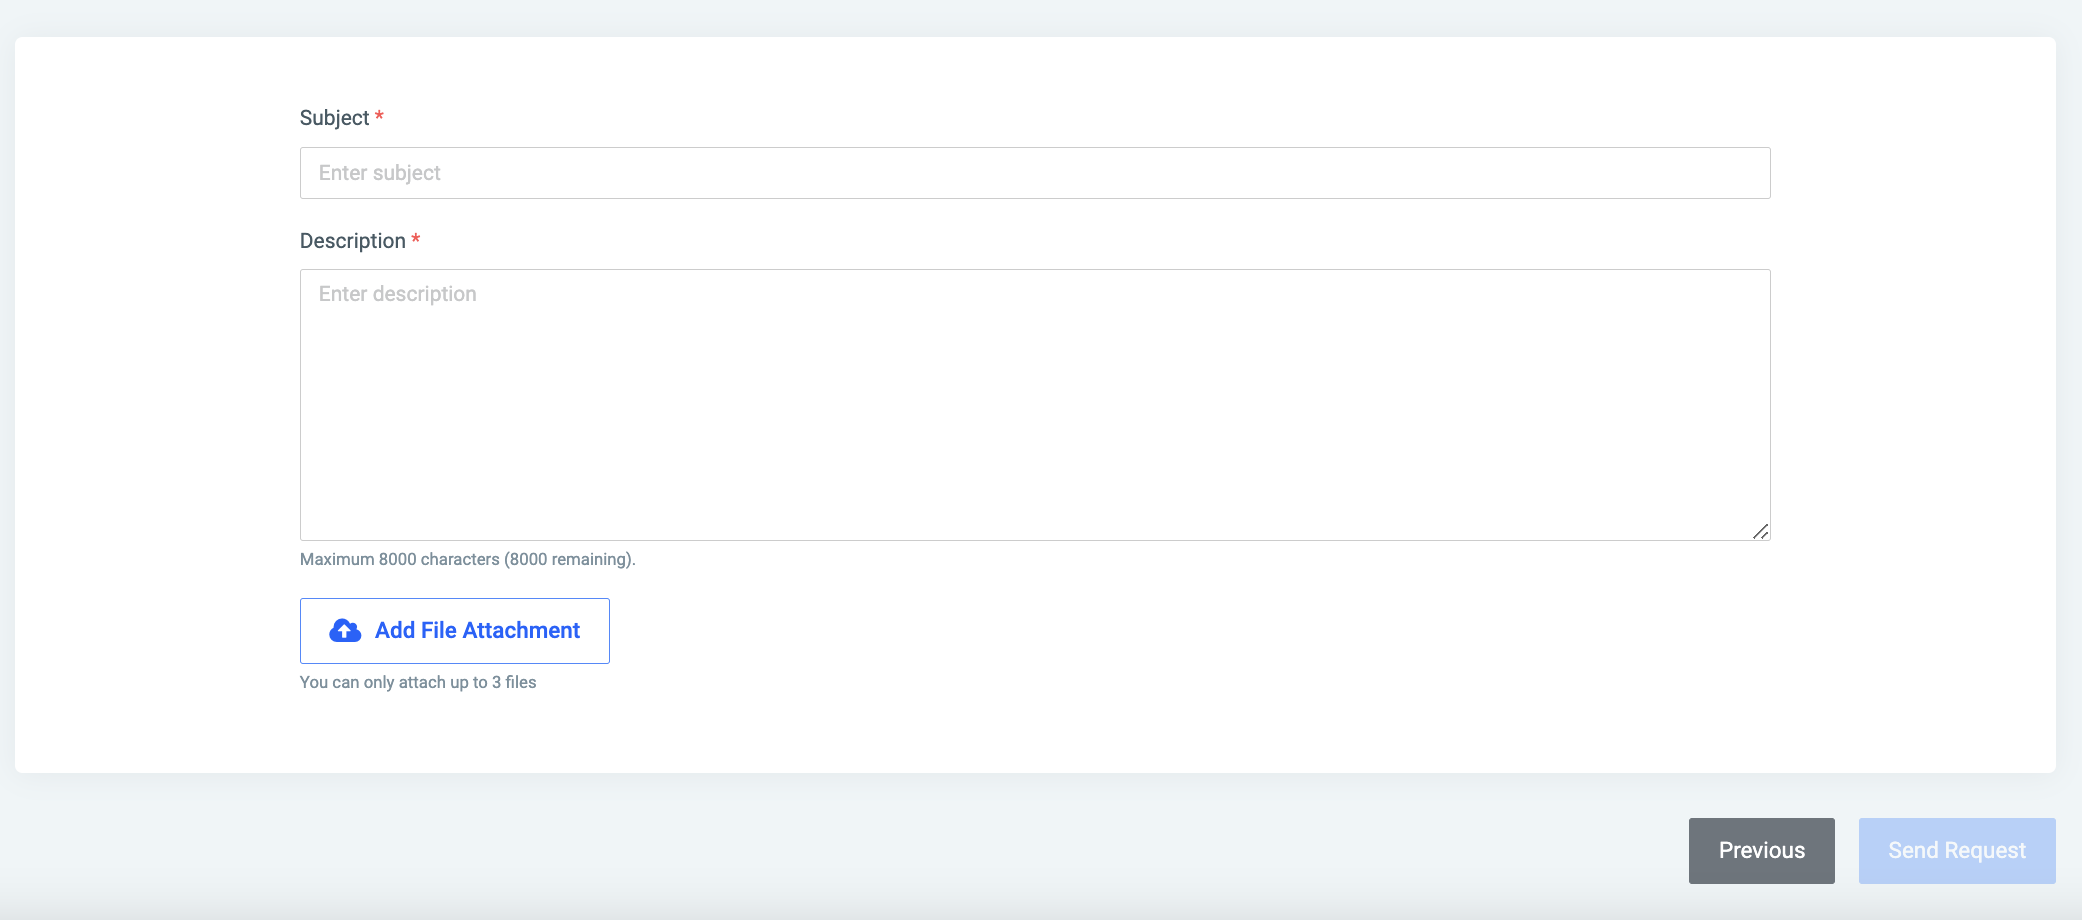
Enter the subject and a description; just like you would draft an email. You also have the option to attach a file. The maximum files once is allowed to attach is three(3). Click on the Add File Attachment button to attach a file/files.
✑ Click on the Send Request button to send the issue to OSIS.
On this page, there is an All Cases button. This allows the user to go back to the main page to present the list of all cases ever sent.

The following fields are presented on the main page;
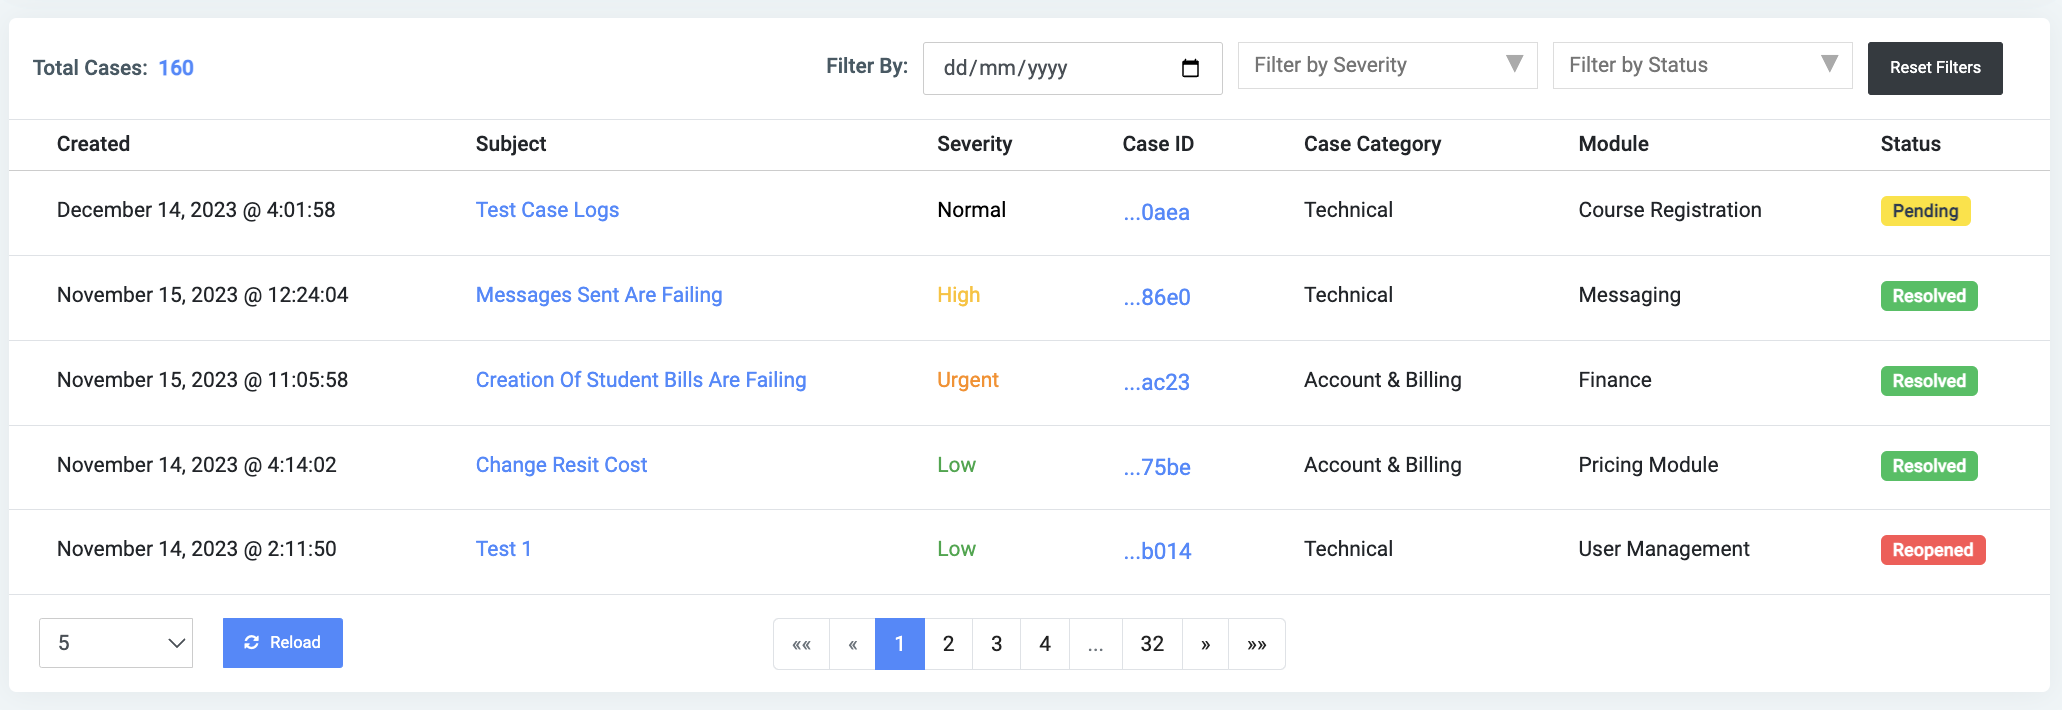
- Created: The date the issue was raised and sent
- Subject: The subject of the issue raised
- Severity: The intensity of the issue
- Case ID: The unique ID of the case raised
- Case Category: The option the issue falls under. Either Technical or Account & Billing
- Module: The module the issue is related to
NB: There are also options to filter by date, severity, and status. To clear out the fields in the filter option, click on the Reset Filter button to do so.
The Account & Billing option.
This also presents the user with categories to base their cases on. They are the Module and Severity options.
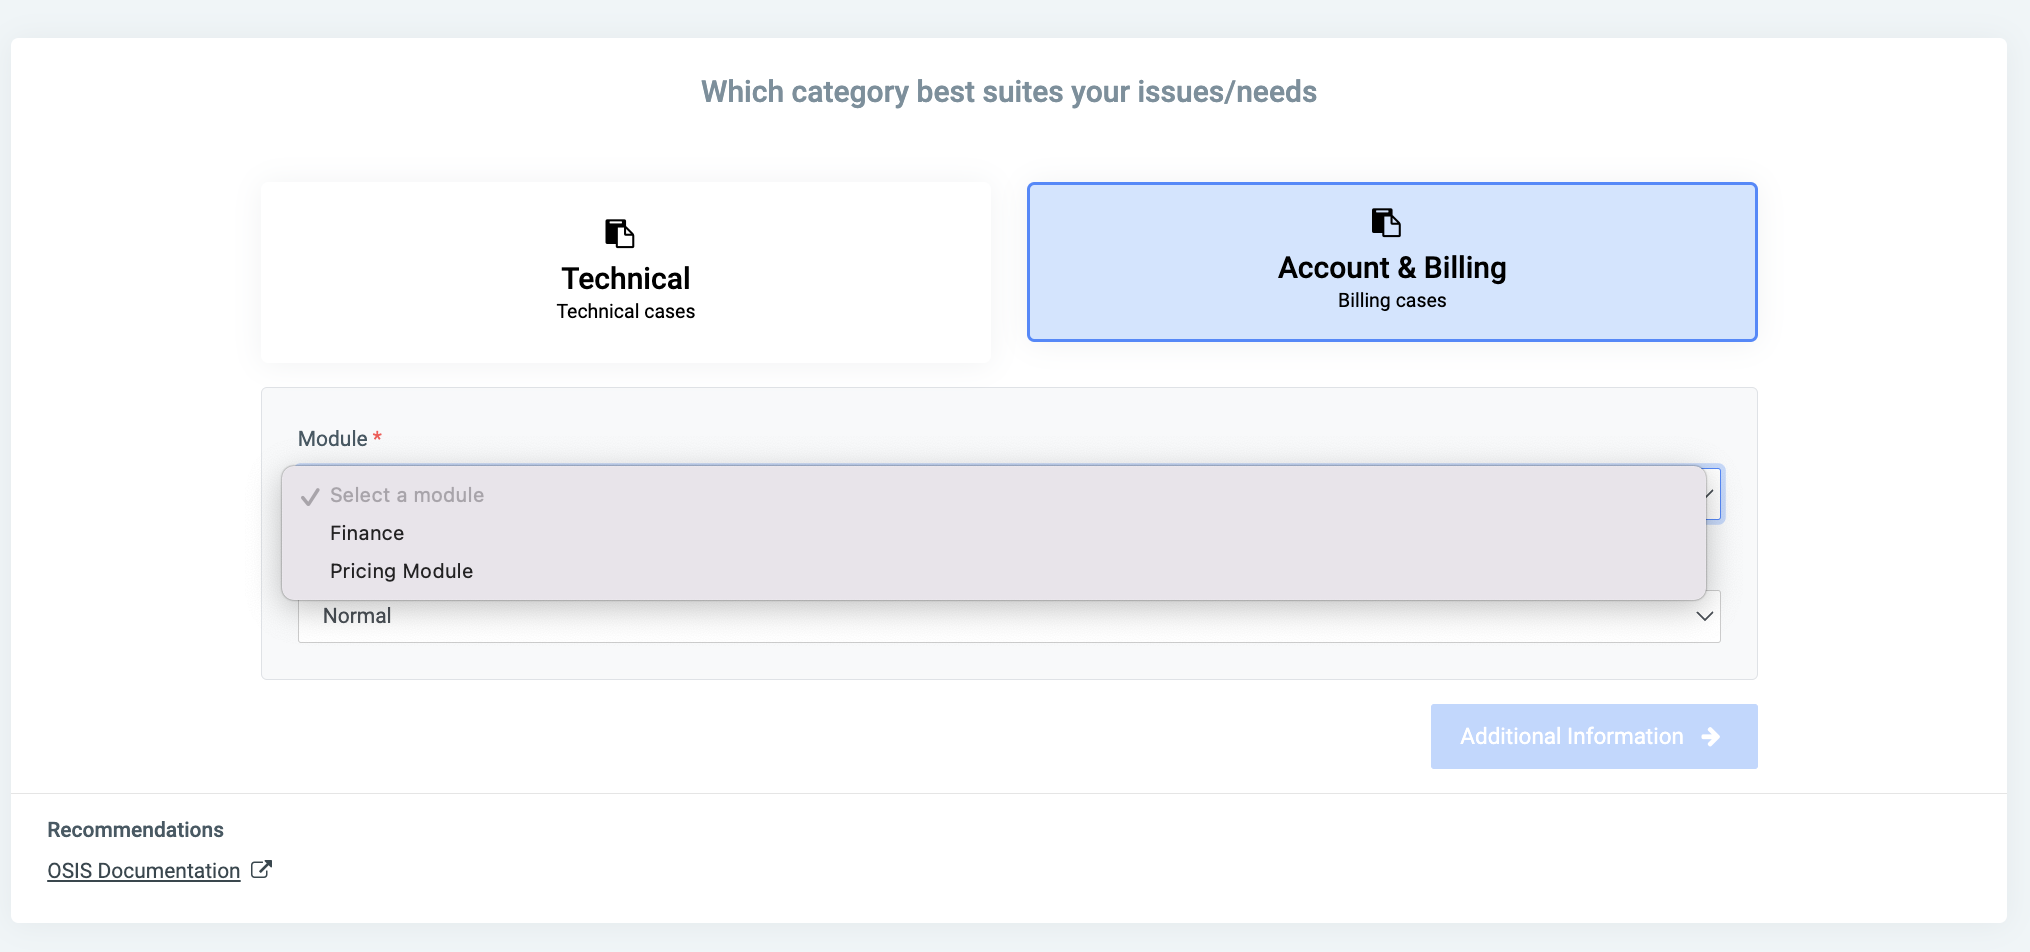
The Module option:
This brings up the Finance and Price modules.

The Severity option:
This allows the user to specify the intensity of the issue.
The options are:
- Critical
- High
- Low
- Normal
- Urgent
Once the options are selected from both categories, the Additional Information button is made active. Click on it to proceed to the next step.
Enter the subject and a description; just like you would draft an email. You also have the option to attach a file. The maximum number of files one is allowed to attach is three(3). Click on the Add File Attachment to attach a file/files.
✑ Click on the Send Request button to send the issue to OSIS.