Setup

The Setups module has two tabs: Graduation Bills and Graduation Bill Items. The default selected tab is the Graduation Bills tab.
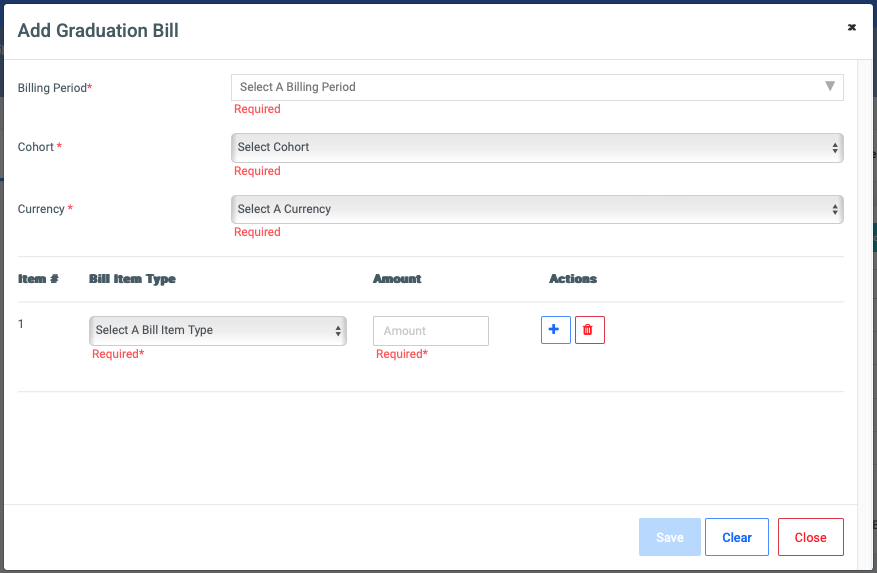
The Add Bill button opens a form requiring the following fields:
- Billing Period (Dropdown Selection) – Required
- Cohort (Dropdown Selection) – Required
- Currency (Dropdown Selection) – Required
- Bill Item Type (Dropdown Selection) – Required
- Amount (Number Input) – Required
Users can add multiple bill items to a single bill entry by clicking the add button.
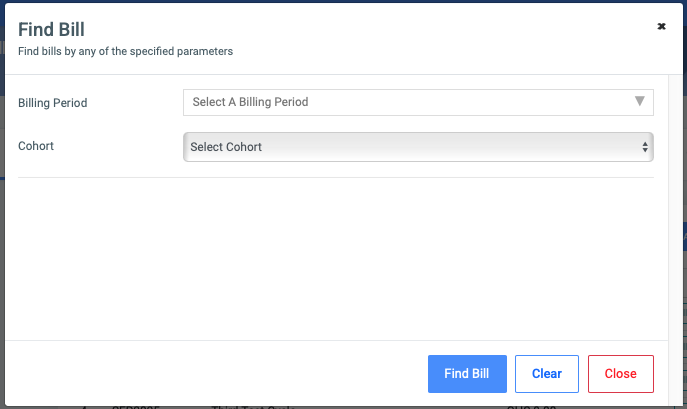
The Find Bill button is next to the Add Bill button and it opens a form that allows users to search for bills using the following parameters:
- Billing Period (Dropdown Selection)
- Cohort (Dropdown Selection)
Users can initiate a search or clear the input fields.
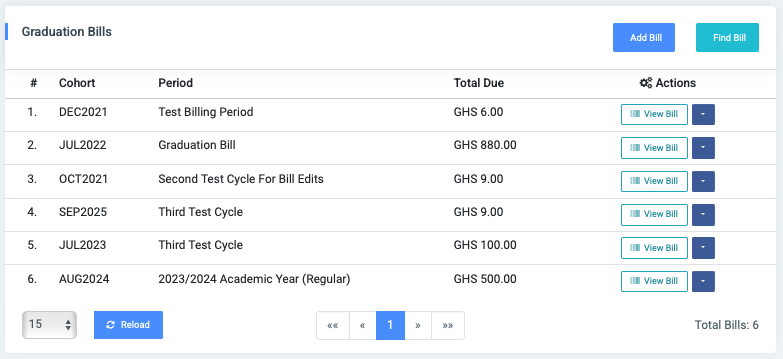
After searching or adding a bill, it appears in the list of graduation bills, displaying the following details:
- Cohort
- Billing Period
- Total Due
- Actions
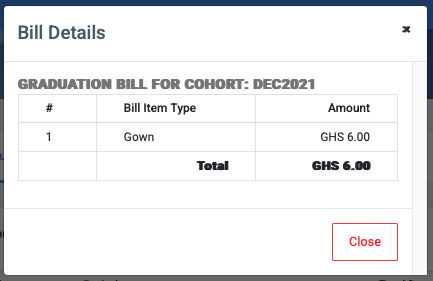
Clicking on the ‘View Bill’ button entry opens a popup displaying the bill details:
- Cohort Name
- List of Bill Items with Amounts
- Total Bill Amount
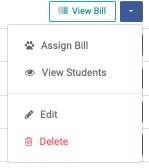
Each bill entry has an Actions dropdown with the following options:
- Assign Bill – Opens a modal to assign the bill to students.
- View Students – Displays students associated with the bill.
- Edit – Allows modifications to the bill details.
- Delete – Opens a confirmation modal for bill deletion.
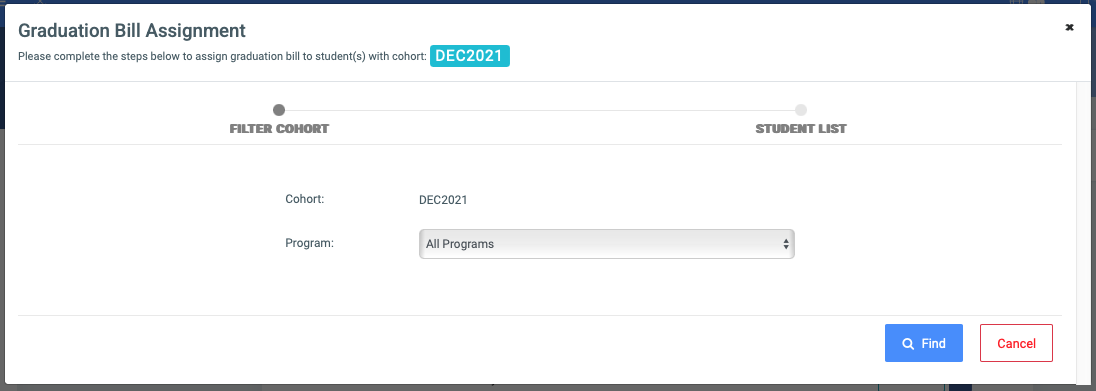
Clicking Assign Bill opens this form. Users must first select a cohort from the dropdown list and use the Find button to retrieve students in that cohort.
- Cohort (Dropdown Selection – Pre-selected)
- Program (Dropdown Selection)
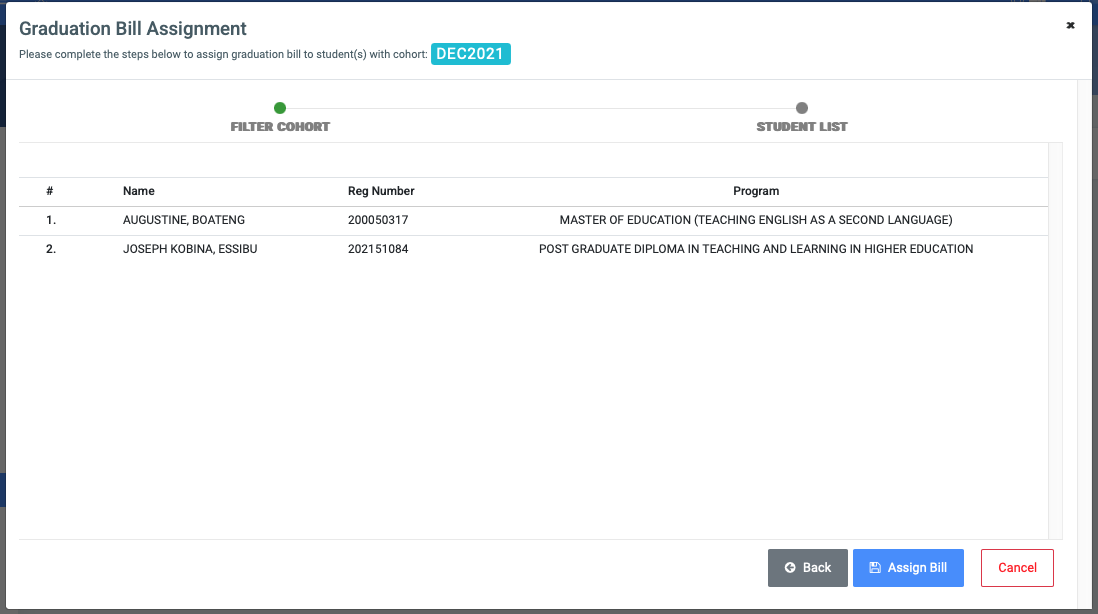
Once the students are displayed, they can proceed to assign the bill by clicking the Assign Bill button. The modal also includes a Cancel button to exit the process.
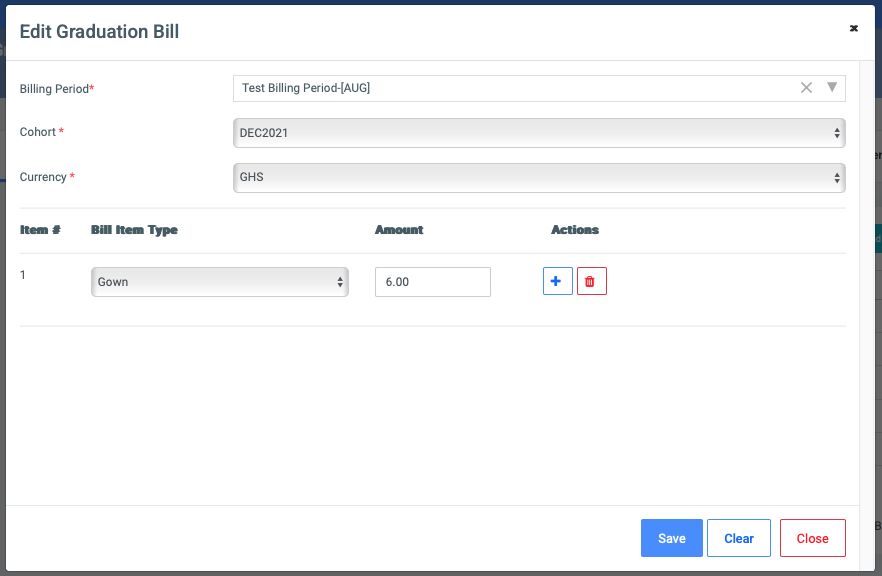
Bills can also be edited and deleted. The edit form allows changes to all fields, but none are mandatory. The Save, Clear, and Close buttons finalize the editing process.
The next tab is the Graduation Bill Items

Once on the tab, the user can add an item type by clicking the button. And a pop-up will be displayed.
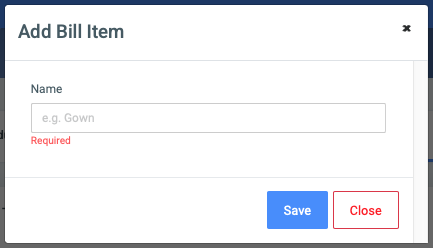
In the pop-up form, there is only one input and it is required:
- Name (Text Input)
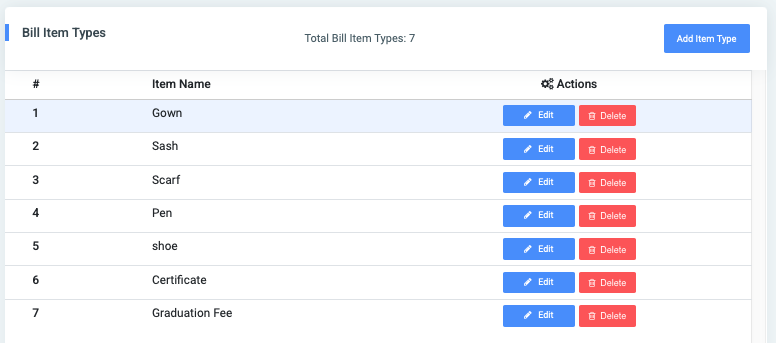
After adding the bill item, the list of bill items is updated and shown.
Bill items can be edited by clicking the ‘edit button’
At the same time, bills can also be deleted with the ‘delete button’

0 Comments