
Score Processing
This feature displays all sheet(s) that have been assigned to a user. This enables users to manage their sheets and view results.
✑ From the OSIS sidebar, Click on the Score Processing link under Assessment Management.

On the Score Processing page, there is a Find Assessment Sheets button to search for a particular assessment sheet.

✑ Click on the Find Assessment Sheets button. The Find Assessment Sheets modal has the following fields:

- Semester: This is a dropdown list of all semesters available in OSIS.
- Course: Select course from the dropdown search.
- Course Group: Select the Semester and Course to populate this list. Select the course group.
- Grading Scheme: This is a dropdown list of all grading schemes available in OSIS.
- Sheet Status: Select the status of the sheets you want to view. This can be:
- Unassigned.
- Lecturer.
- Faculty.
- Published.
- Staff: This is a dropdown list of all staff. Select the staff from the dropdown
- Registration type: Registration type whether regular or resit
- Level: Select the level the sheet is associated with
- Campus: Select the campus the sheet is tied to
- Unit: This is the dropdown of all the units in the institution
- Program: Select the program the sheet falls under
Search fields are optional. Fill in as many as can help in narrowing down and click the Find Sheet button. Clicking the Find Sheet button with no entries will show all existing sheets in OSIS.
✑ Click on the Find Sheet button to confirm your actions.
✑ Click on Clear to clear all fields.
✑ Click on Close to close the modal.
For each sheet, the user can manage, and view the results and the statistical performance of students. It comes with a Manage button, a Results button, and an Analysis button for that purpose.


✑ To manage a sheet, click on the Manage button. This opens a Manage Score page with three different sections, namely: Score Entry, Assessment Columns, and Assessment Column Preview.

NB: The Add column button is active because no columns have been added.

NB: The Add column button is inactive because the maximum number of columns to be created has been met.
The Score Entry also has three buttons: Settings, View Result, Exit Score Entry, Upload Scores, Download File Template and Submit Scores To Department (This is entirely dependent on how the submission hierarchy was set up in the institution)
A. Score entry: This section displays brief details about the sheet. Clicking on the Settings button also reveals details about the sheet. The details are as follows:

- The name of the sheet.
- Total assessment space.
- Used assessment space.
- Total exam space.
- Used exam space.
- Maximum Number Assessment Columns.
- Assessment Columns Created.
- Maximum Number Exams Columns.
- Exams Columns Created.
- The grading scheme governing the assessment sheet and an option to change the grading scheme.
✑ Click on the View Result button to view the results of students registered on that sheet. This opens a modal displaying a list of all students with their scores.

☛ The user can filter by registration number, Print Results, and Export the result list to an Excel sheet.

The user can also customize the fields they want to display by clicking on the settings button
✑ Click on the Exit Score Entry button to close the Manage Score page and go back.
✑ Click on the Submit Scores To Department button after entering results to submit sheets.

B. Assessment Columns section: This section has an Add Column button to add student assessments and exam titles.

✑ Click on the Add Column button. This opens a modal with the following details:
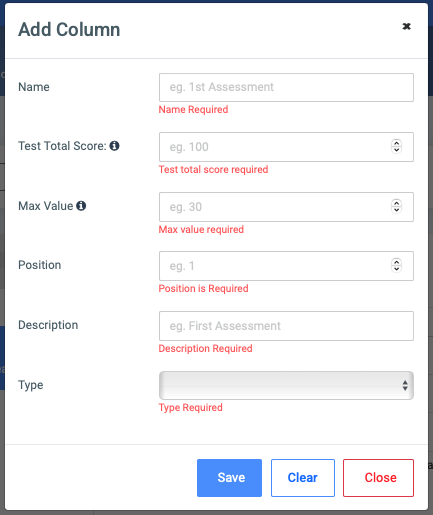
- Name: Enter the name of the scores, you want to take. Eg. Mid-semester exams, class assignments
- Max Value: Enter the max value for the
- Position: Enter the position value that you want for the assessment to be.
- Description: Enter a brief description of the assessment. Eg. First class quiz.
- Type: This is a dropdown to choose between Assessment or Exam.
✑ Click on the Save button to confirm actions.
✑ Click on Clear to clear all fields.
✑ Click on Close to close the modal.
☛ The Add Column button is disabled after all assessment spaces are used up.

Score Sheets Remarks:
☛ This feature allow lecturers to enter remarks for each score assigned to students.
The Remarks link shows up automatically if only the assessment column or exam column is created.
✑ To enter remarks for each student, Click on the down arrow icon and click on Remarks.
This displays a list of all students on the sheet.

✑ For each student click on the remarks link. This opens a modal with a text field to enable lecturers to enter remarks about scores.

✑ Click on Save to confirm actions.
✑ Click on Close to close the modal.
✑ To view remarks on the sheet. Simply hover to the view in View Results to show a tooltip of the remark entered for that particular student score.

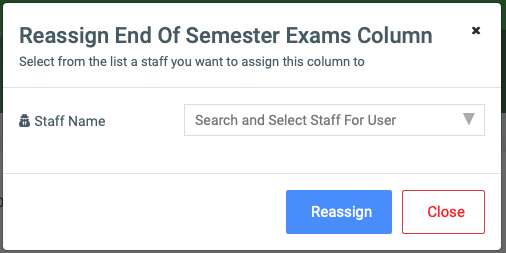
✑ Users can reassign the sheet to another staff by clicking on the Reassign button.
C. Assessment Column Preview section: This section displays a list of all students registered with that course and an entry for their scores.

☛ Scores entered are saved automatically.
- There are two ways of entering scores, ie; Grid view and list view.
- List View

- Grid view

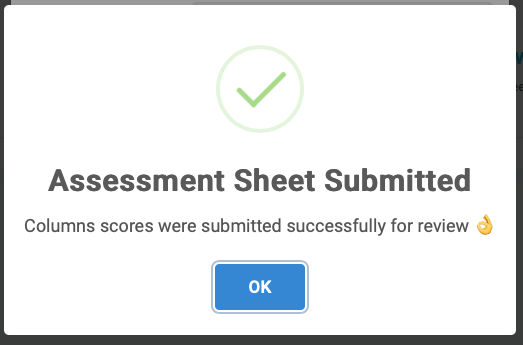
✑ Click on the Submit Scores To Department button after entering all results to submit your sheet.

✑ Click on the Submit Columns Scores button to confirm your actions.
✑ To view the result of students of a sheet, click on the Result button.

This opens a View Scores page with search Reg. No. field and three different buttons namely: Print Results, Export To Excel, and settings.

✑ Click on the Print Results button to print the students’ results below.
✑ Click on the Export To Excel button to export results to an excel sheet.
✑ Click on the Settings button to customize the column display in the result view.
Upload Scores:
☛ This feature allow lecturers to uploads scores in bulk.

To upload scores for students, click on the Download File Template button. This will download an excel sheet with all the column created. This will allow the lecturer eailsy enter the scores for each column.

Save the file and upload it by clicking on the Upload Score button.
This brings up an modal to allow the user choose the file they want to upload.

✑ Click on the choose file button and select the file with the scores you want to upload for the students. Then click on the Continue to proceed to the next step.


✑ Map the created columns to their respective columns in the file and click on the upalod button.
NB: It is not mandatory to upload scores for all columns in a sitting. One can do the upload a column at a time or upload scores for all the columns at once.