
Schedules
The registration schedule is set up when registration is open. The schedule is set up for specific groups of students based on the Date Of Completion, Semester, Stream, etc.
✑ From the OSIS sidebar, Click on the Schedules link under the Registration Setup.

The Schedules page has two main sections. Resit Registration Payment Info and Schedules;
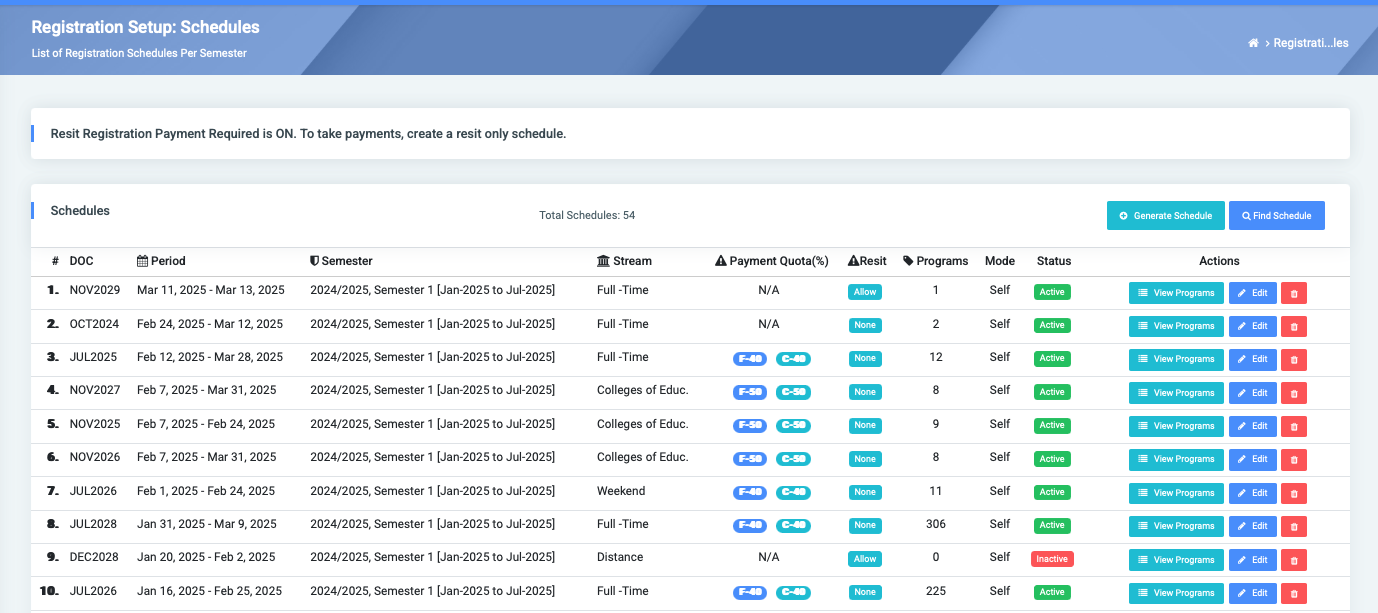
A. Resit Registration Payment Info: This displays information about resit registration payment.

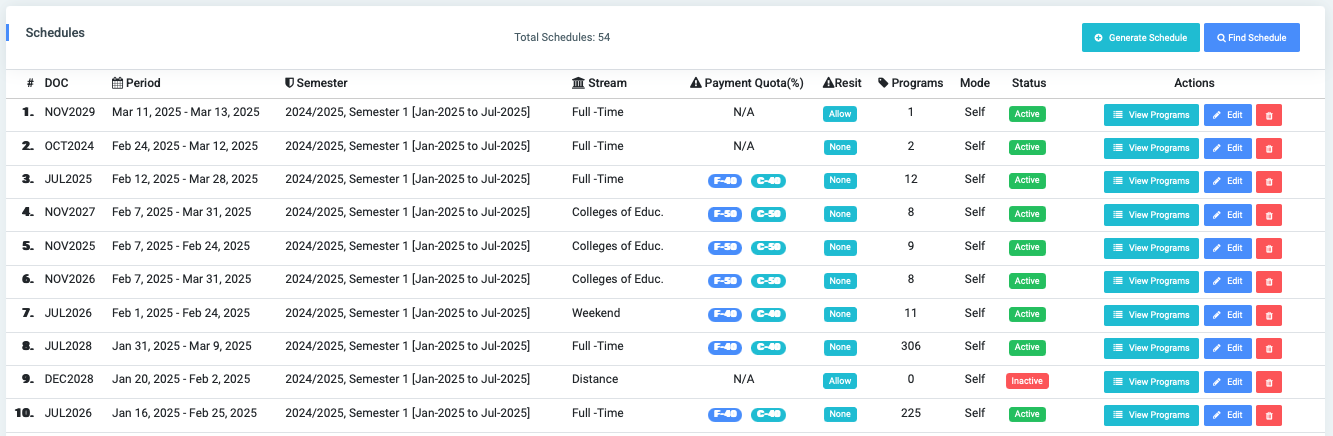
B. Schedules: This section has two(2) different buttons. Generate Schedule button and Find Schedule button.
✑ Click on the Generate Schedule button to create a new schedule for selected groups of students. This shows opens a modal with the following fields:
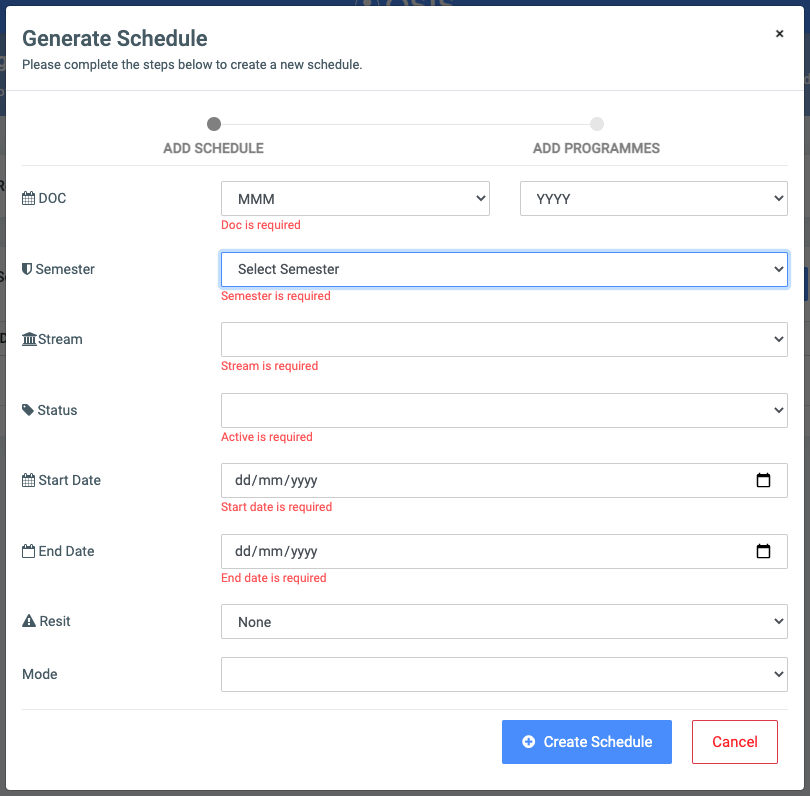
Steps
- DOC: Select the date of completion with MMM(month) and YYYY(year).
- Semester: This is a dropdown list of all semesters available in OSIS.
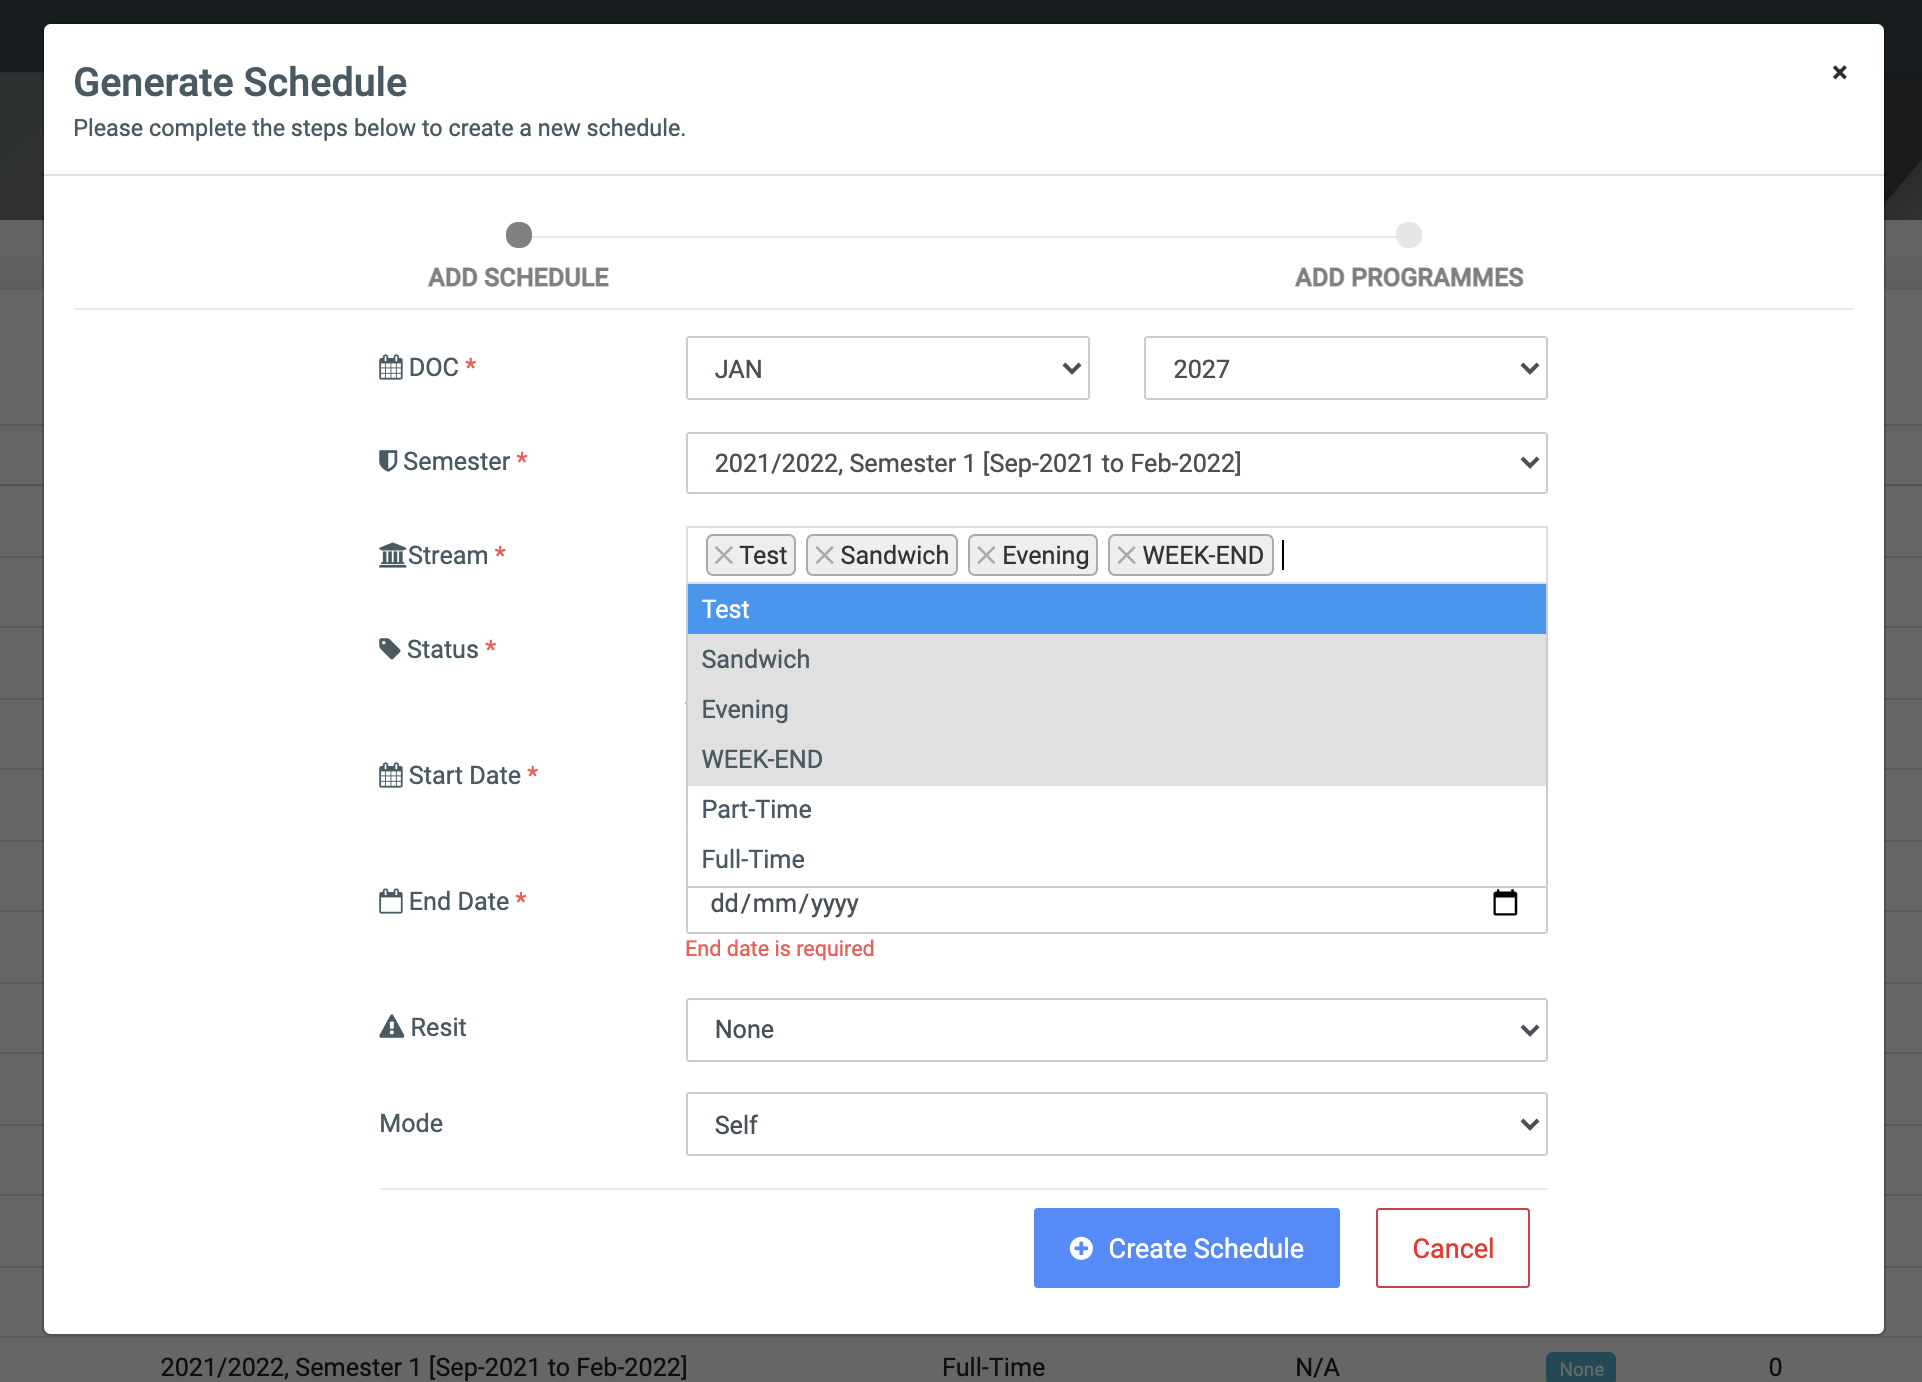
- Stream: This is a dropdown list of all streams available in OSIS. Multiple streams may be selected.
- Status: Select from dropdown whether the schedule is Active or Inactive.
- Start Date: Enter the start date of the schedule.
- End Date: Enter the end date of the schedule.
- Resit: This is a dropdown showing the following list to select.
- None: Select None if, there are no resits courses or the user doesn’t want to open resit registration.
- Allow: Select Allow to allow both regular course registration and resist course registration at the same time.
- Only: Select Only to allow resit courses only for registration. This will affect selected students who have resit courses to write.
- Mode: This is a dropdown to select Self or Assisted. Select Self to allow a student to register by themselves or Assisted if the user will register on behalf of the student.
✑ Click on Create Schedule to confirm actions.
✑ Click on the Continue button to Add Programs to the Schedule
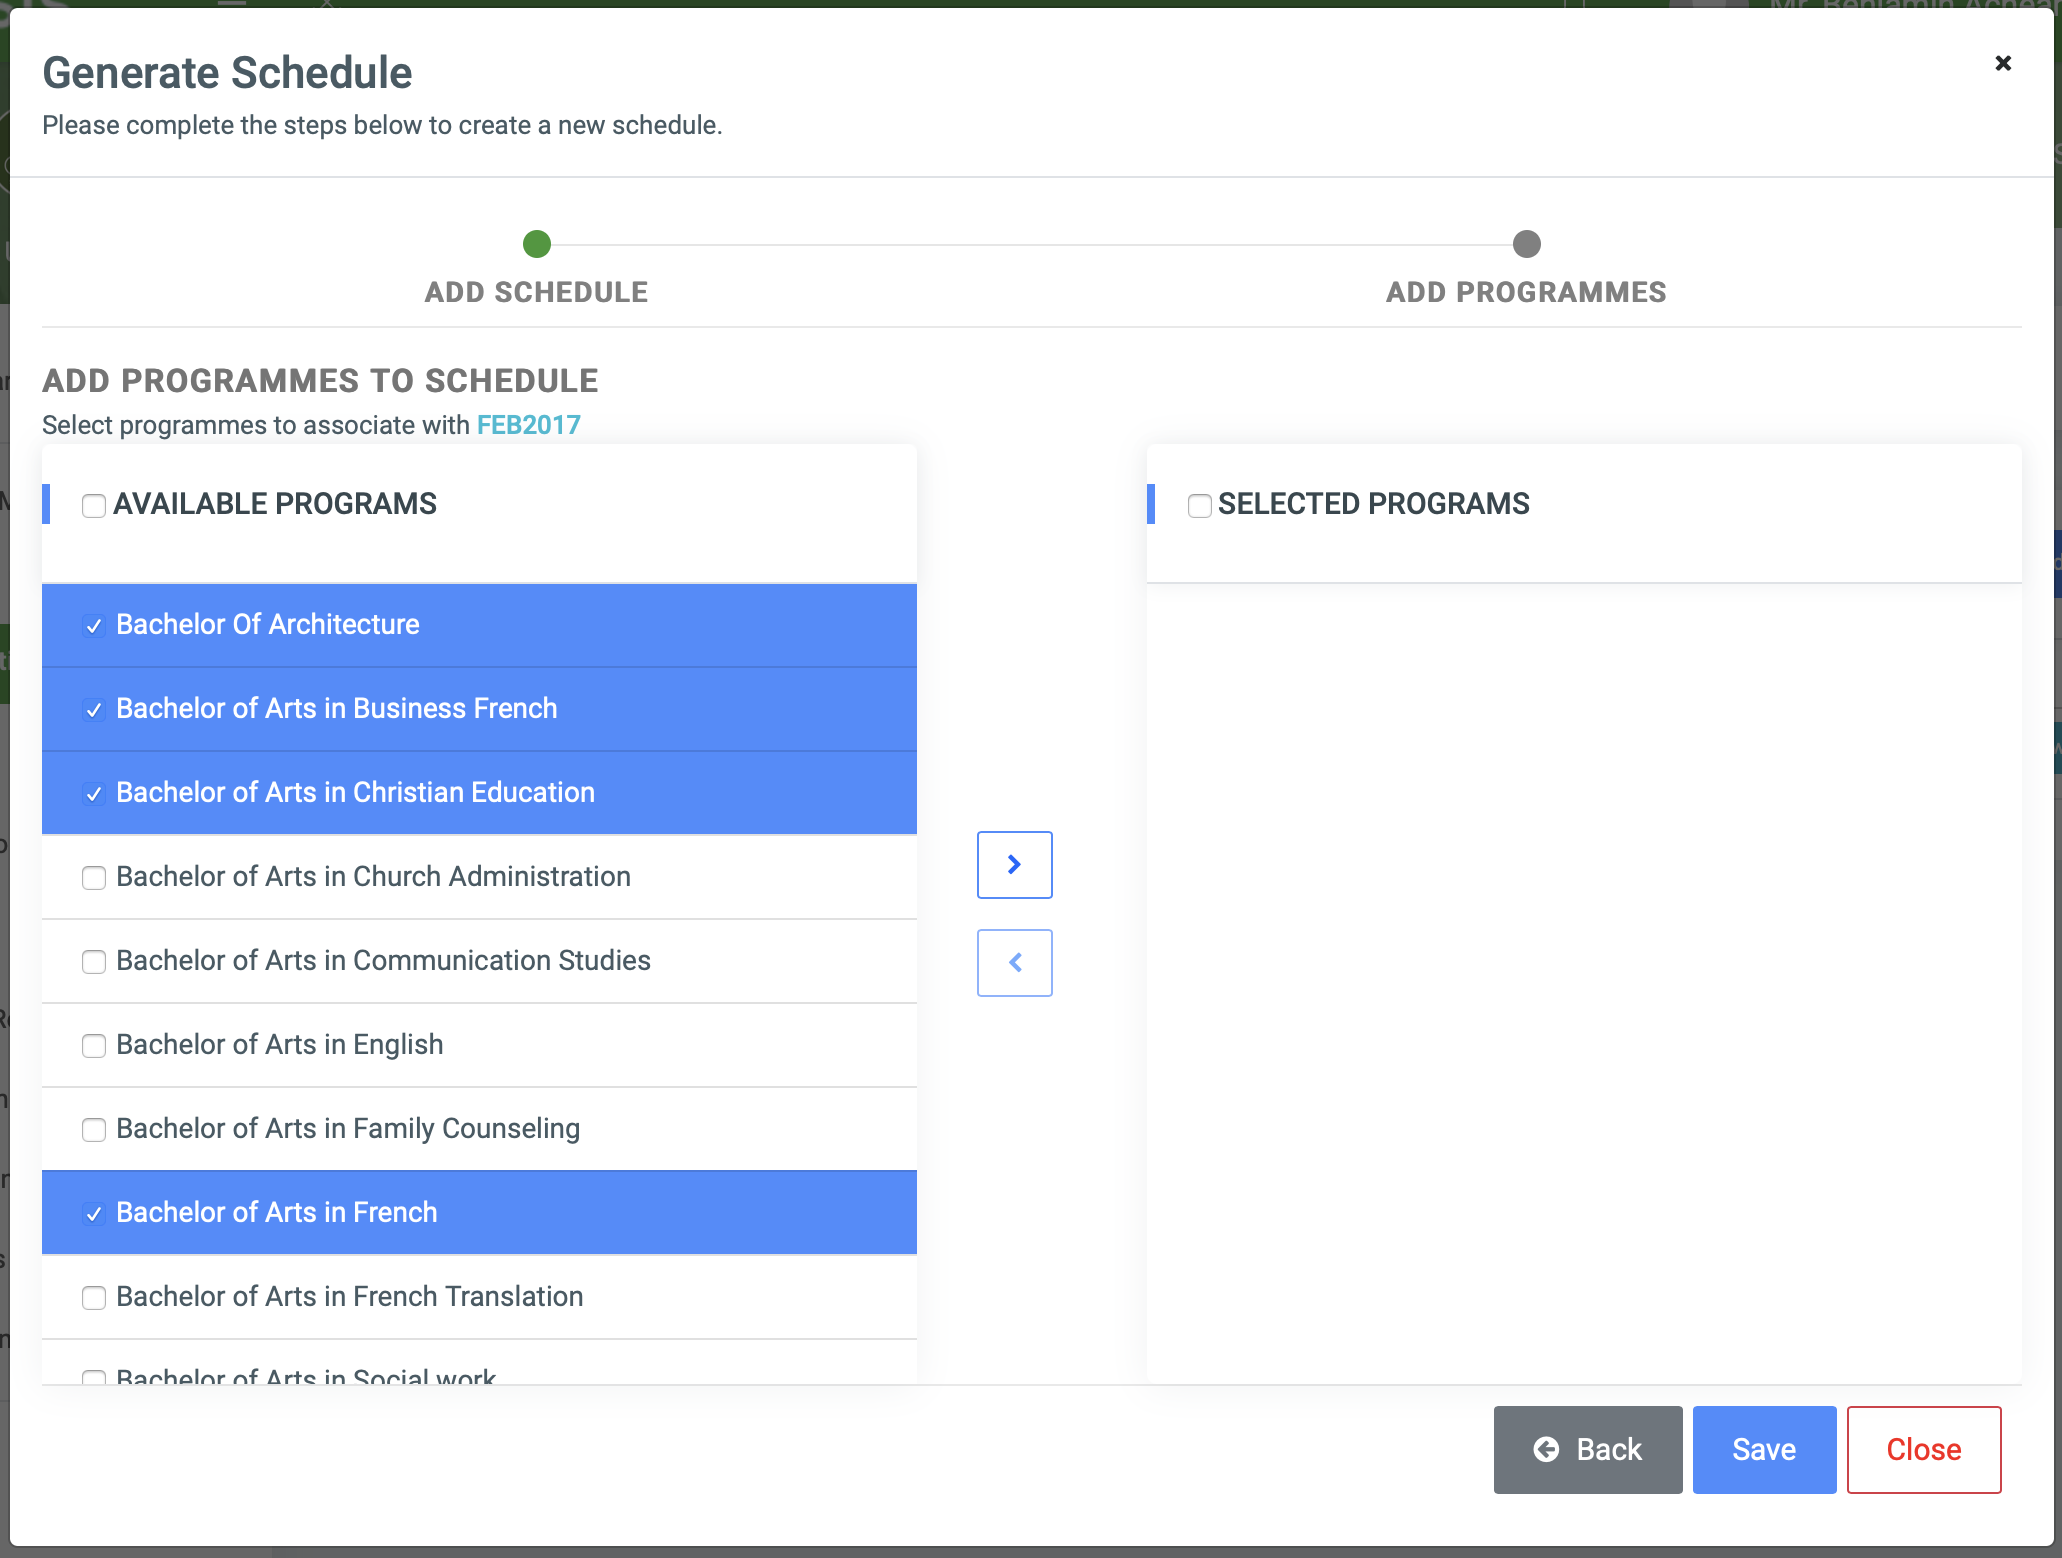
✑ Click on the Save button after moving the programs you want to schedule from the Available Programs to Selected Programs.
✑ To search for a particular Schedule, Click on Find Schedule button and fill in the details for that schedule by;
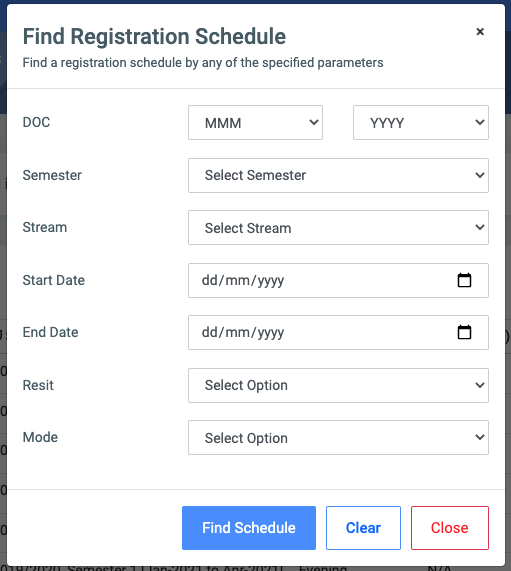
- DOC
- Semester
- Stream:
- Status:
- Start Date:
- End Date:
- Resit:
- Mode:
✑ Click on Find Schedule button to confirm your actions,
✑ Click on Clear to clear all fields,
✑ Click on Close to close the modal.
☛ All Find Registration Schedule fields are optional. Fill in as many as can help in narrowing down and click the Find Schedule button. Clicking the Find Schedule button with no entries will show all existing schedules.
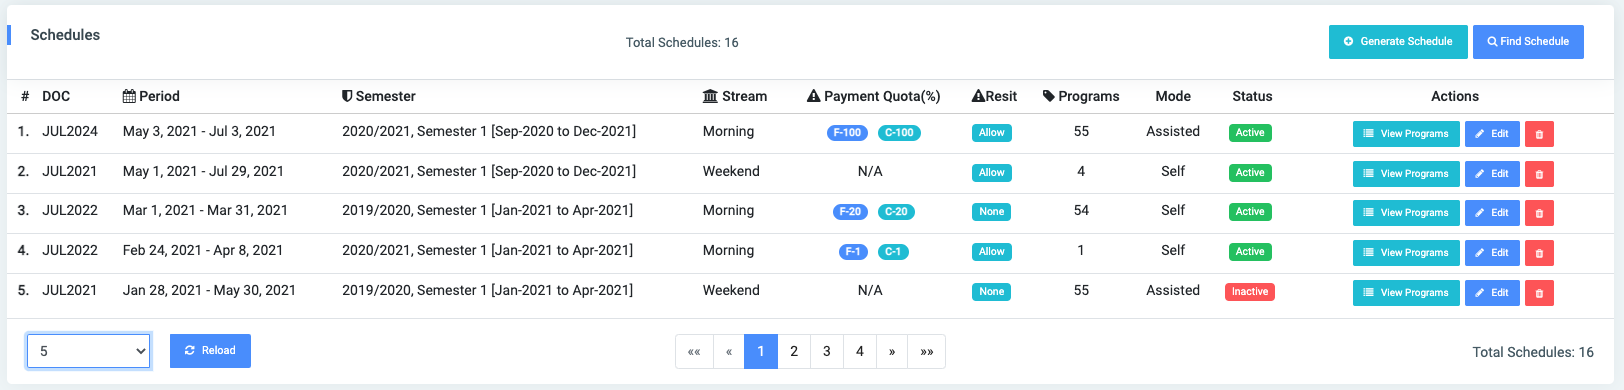
Each added schedule, the user can View Programs, Edit and Delete them.
✑ To view programs for the created schedule, click on View Programs button. This opens a modal showing all selected programs for registration.
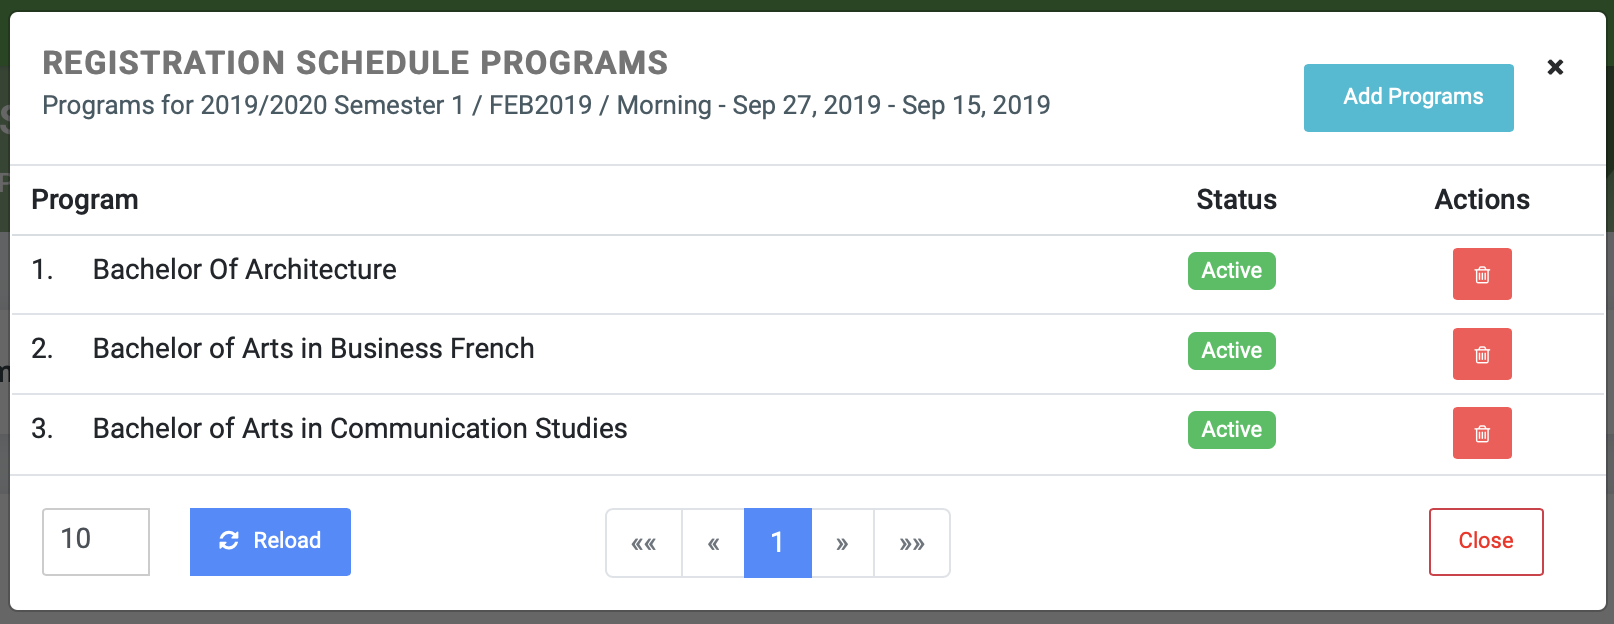
☛ Users can add more programs to the schedule by clicking the Add Programs button in the which opens another modal displaying all program schedule.
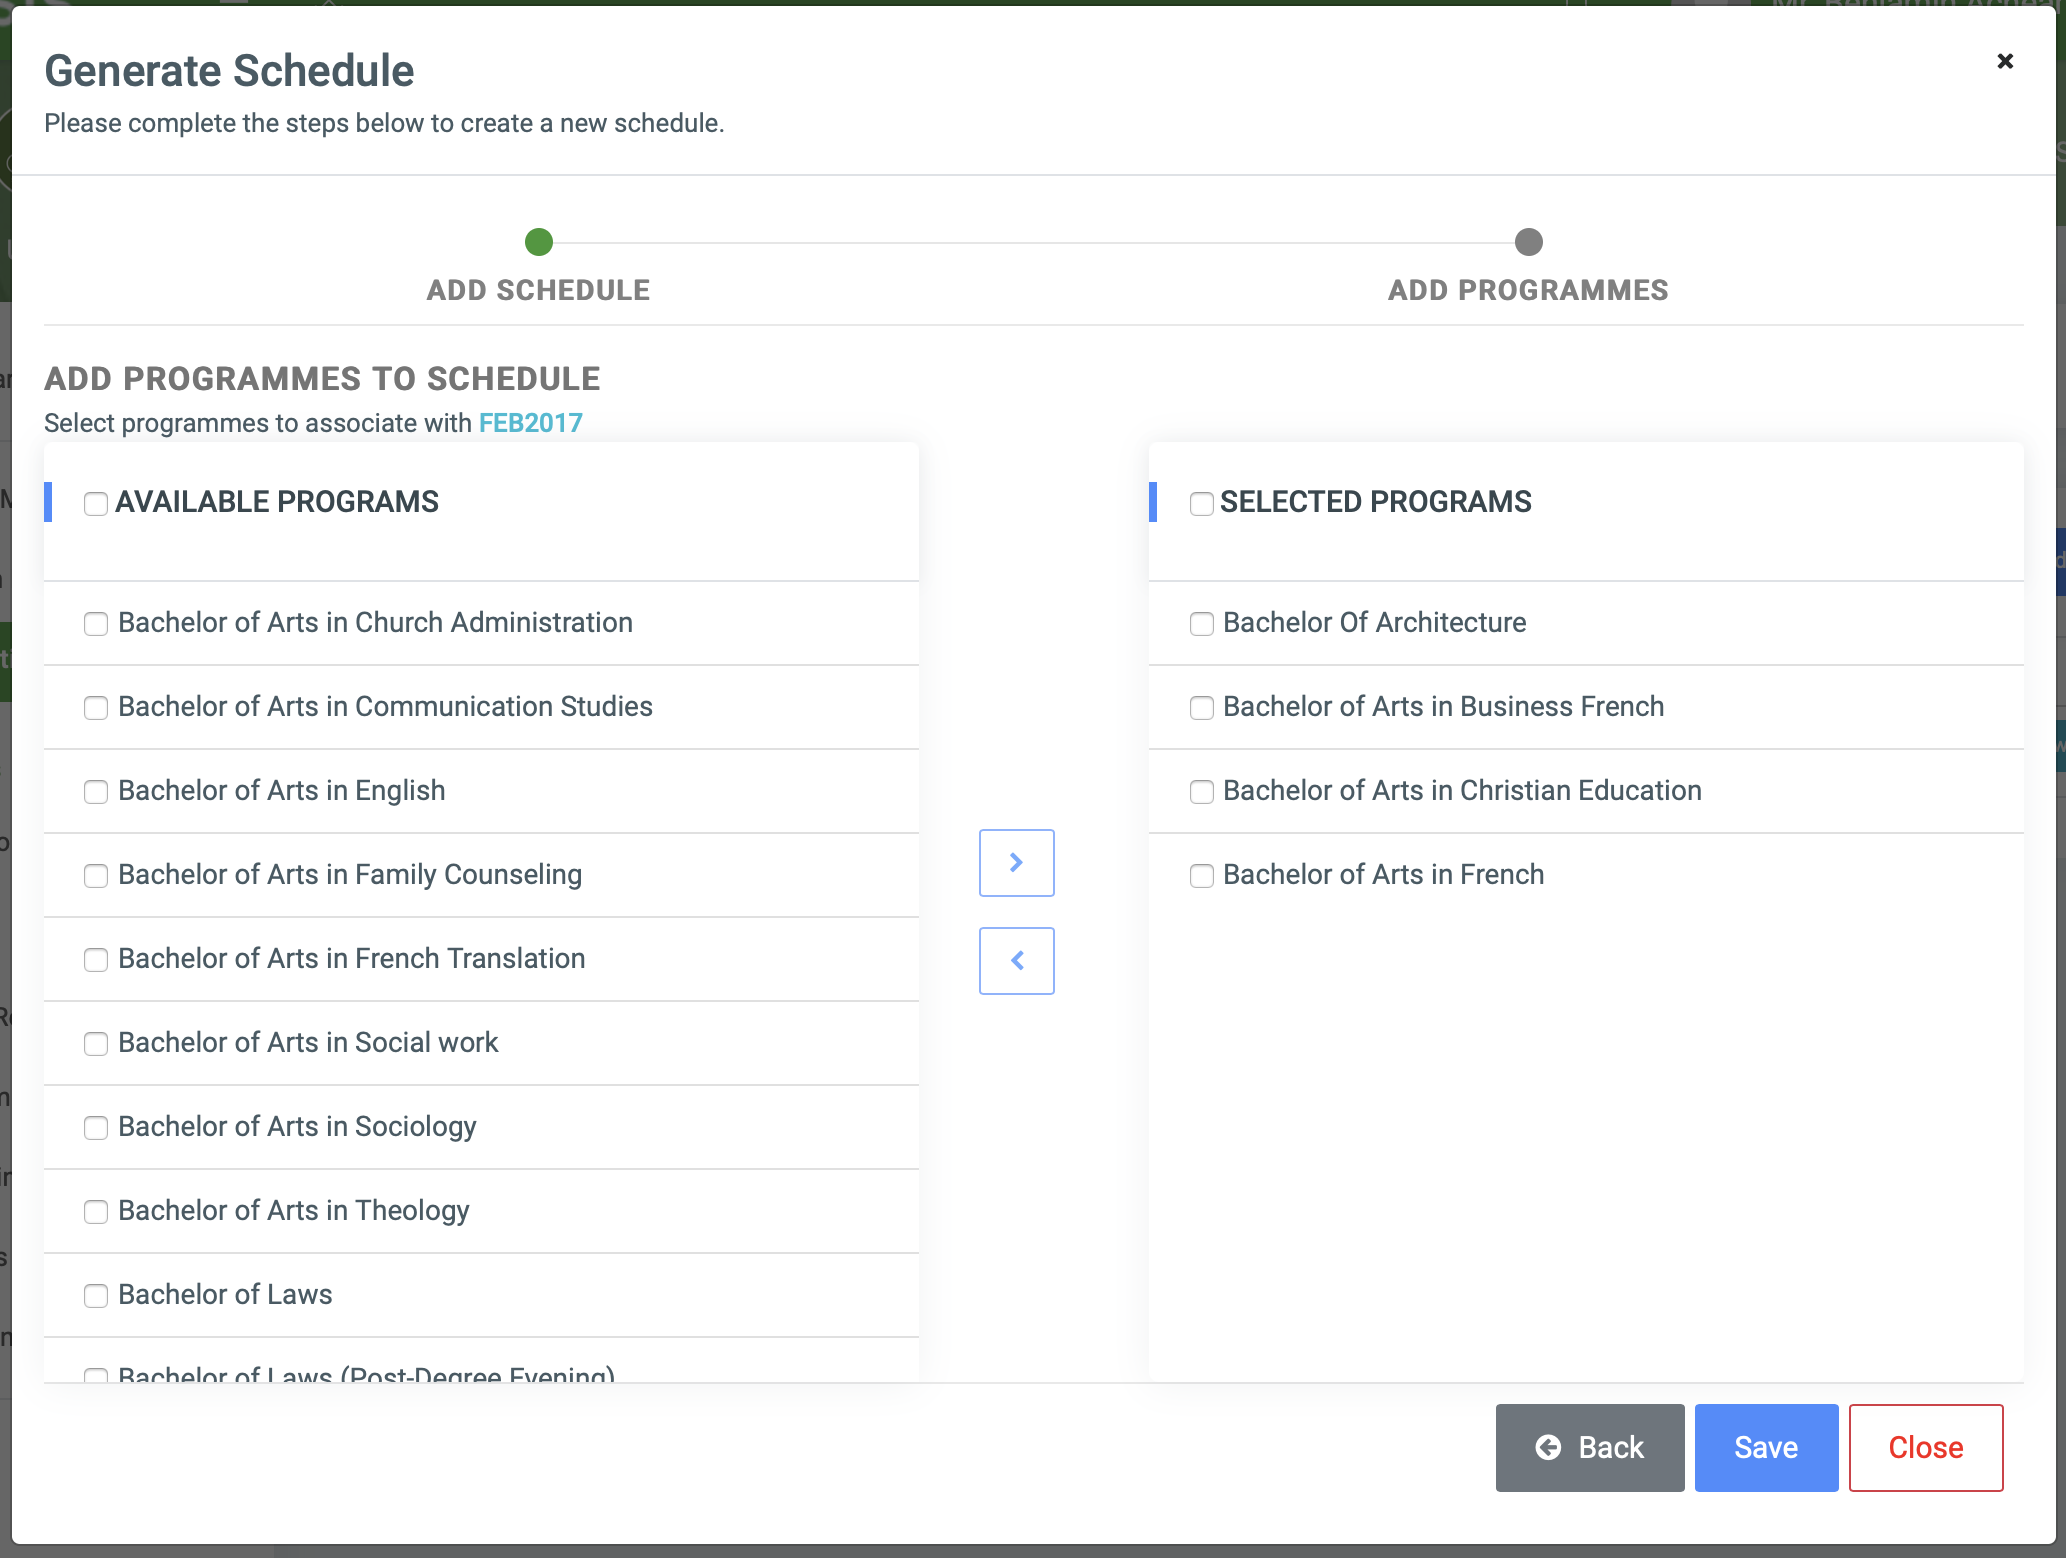
✑ Click the checkbox of programs you want to add in Available Programs, then click the Greater hand sign to move programs to Selected Programs.
✑ Click on Save to confirm actions.
✑ Click on the Delete button icon to delete the program from the Registration Schedule Programs modal list.
✑ To edit a schedule, click on the Edit button.
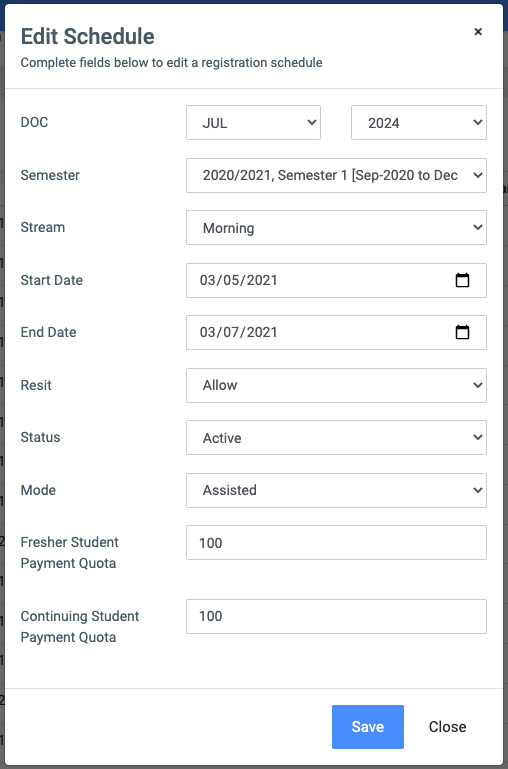
Change the old entries from the Edit Schedule form and click on the Save button. Pics
✑ To Delete a schedule, click on the Delete button icon.
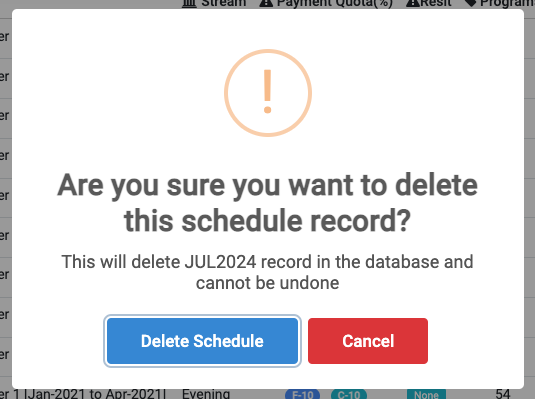
✑ Click on the Delete Schedule button from the modal popup to confirm your actions.
✑ Click on the Reload button to refresh the batch list.