
Manage Semester
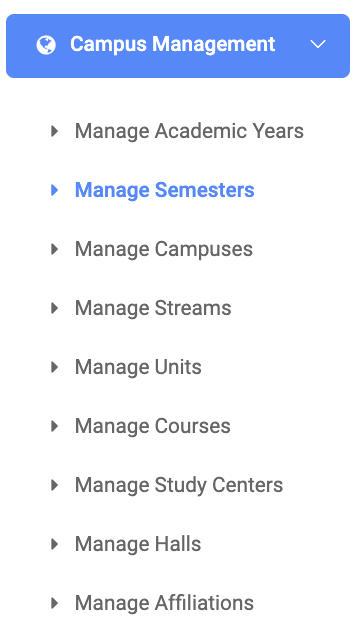
✑ From the OSIS sidebar, Click on the Manage Semesters link under Campus Management.
From the top right of the Manage Semesters page, there are three (3) buttons, Add Semester, Find Semester, and Export.

✑ Click the Add Semester button to add a semester to OSIS. The Add Semester modal comes with the following;
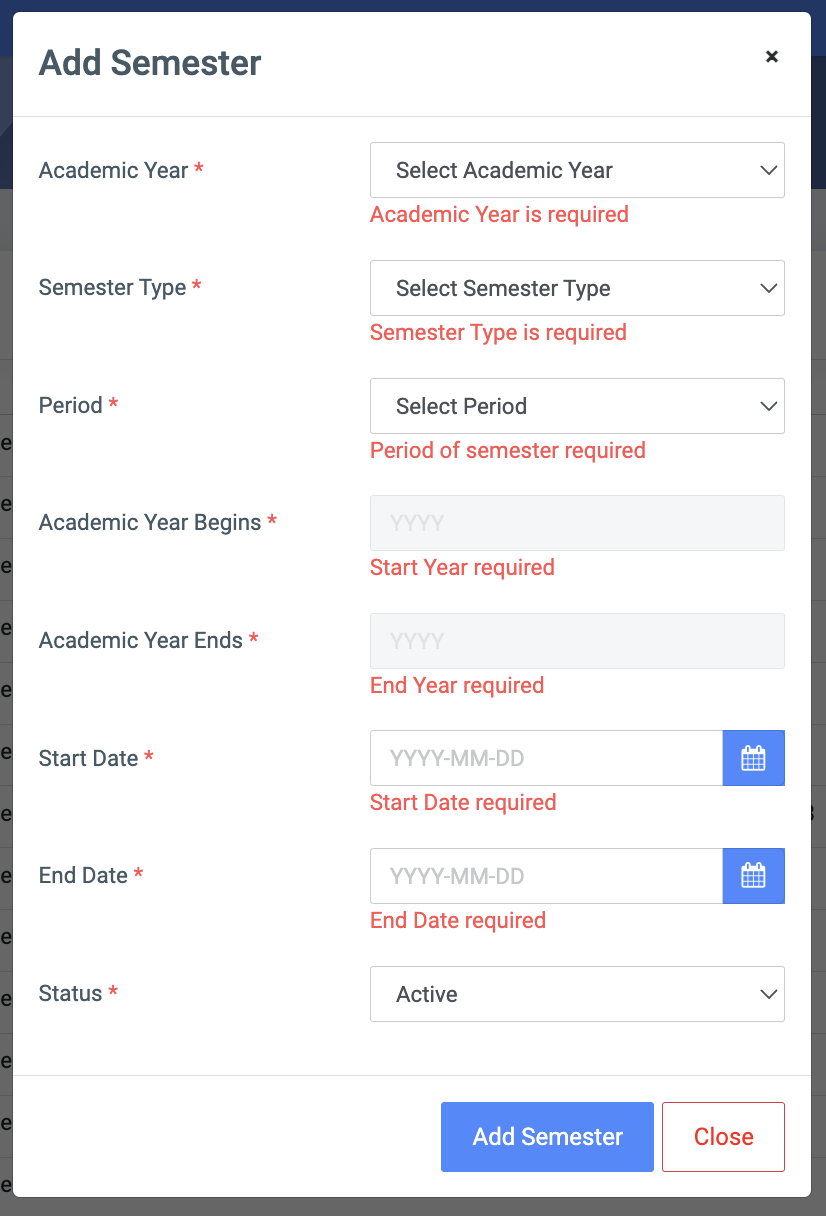
- Academic Year: This is a dropdown of academic years set by the institution. It is a populated dropdown from the Academic Years page.
- Semester Type: This shows a dropdown list for users to select the type of semester. Eg. Semester or Trimester.
- Period: This provides a dropdown of semester numbers to select which semester. Eg. 1 for 1st semester, 2 for 2nd semester.
- Academic Year Begins: The start of the academic period. Eg. 2018.
- Academic Year Ends: the end of the academic period. Eg. 2019.
- Start Date: the start date of the semester.
- End Date: the end date of the semester.
- Status: A dropdown to select whether the semester is Active or Inactive.
✑ Click on Save Changes to confirm actions.
✑ To search for a particular semester, Click on Find Semester button and fill in the details for that semester by:
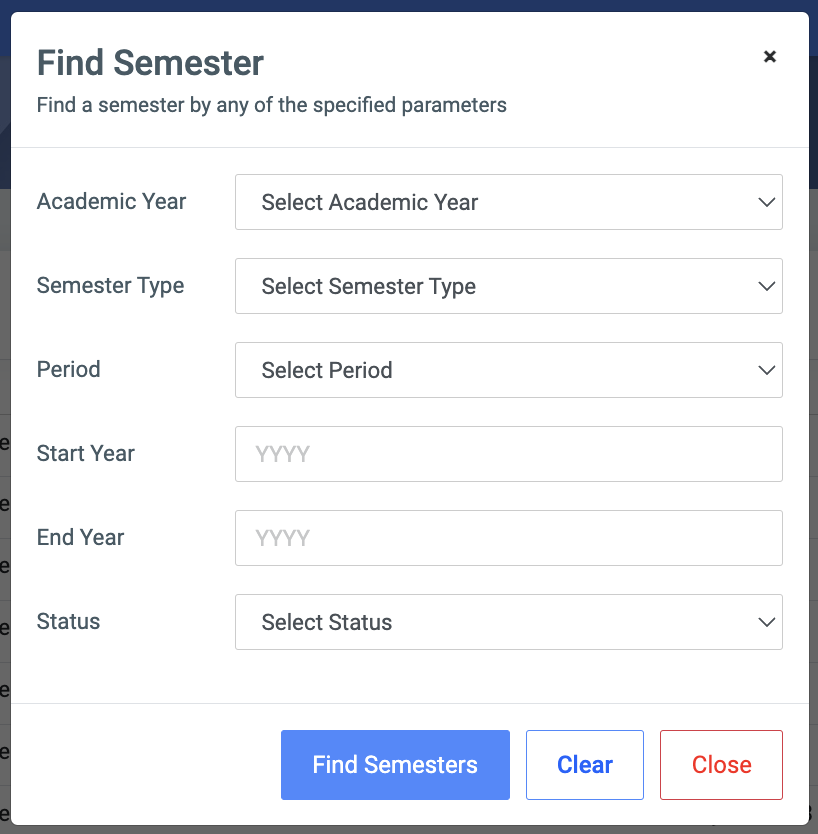
- Academic Year.
- Semester type.
- Period.
- Start Year.
- End Year.
- Status
✑ Click on the Find Semester button to confirm your actions.
✑ Click on Clear to clear all fields
✑ Click on Close to close the modal.
☛ Find Semester fields are optional. Fill in as many as can help in narrowing down and click the Find Semester button. Clicking the Find Semester button with no entries will show all existing Semesters.

For each added semester, the user can Edit, End Semester, Extend, and Delete them.
✑ To Edit a semester, click on the Edit button.
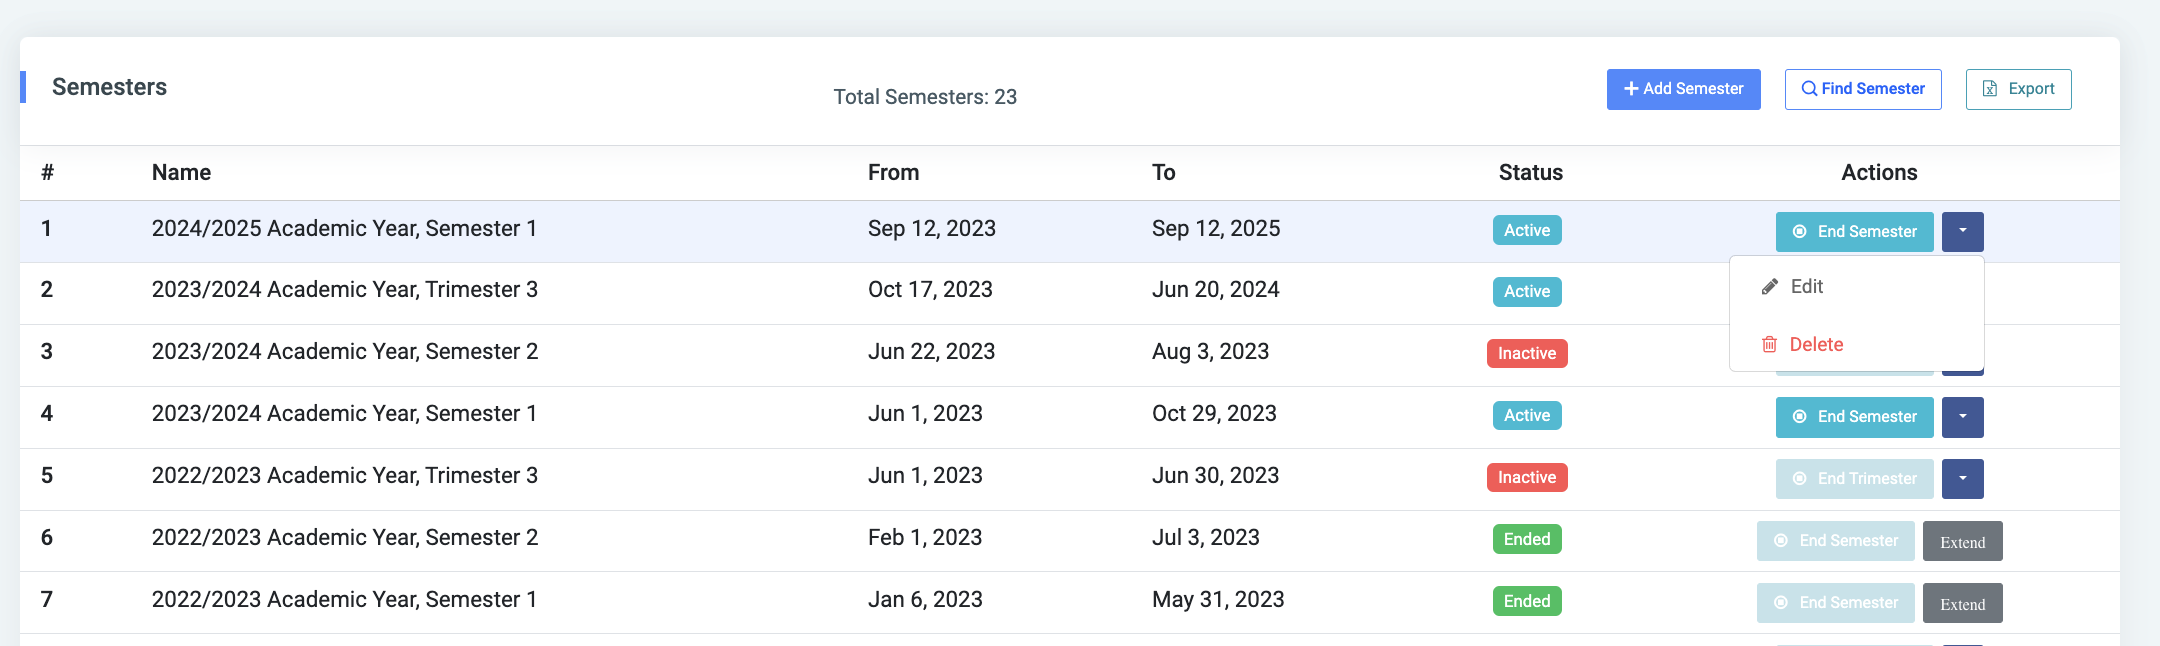
Change the old entries from the Edit Semester form and click on the Save Changes button.
✑ To Delete a semester, click on the Delete button icon. 
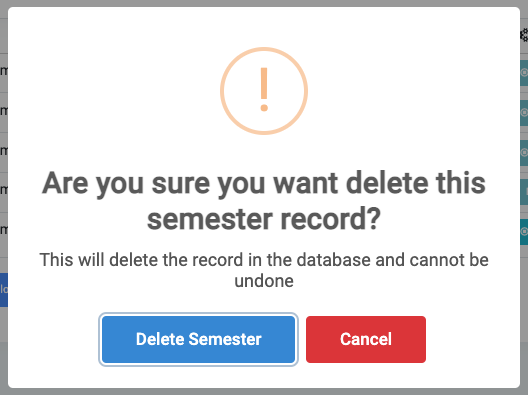
✑ Click on the Delete button from the modal popup to confirm your actions.
☛ Select Export to export results to Excel
Ending a Semester
The following are some important things to check before ending the Semester successfully.
- Student Promotion Settings from Institution profile. Student Promotion from Institution Profile.
- Cohort Merging of Admission Batches if any. Admission Batches from Student Management.
✑ To End an active Semester, click on the End Semester button. 
✑ Click on the End Semester button from the modal popup to confirm your actions.
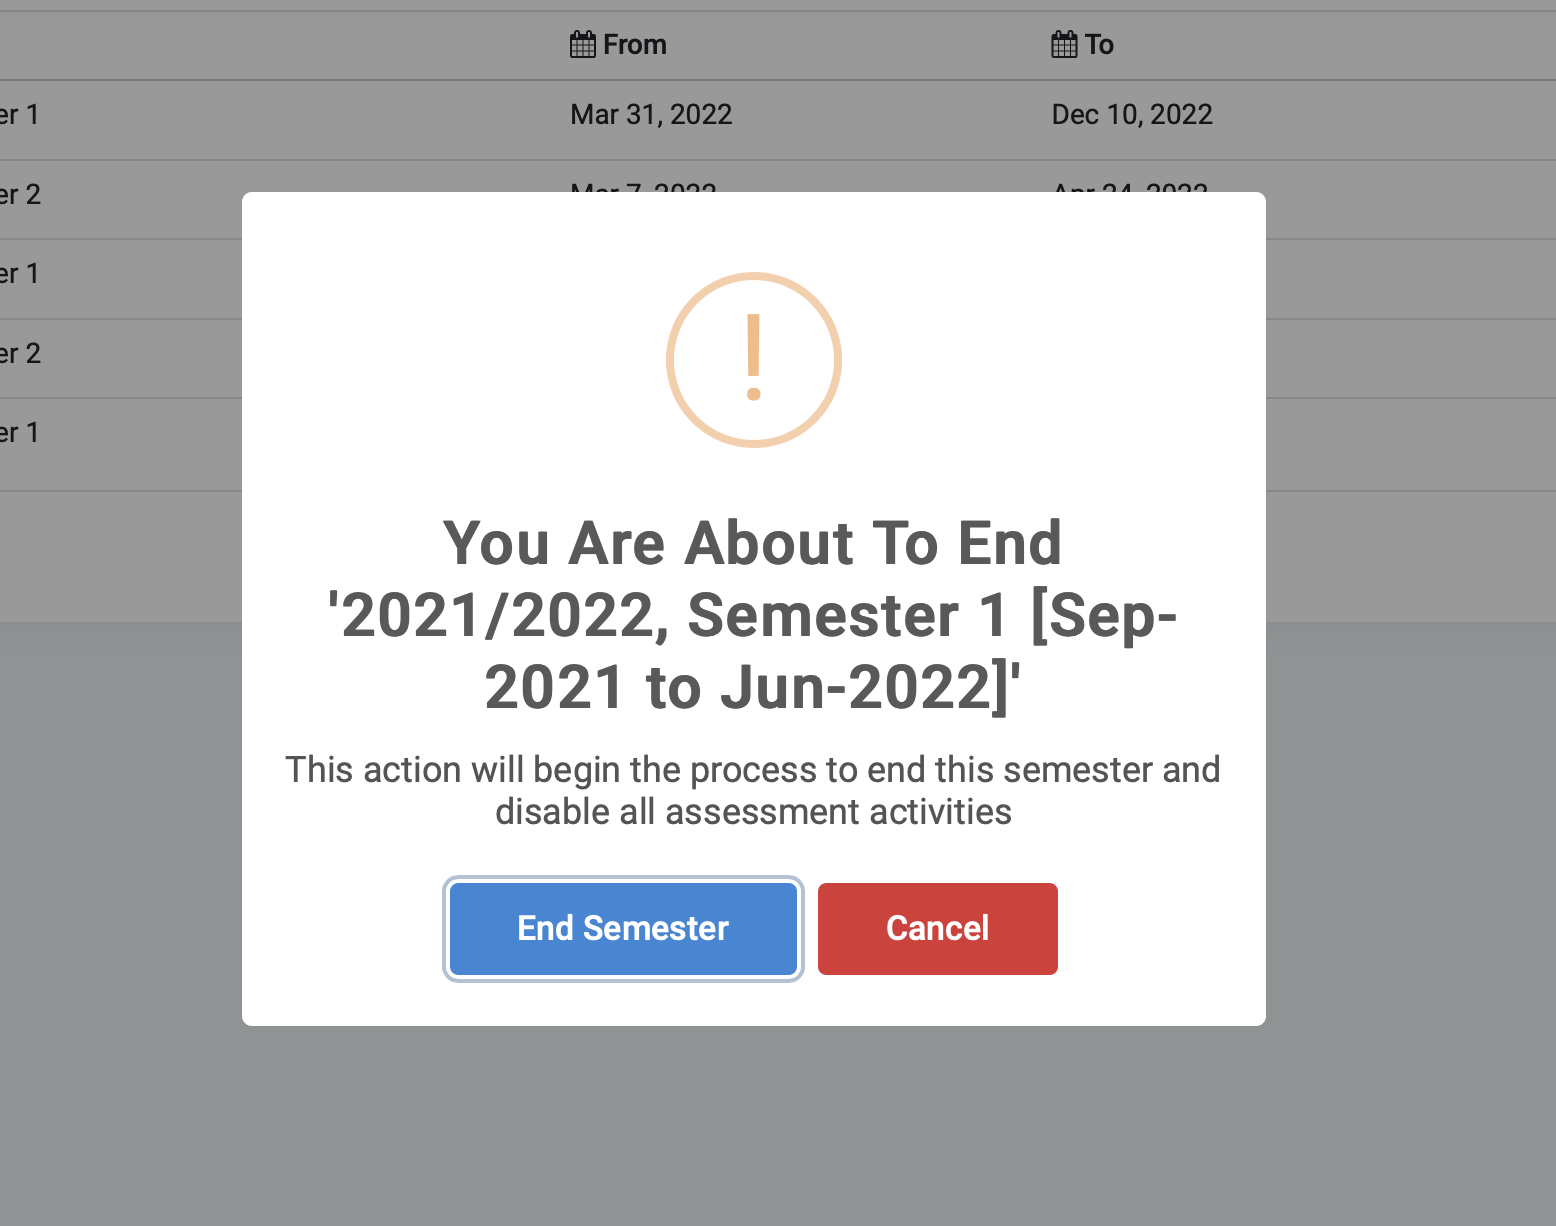
This action opens the end semester page showing three(3) major steps of things to check before ending a semester successfully. The steps are as follows.
A. Publish Assessments(Step 1)
If there are Unpublished assessment Sheets and assessment Sheets Under Review then,
From the top right of the end semester page, you will see two (2) buttons, the Publish Submitted Sheets button and the Publish All Sheets button.
✑ Click on the Publish Submitted Sheets button to publish all sheets submitted by Lectures and all Sheets Under Review.
✑ Click on Publish All Sheets to force all unpublished sheets to process.
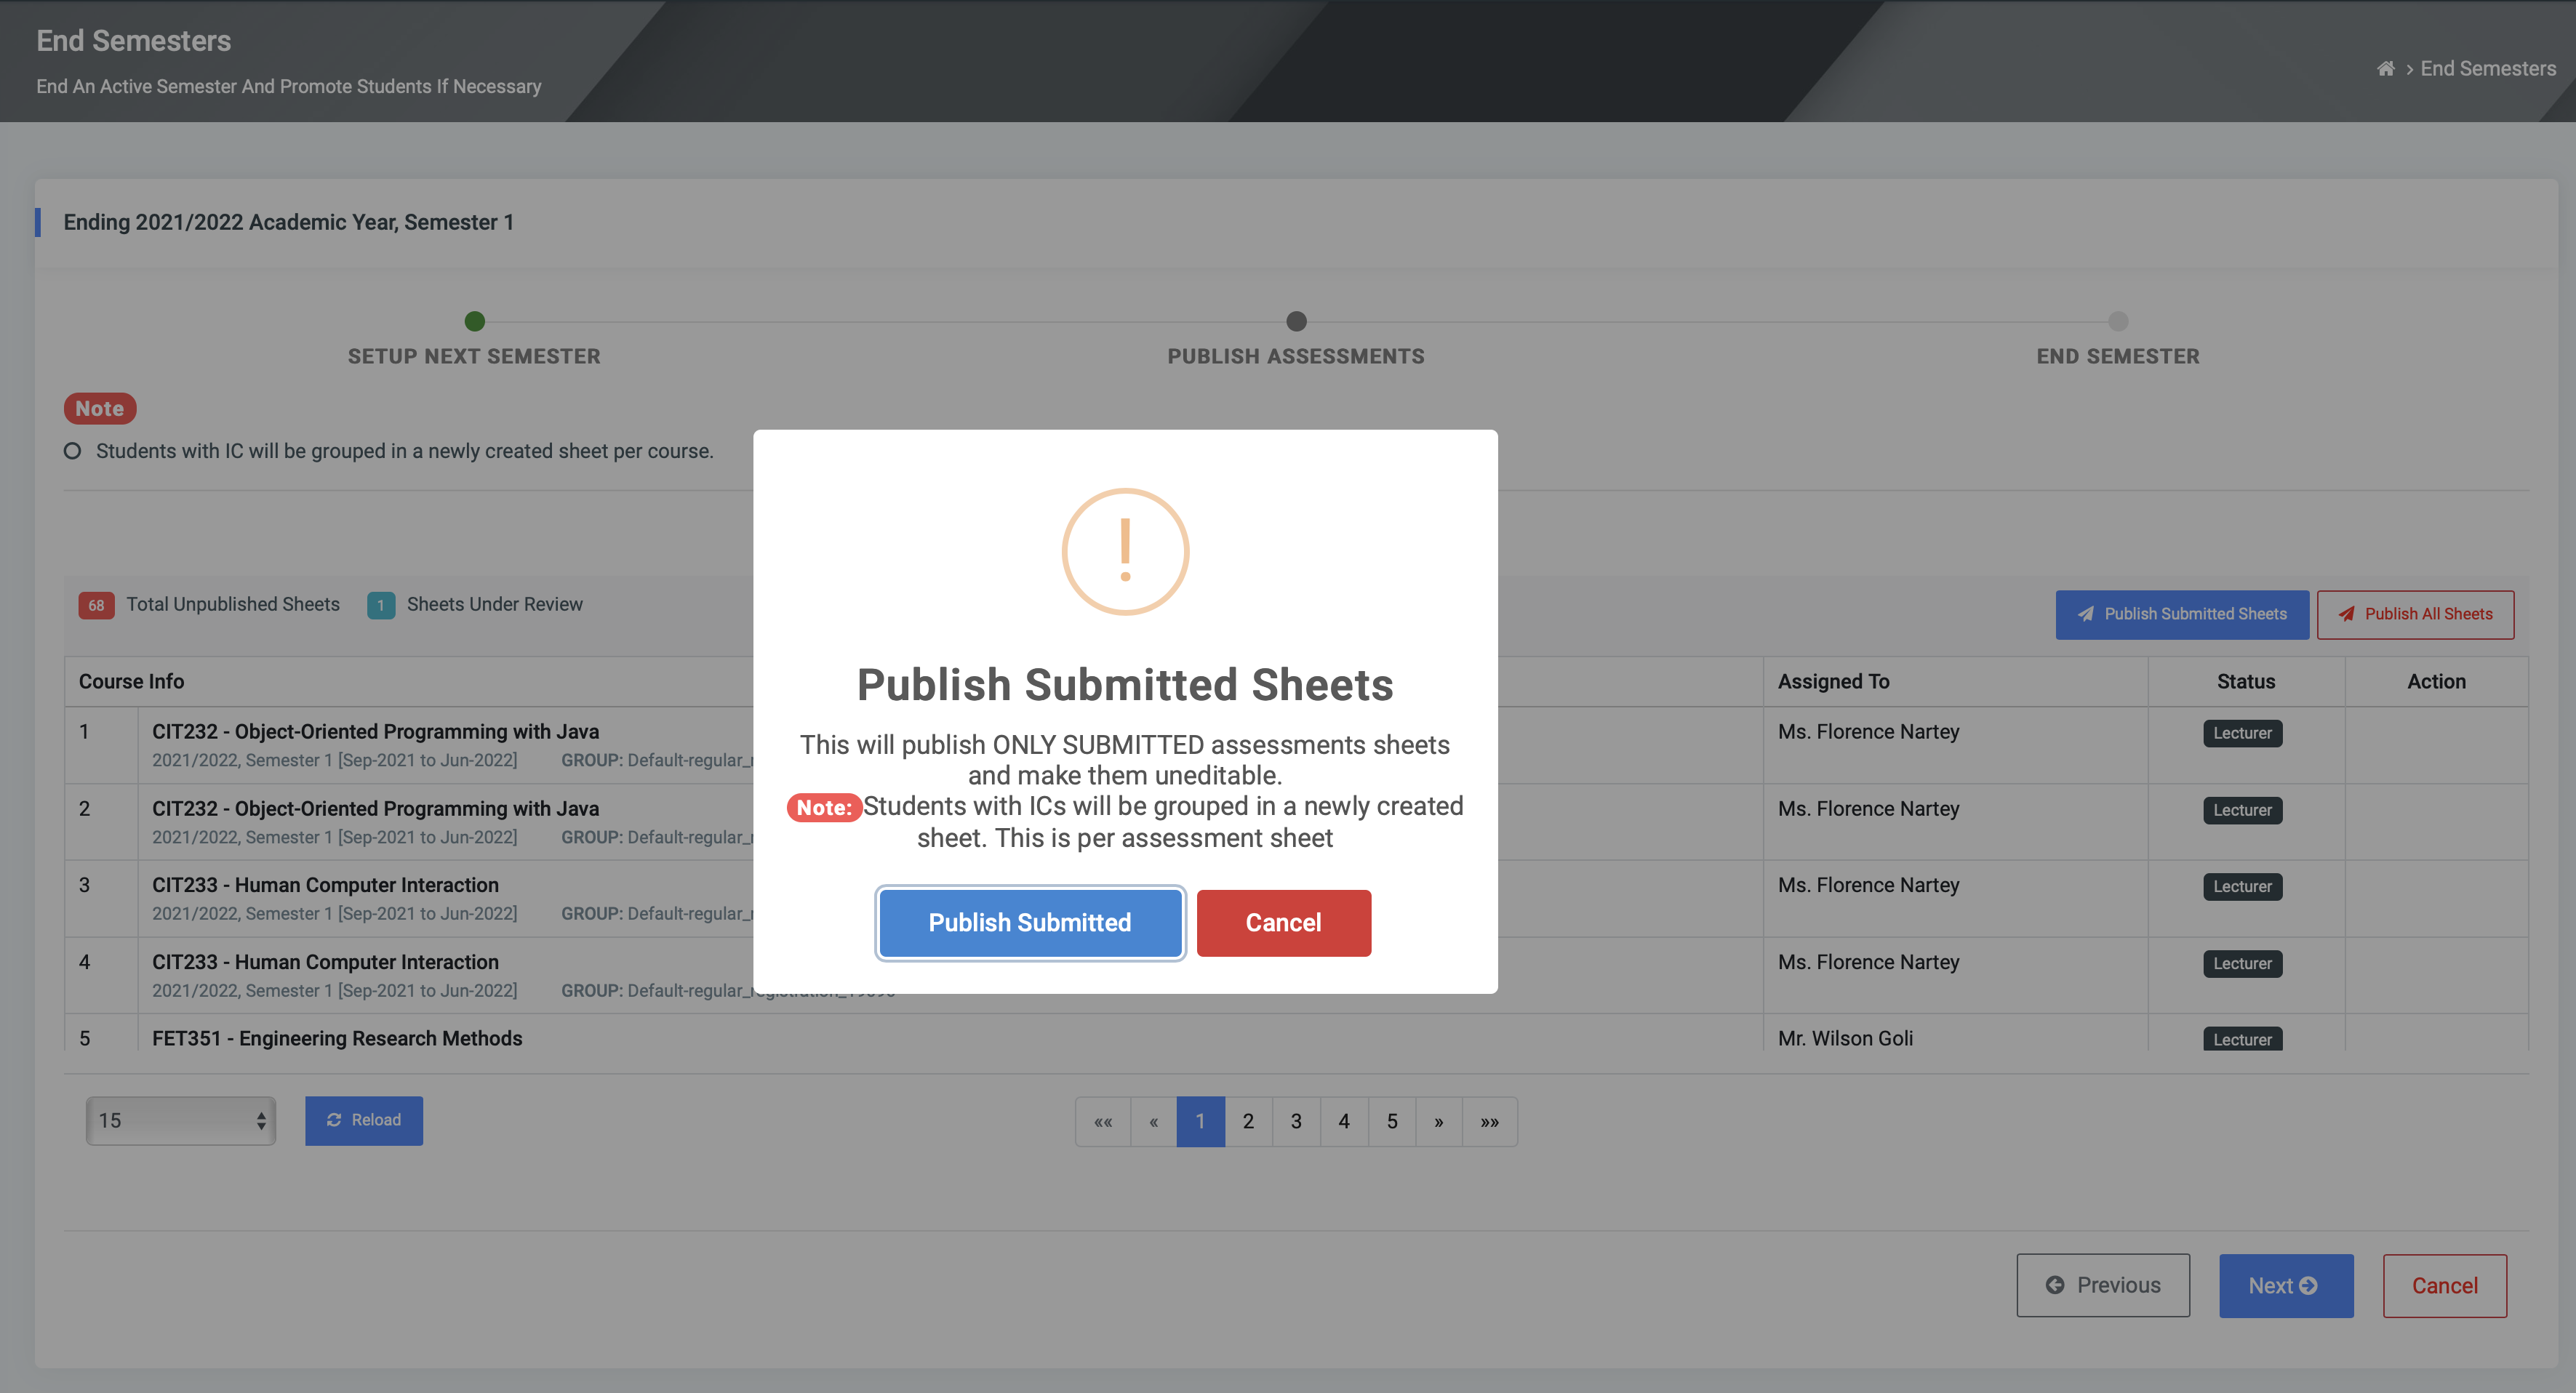
☛ All assessment sheets need to be published before the user can successfully end an active semester. Only authorized users can publish assessments. Please check Approvals & Publication for more details
✑ Click on Next after this is done to enter the next step.
If there are no assessment sheets unpublished or under review,
✑ simply click on Next to the next step.
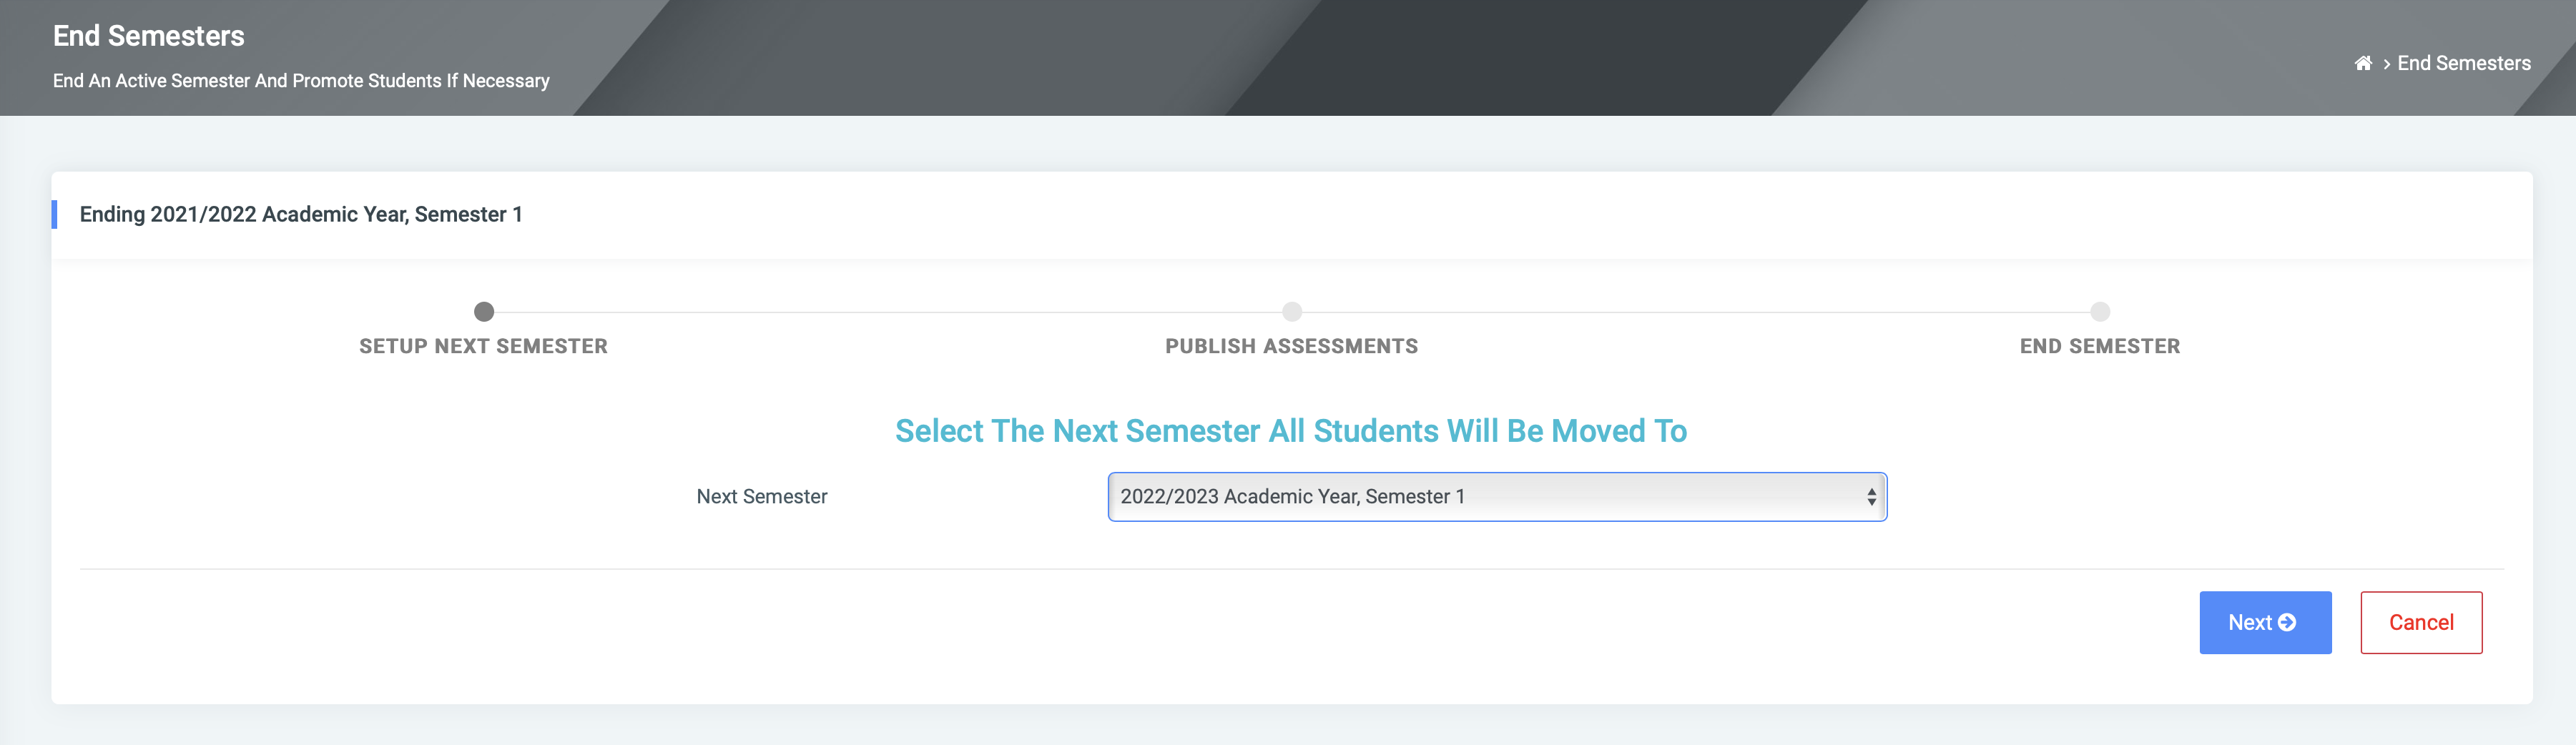
B. Setup Next Semester (Step 2)
This level has a next semester dropdown, listing all semesters for the user to select the newly created semester the institution is entering.

✑ From the dropdown find and click the preferred semester period to check it.
✑ Click on Next to the last step.
✑ Click on Previous to go back.
C. End Semester(Final Step)
This view or page shows you all the thing that goes on when you finally end a semester.

The following are the actions will take place:
- The current active semester will be marked as ended and can no longer be edited.
- All students with assessments tied to this semester will be moved to the next selected semester.
- Assessment sheets for this semester will no longer be available for editing.
Student Promotion Enabled:
- All students with assessments in this semester will be processed for promotion or graduation
- New Program Plans will be auto-generated for repeating students in not present
- Final year students without trails will be promoted to Completed status, pending graduation.
✑ Click on the End Semester button and confirm your actions by clicking the End Semester from the modal popup to affect change.

✑ Click on Previous to go back.
✑ Click Cancel to stop the process.
Extending a Semester
✑ Click the Extend button on an ended semester. This will present a modal for the user to enter the date they want to extend the semester end date to.
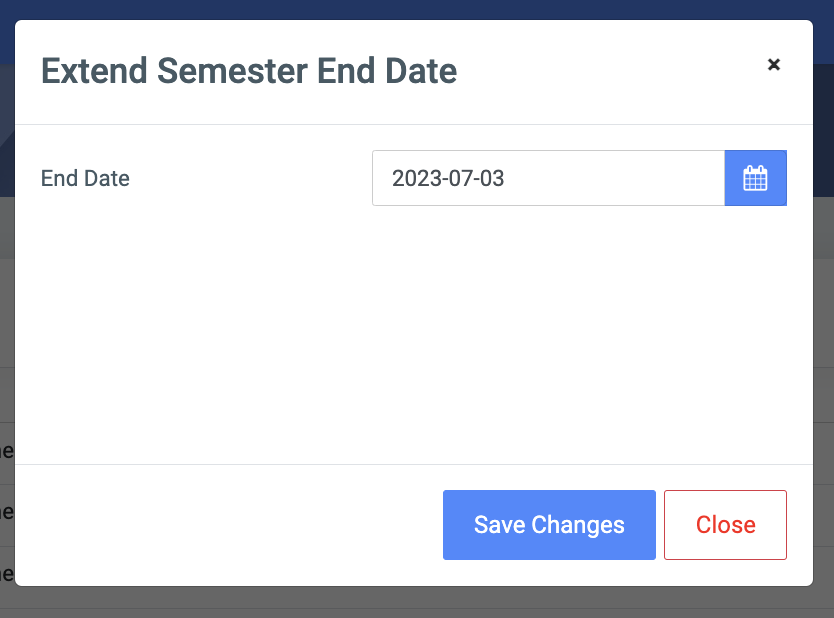
Click on Save Changes to confirm actions.
Click on Close to revert actions.