Financial Aid Setup
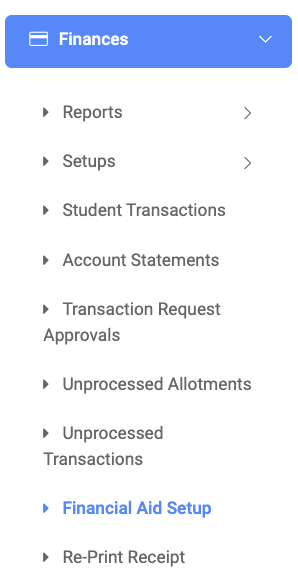
✑ From the OSIS sidebar, Click on the Financial Aid Setup link under Finance.
From the Financial Aid Setup page, there are Five(5) buttons, Find button, Add Student Scholarship button, Replicate Scholarship button, Print and Export buttons.

You can set up Financial aid for a student or a batch.
To set up financial aid for a student, follow the steps below;
✑ To add a new scholarship to OSIS, click on the Add Student Scholarship button. The Add Scholarship modal has the following fields;
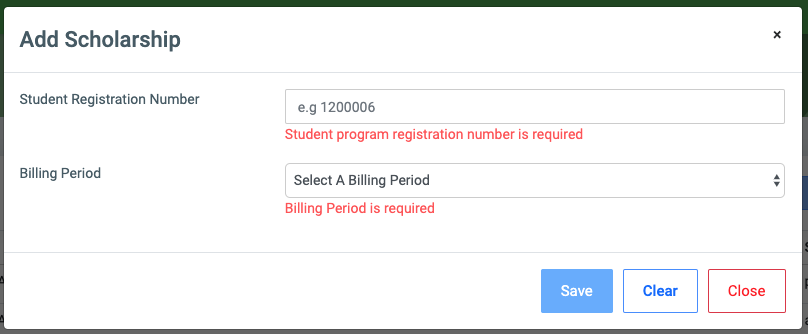
- Student Registration Number: Enter the student registration number.
- Billing Period: This is a dropdown list showing details of all billing periods created.
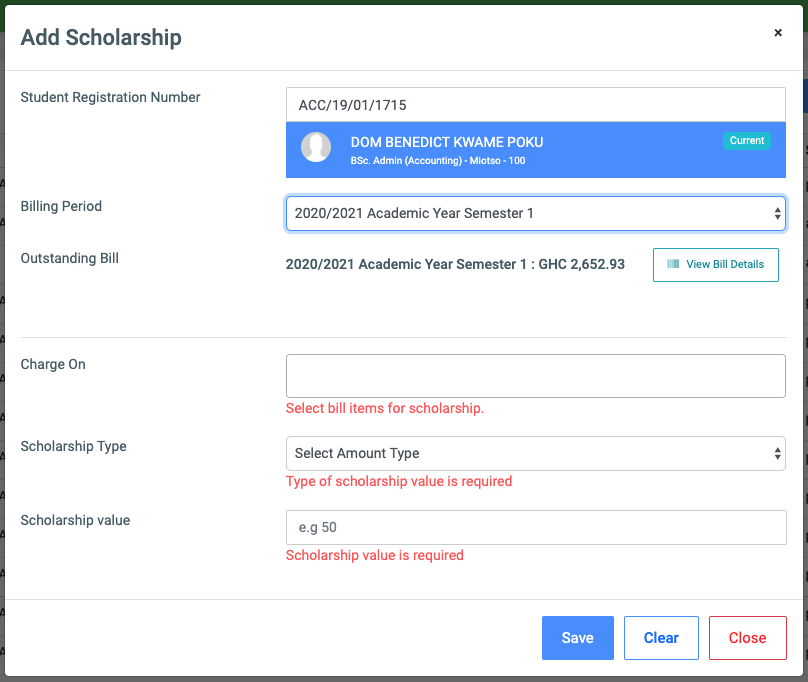
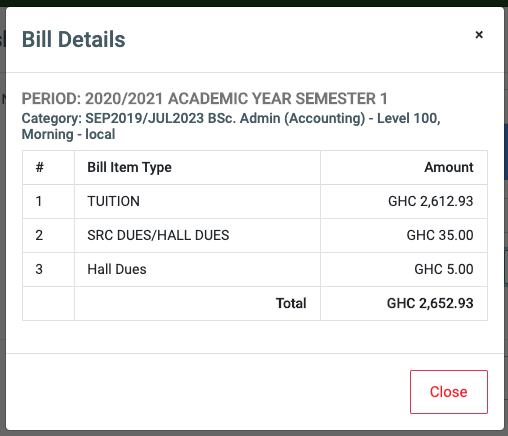
✑ Click on the View Bill Details button  to show the student bill.
- Charge On: Select the bill item type, the scholarship will be on.
- Scholarship Type: A dropdown list to select the type. This can be in Percentage or Amount.
- Scholarship Value: Enter the value in percentage or amount based on the Scholarship Type.
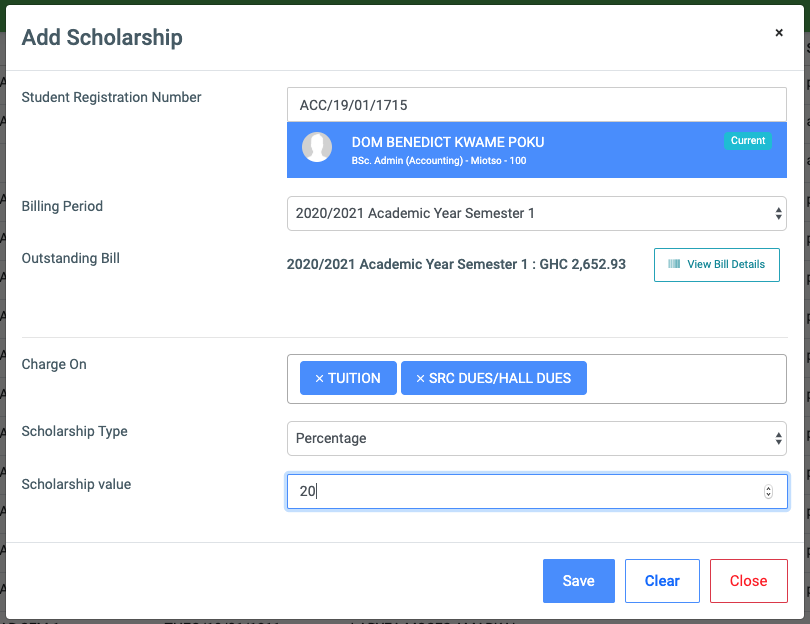
✑ Click on Save to confirm actions.
✑ To Replicate Scholarship or copy existing scholarships to a new semester, Click on Replicate Scholarship button  ;
;
☛ Scholarship Replication: This feature helps OSIS users to copy existing scholarships to a new semester. This improves efficiency by reducing the time it takes to set up scholarships and improve user-friendliness.
This will open a popup with the following details;
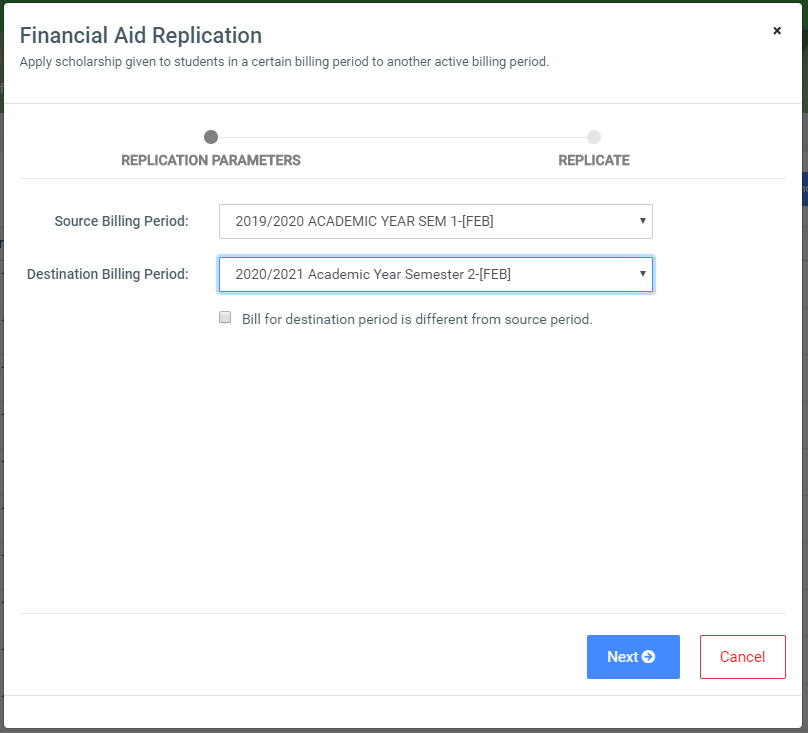
☛ The source and the destination billing period month must be the same. Eg. [Feb]
- Source Billing Period: Select from the dropdown the billing period you want to replicate.
- Destination Billing Period: Select the new billing period, you want to replicate to.
- Bill for destination period is different from source period (Checkbox)
 :
: - If Checked: Then take the scholarship percentage against the bill items of the new billing period.
NB: The students must have bills for the new billing period and the bill amount may differ.
Eg. 10% of the new bill item total (2000), 10% of the new bill item total (1500), etc. - Not Checked: Then take the exact scholarship amount for the new billing period.
NB: Regardless of the new bill item amount take the same scholarship amount.
Eg. GHC 50 of the new bill item total (2000), GHC 50 of the new bill item total (1500), etc.
- If Checked: Then take the scholarship percentage against the bill items of the new billing period.
✑ Click on the Next button
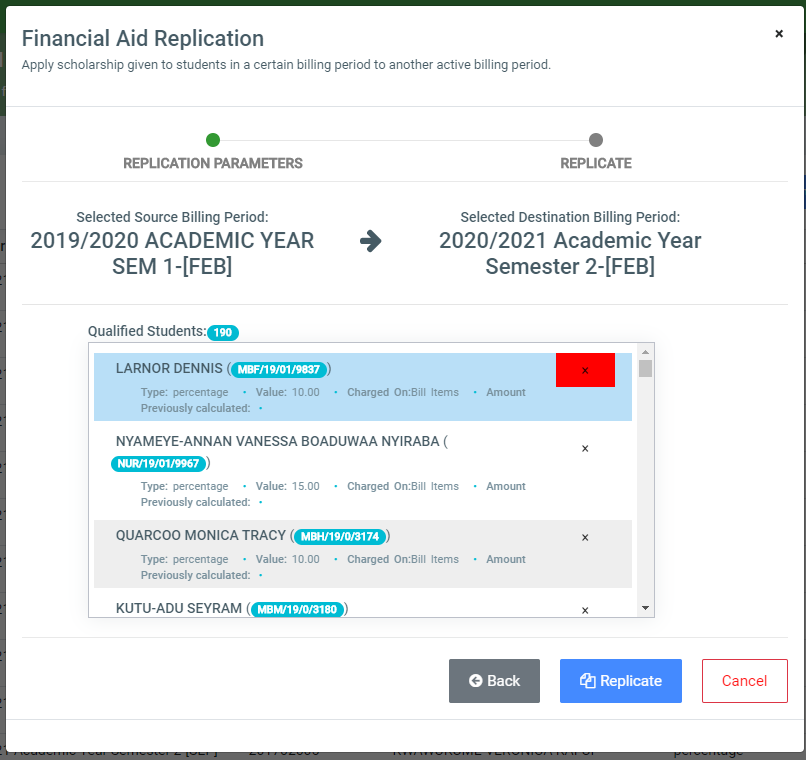
✑ Click on the Replicate button to confirm action.
✑ To search for a particular Scholarship, Click on Find button and fill in the details for that Scholarship by;
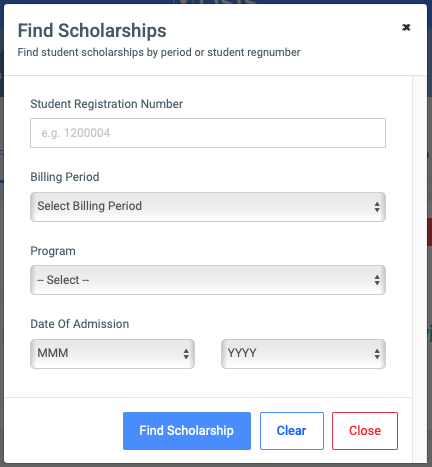
- Student Registration Number:
- Billing Period:
- Program:
- Date of Admission:
✑ Click on Find button to confirm your actions,
✑ Click on Clear to clear all fields,
✑ Click on Close to close the modal.
☛ Find Scholarships fields are not required. Simply click the Find Scholarship button to show all Scholarships.
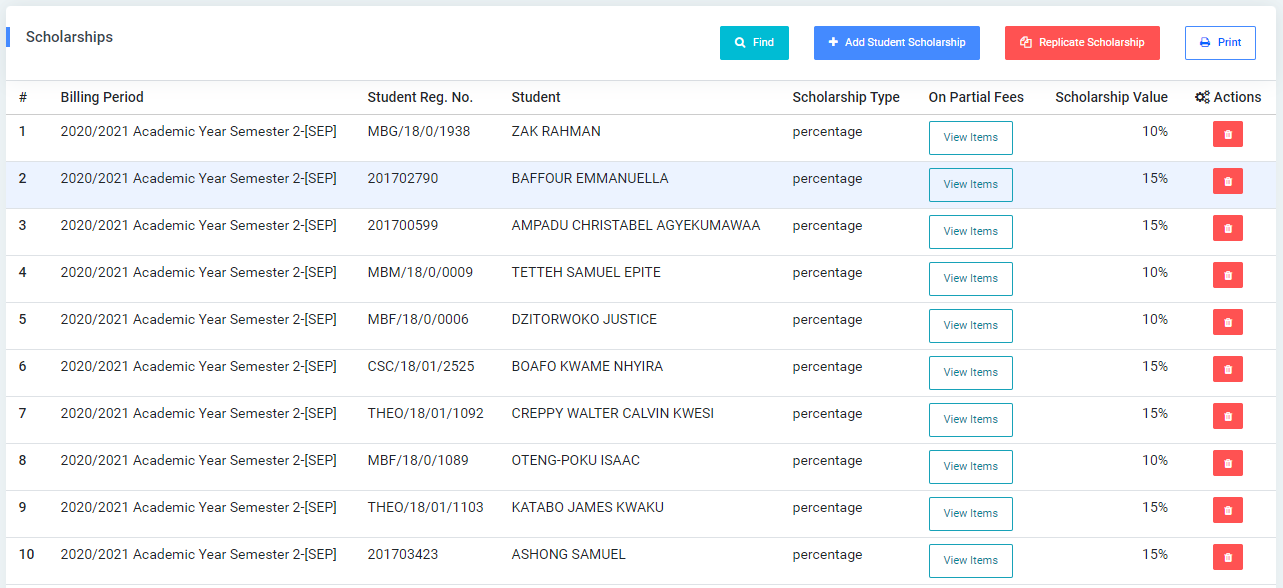
For each added Scholarship, the user can Delete them.
✑ Click on the Reload button to refresh Scholarship fields.
✑ To print Scholarship, click on the Print Result button.
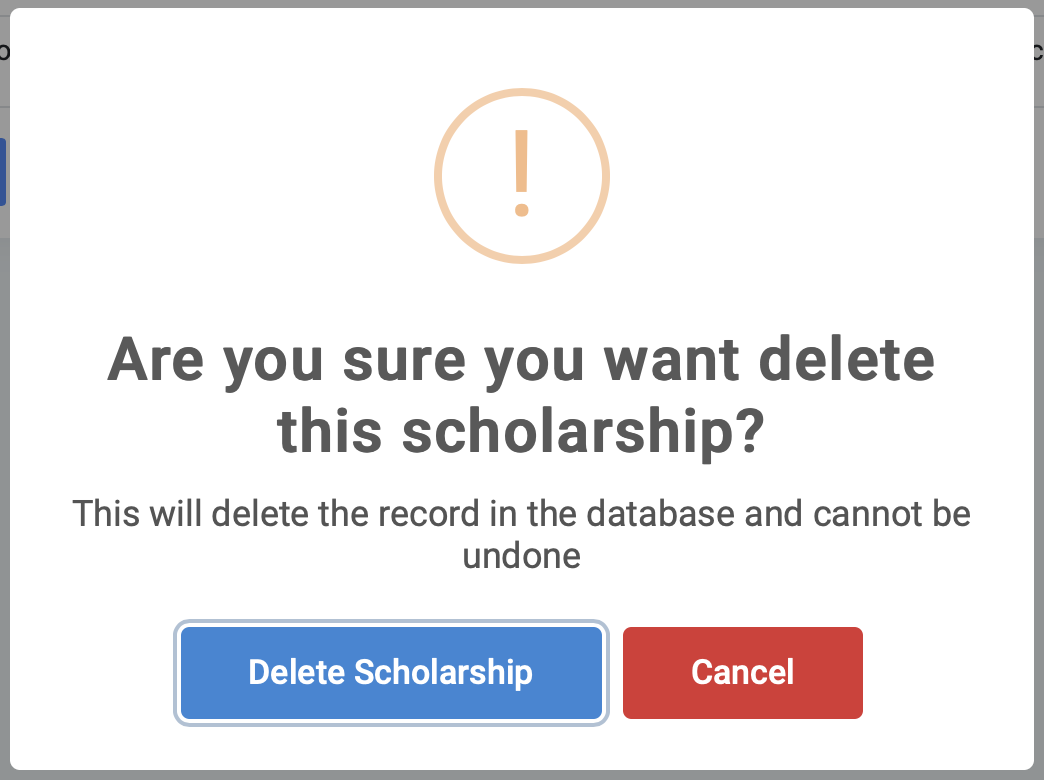
✑ To Delete a Scholarship, click on the Delete button icon.
✑ Click on the Delete Scholarship button from the modal popup to confirm your actions.
To set up financial aid for a batch of students, follow the steps below;
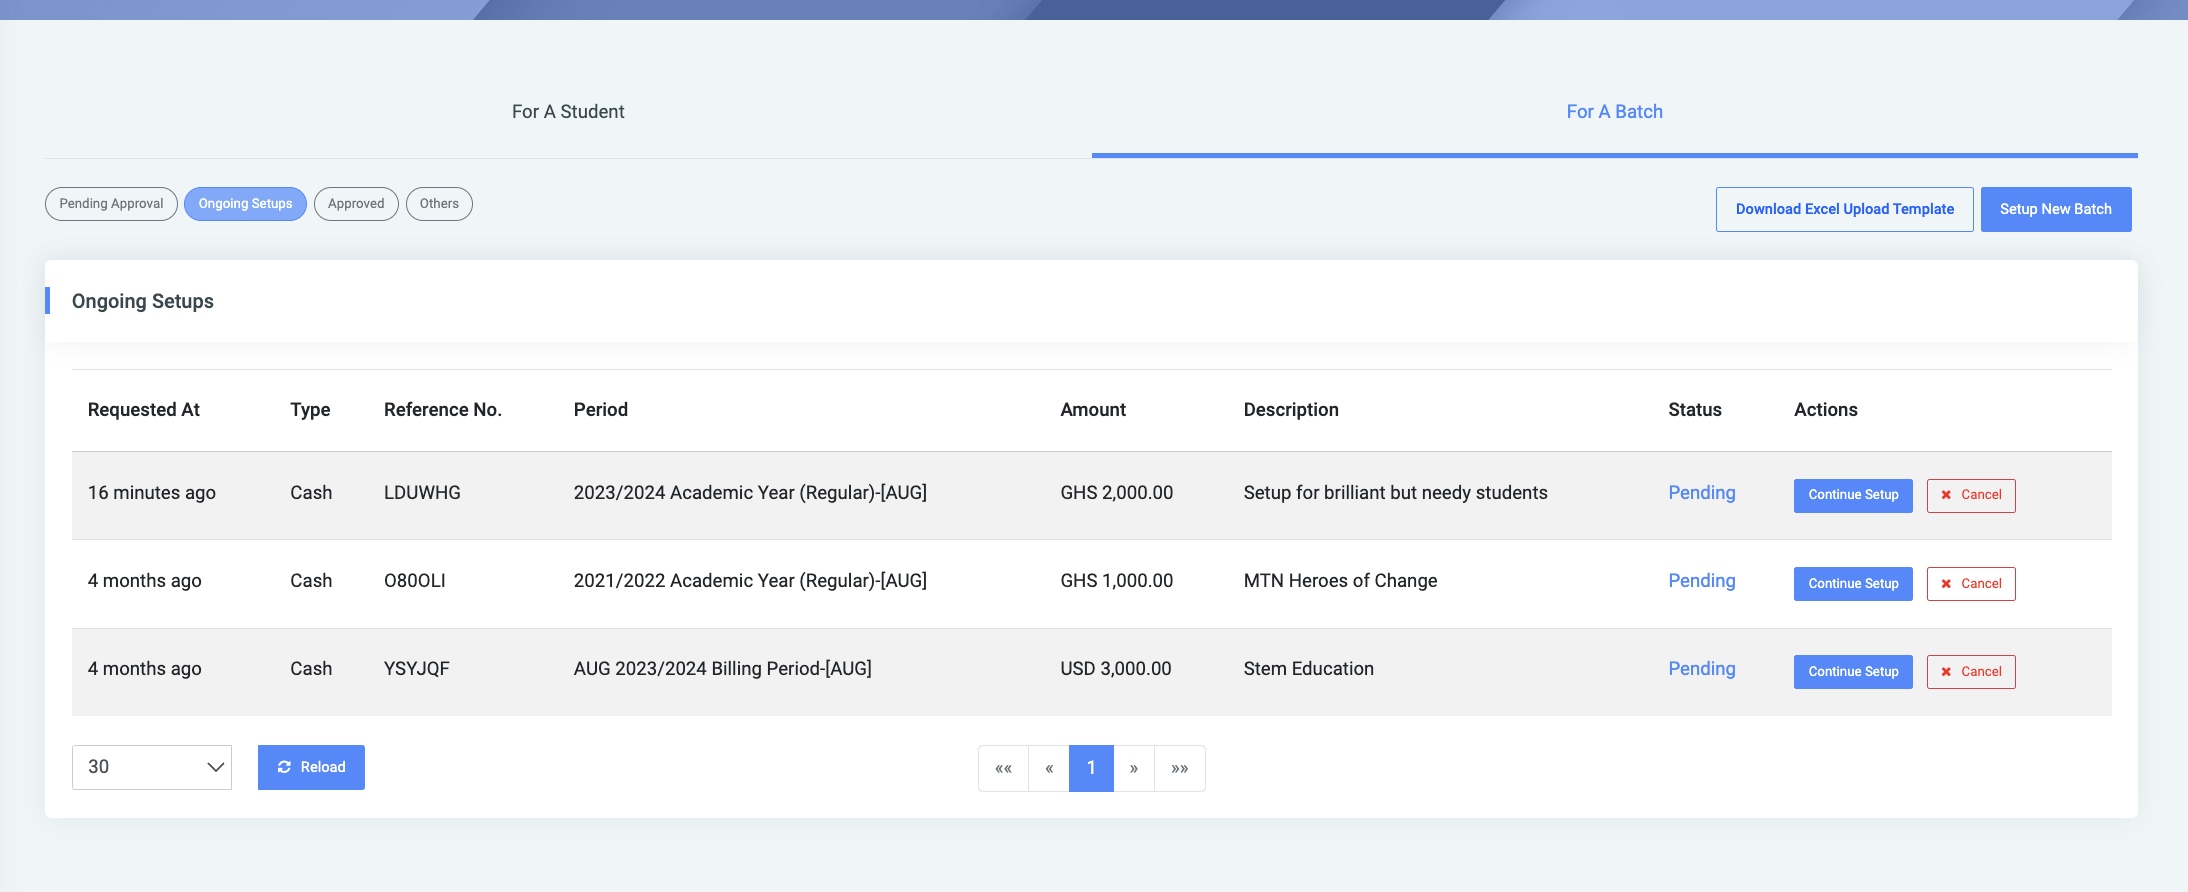
✑ Click on the For a Batch tab

This comes with two(2) buttons on the right, namely: Download Excel Upload Template and Setup New Batch.
✑ Click on the Download Excel Upload Template button to download a template to upload a batch of students.
✑ To set up a new batch for financial aid, click on the Setup New Batch button. It comes with the following fields;
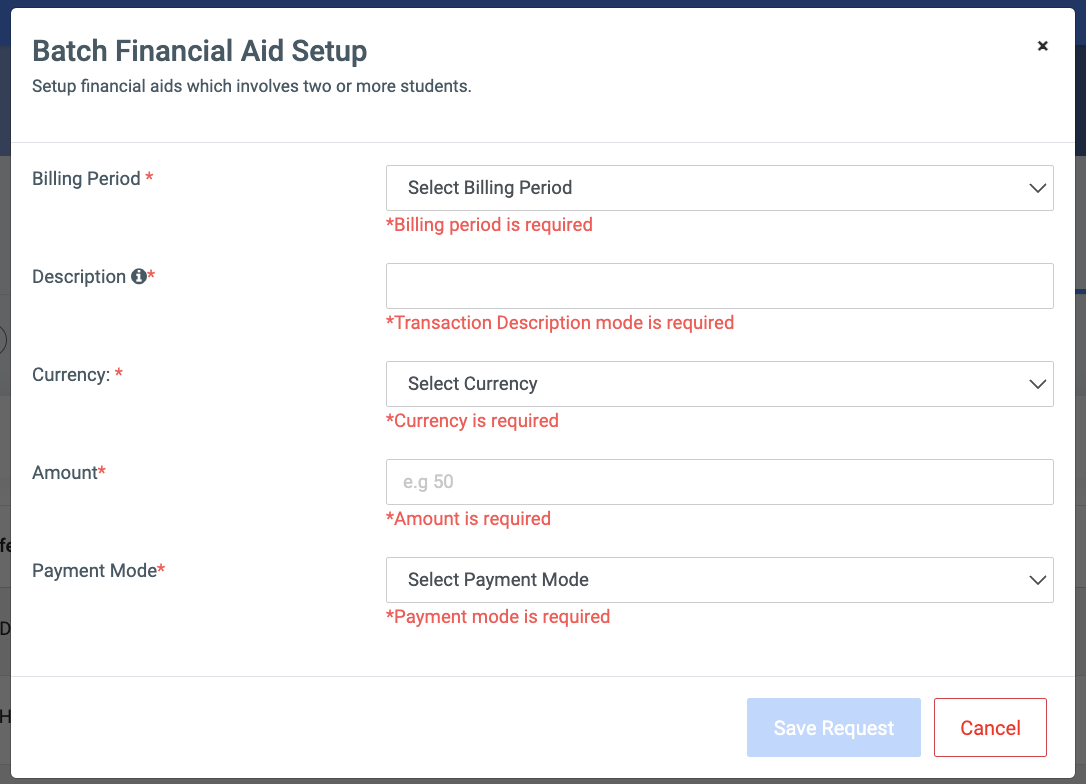
- Billing Period: Select from the list of active billing period in the school.
- Description: Give a short description. This will show on the account statements of the students.
- Currency: Select the type of currency.
- Amount: Specify the amount you want to set for the batch.
- Payment Mode: Specify the payment mode.
NB: All fields are required.
✑ Click on the Save Request button
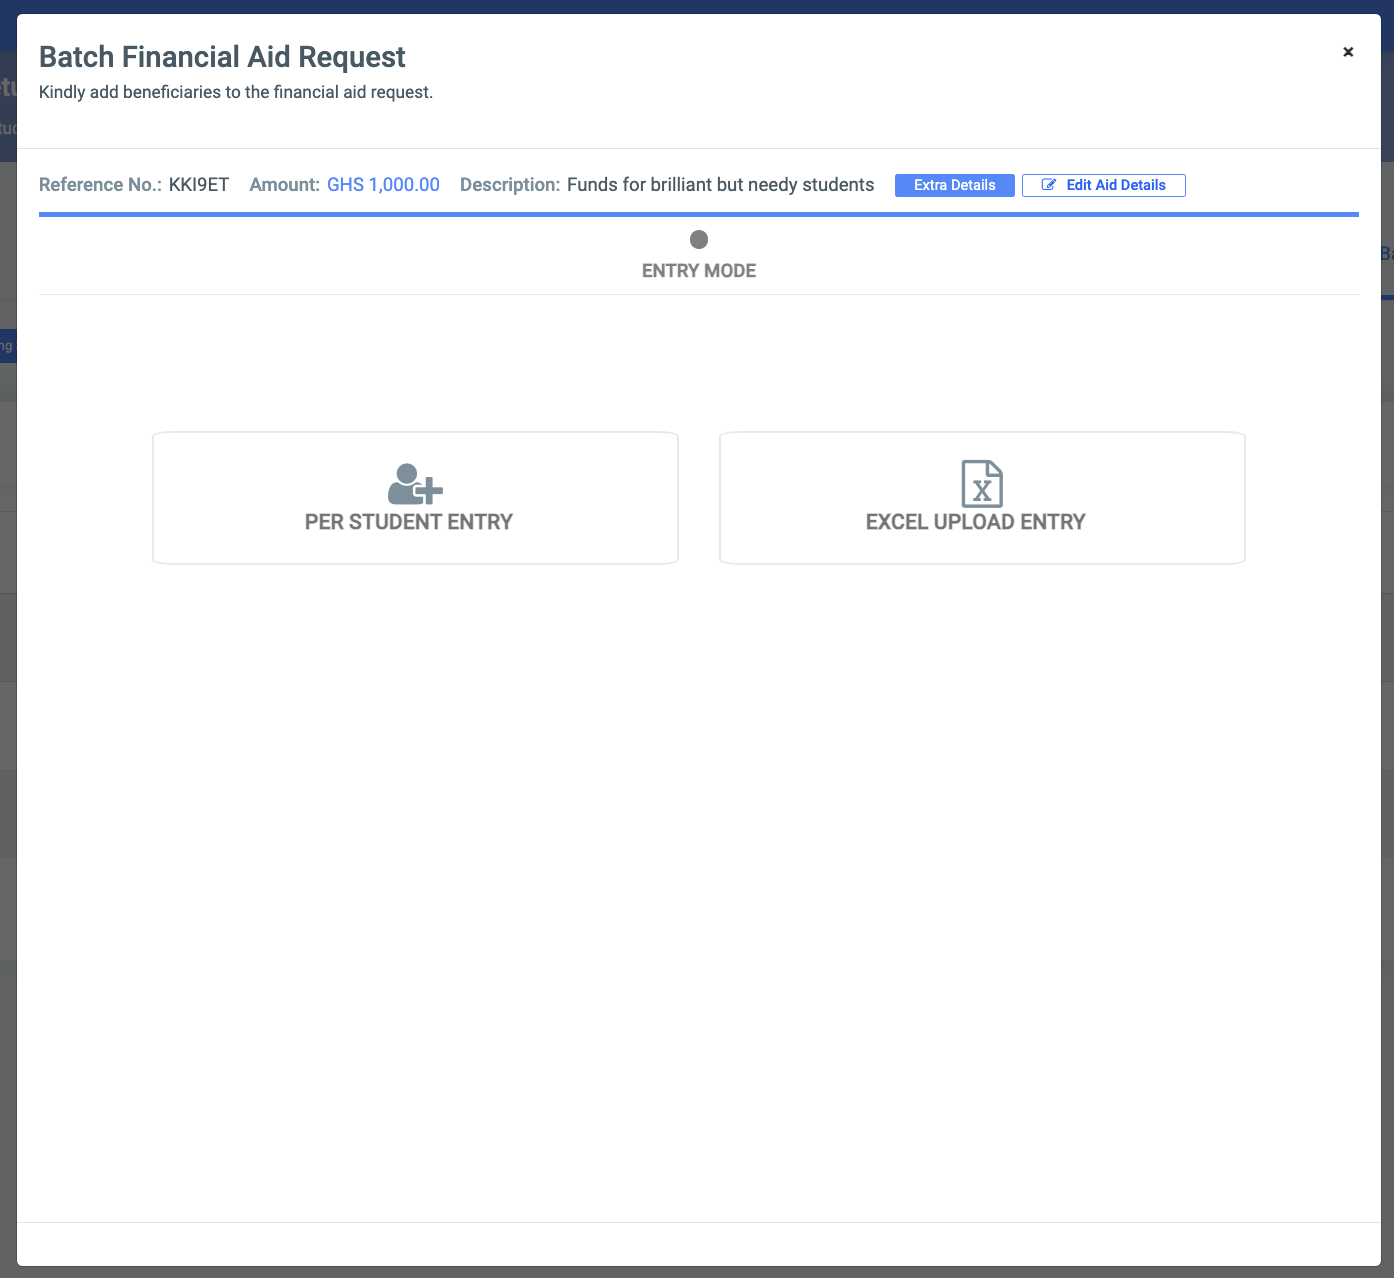
This bring you to a view that gives you the option to add to a batch of students one by one or for a batch by uploading a file with the regnumbers against the amounts.
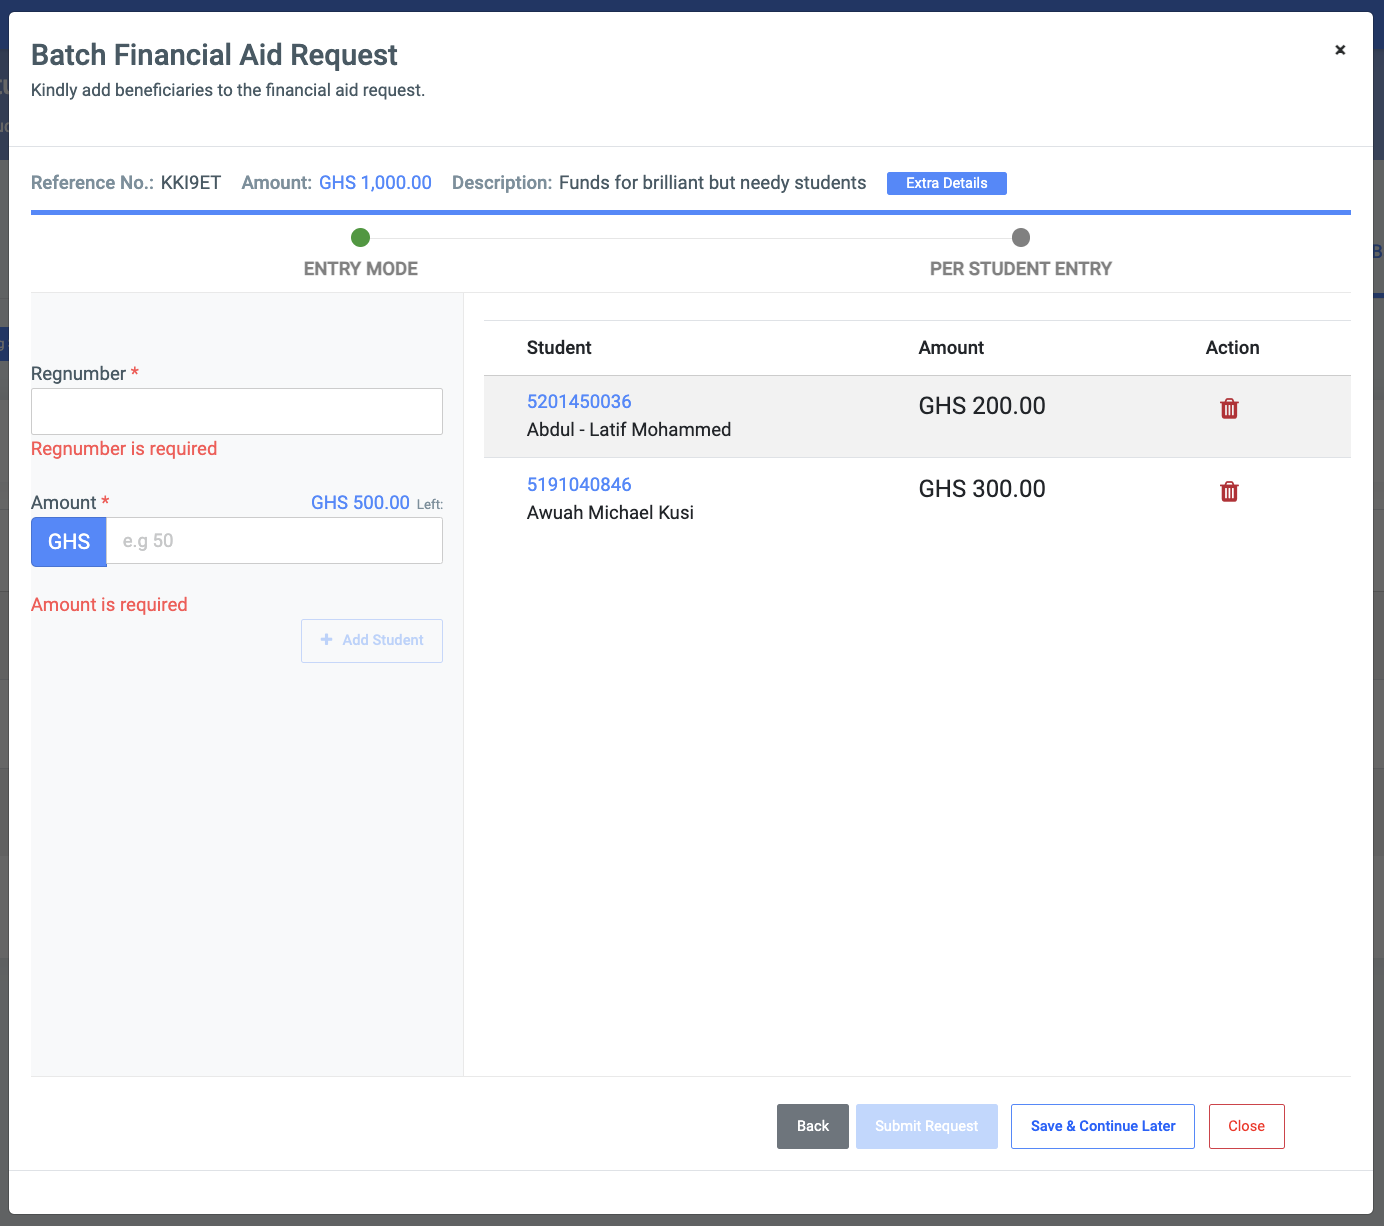
Enter the Regnumber and specify the amount
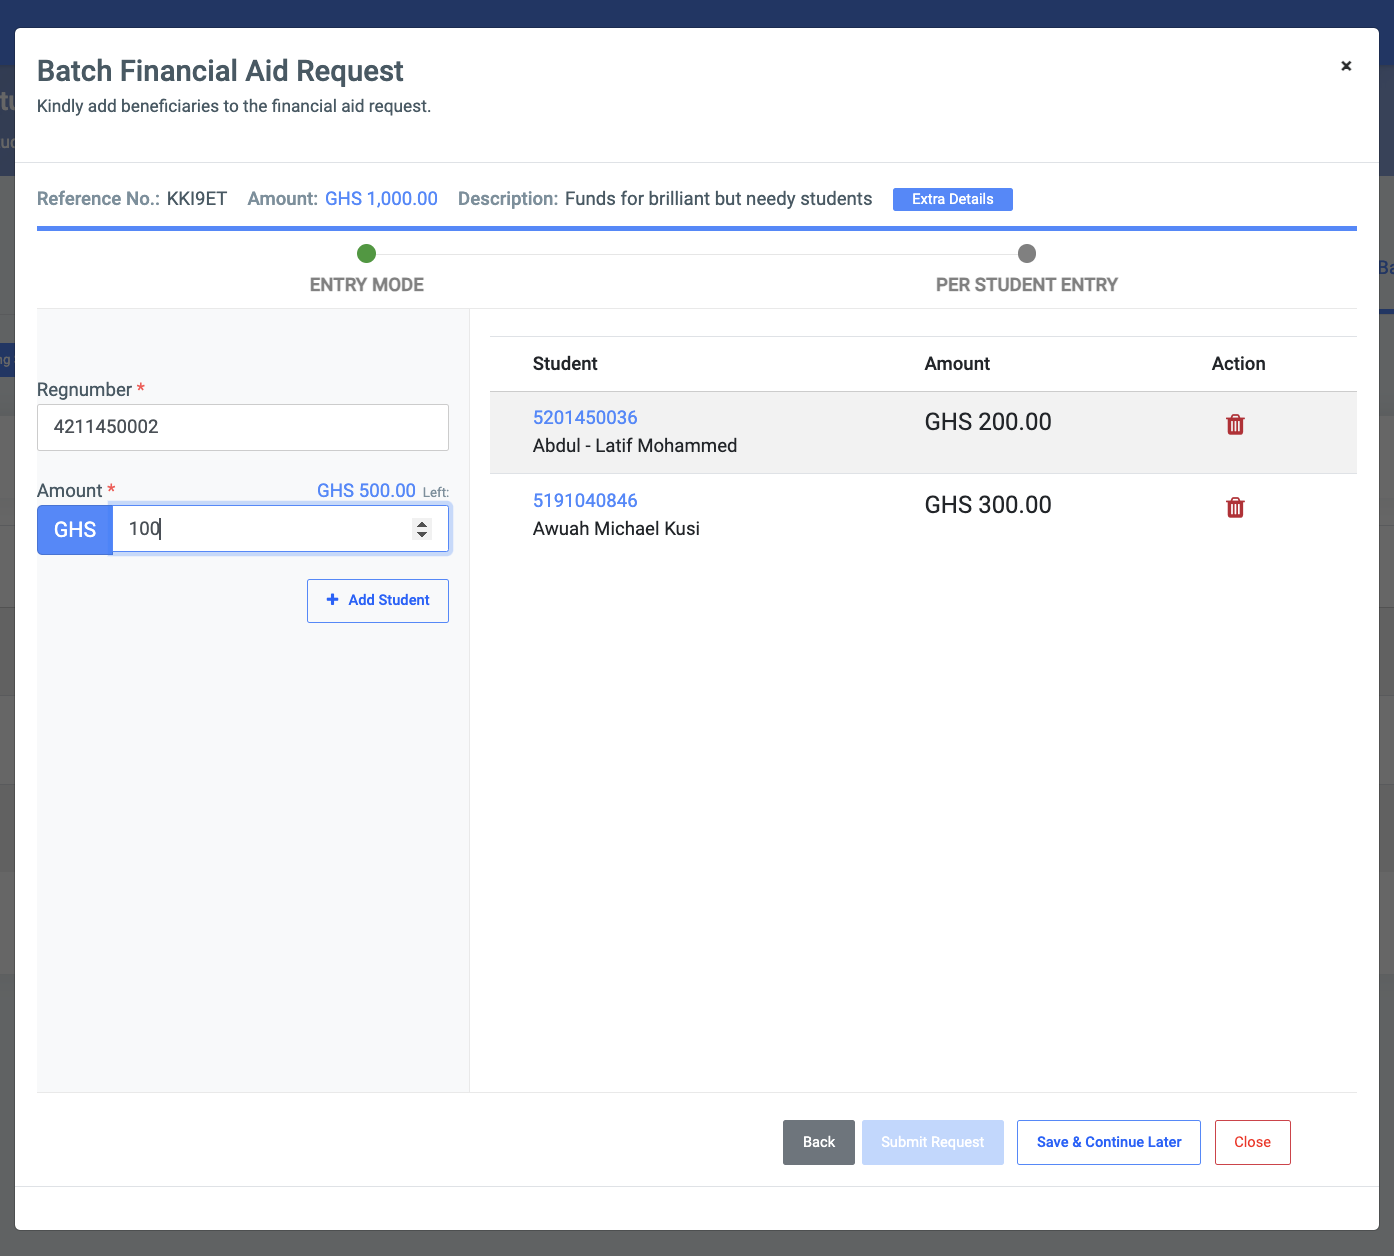
✑ Click on Add Student to register the entry.
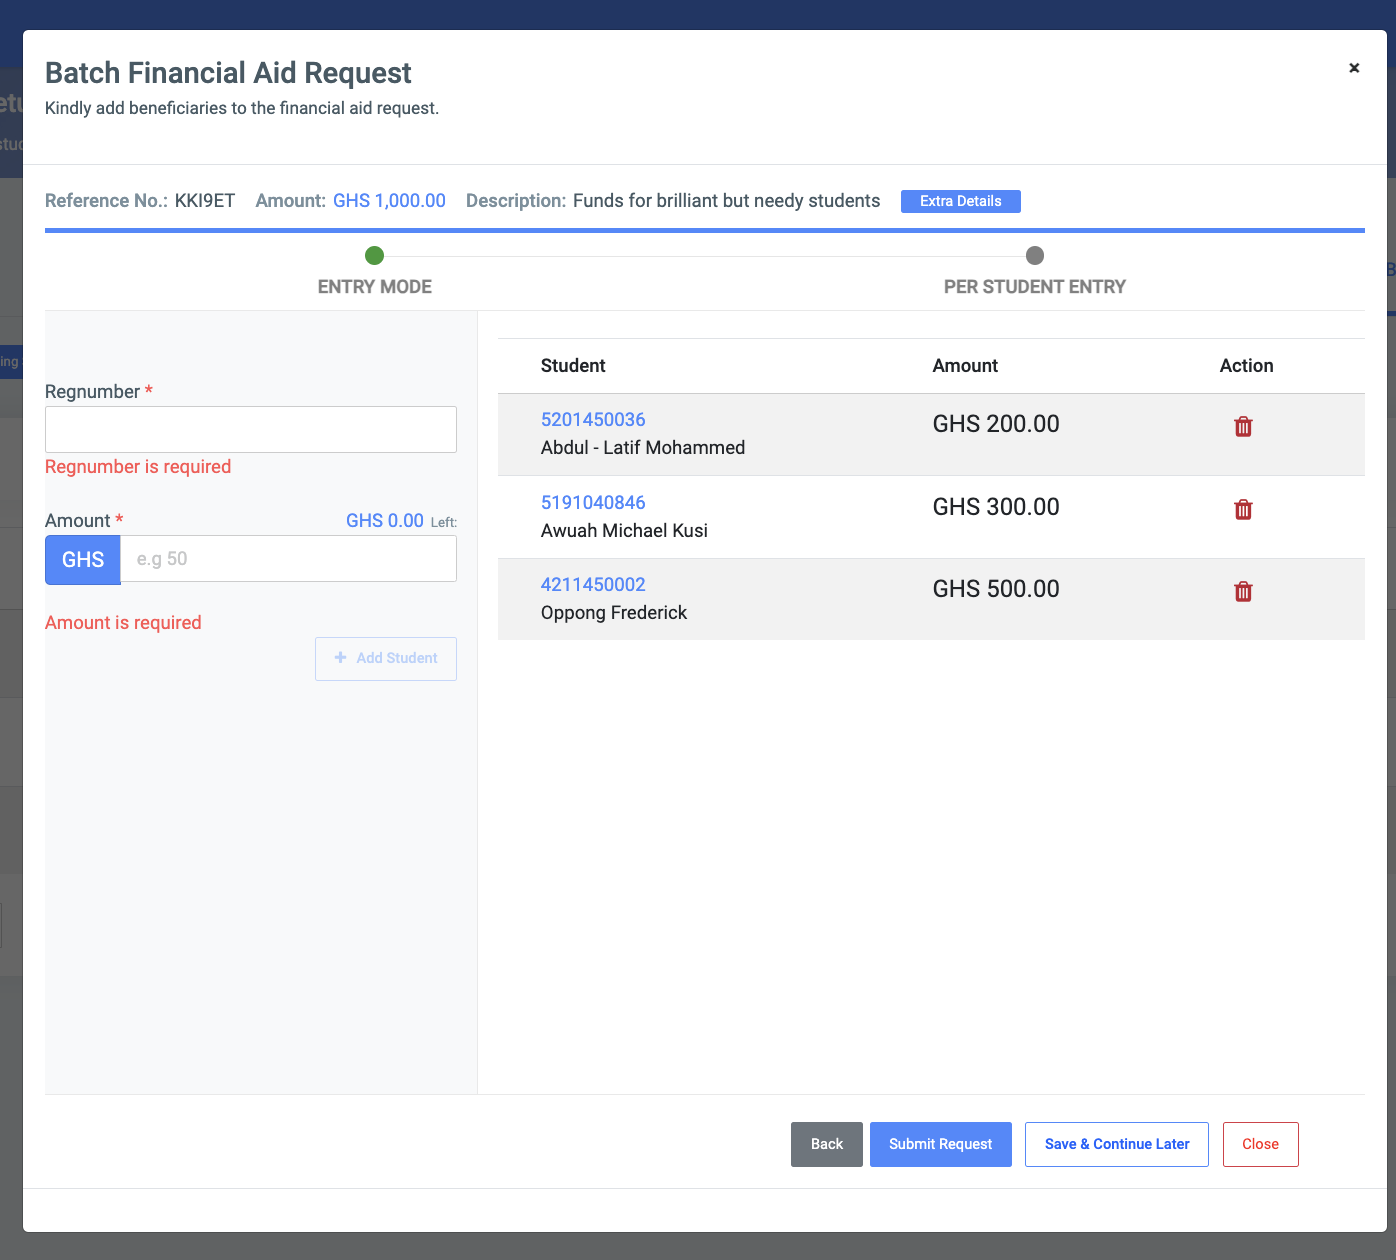
✑ Click on Back to go back to the previous step.
✑Click on Submit Request to Submit the entries.
✑ Click on Save & Continue to come back later to edit the entries.
✑ Click on Close to halt the process and continue later.
✑ To setup financial aid for a batch via an upload, choose the upload option.
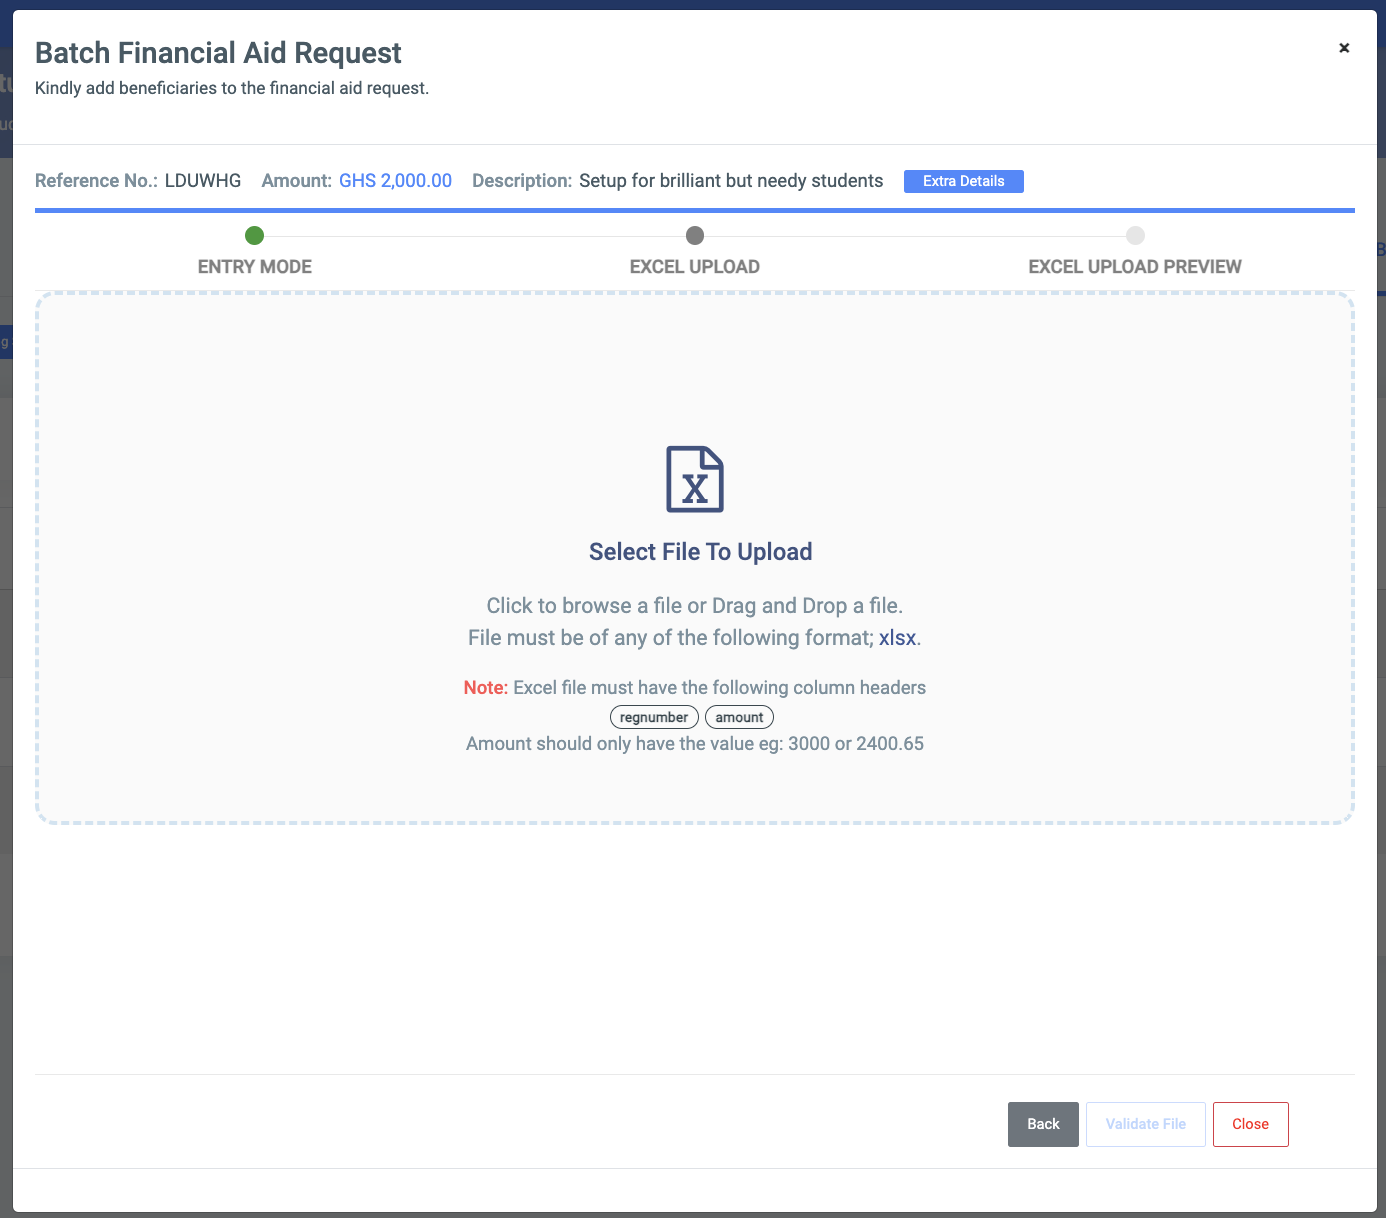
✑ Click on the Select File To Upload are to upload the downloaded Excel file.
After, click on the Submit Request button to Submit the request.
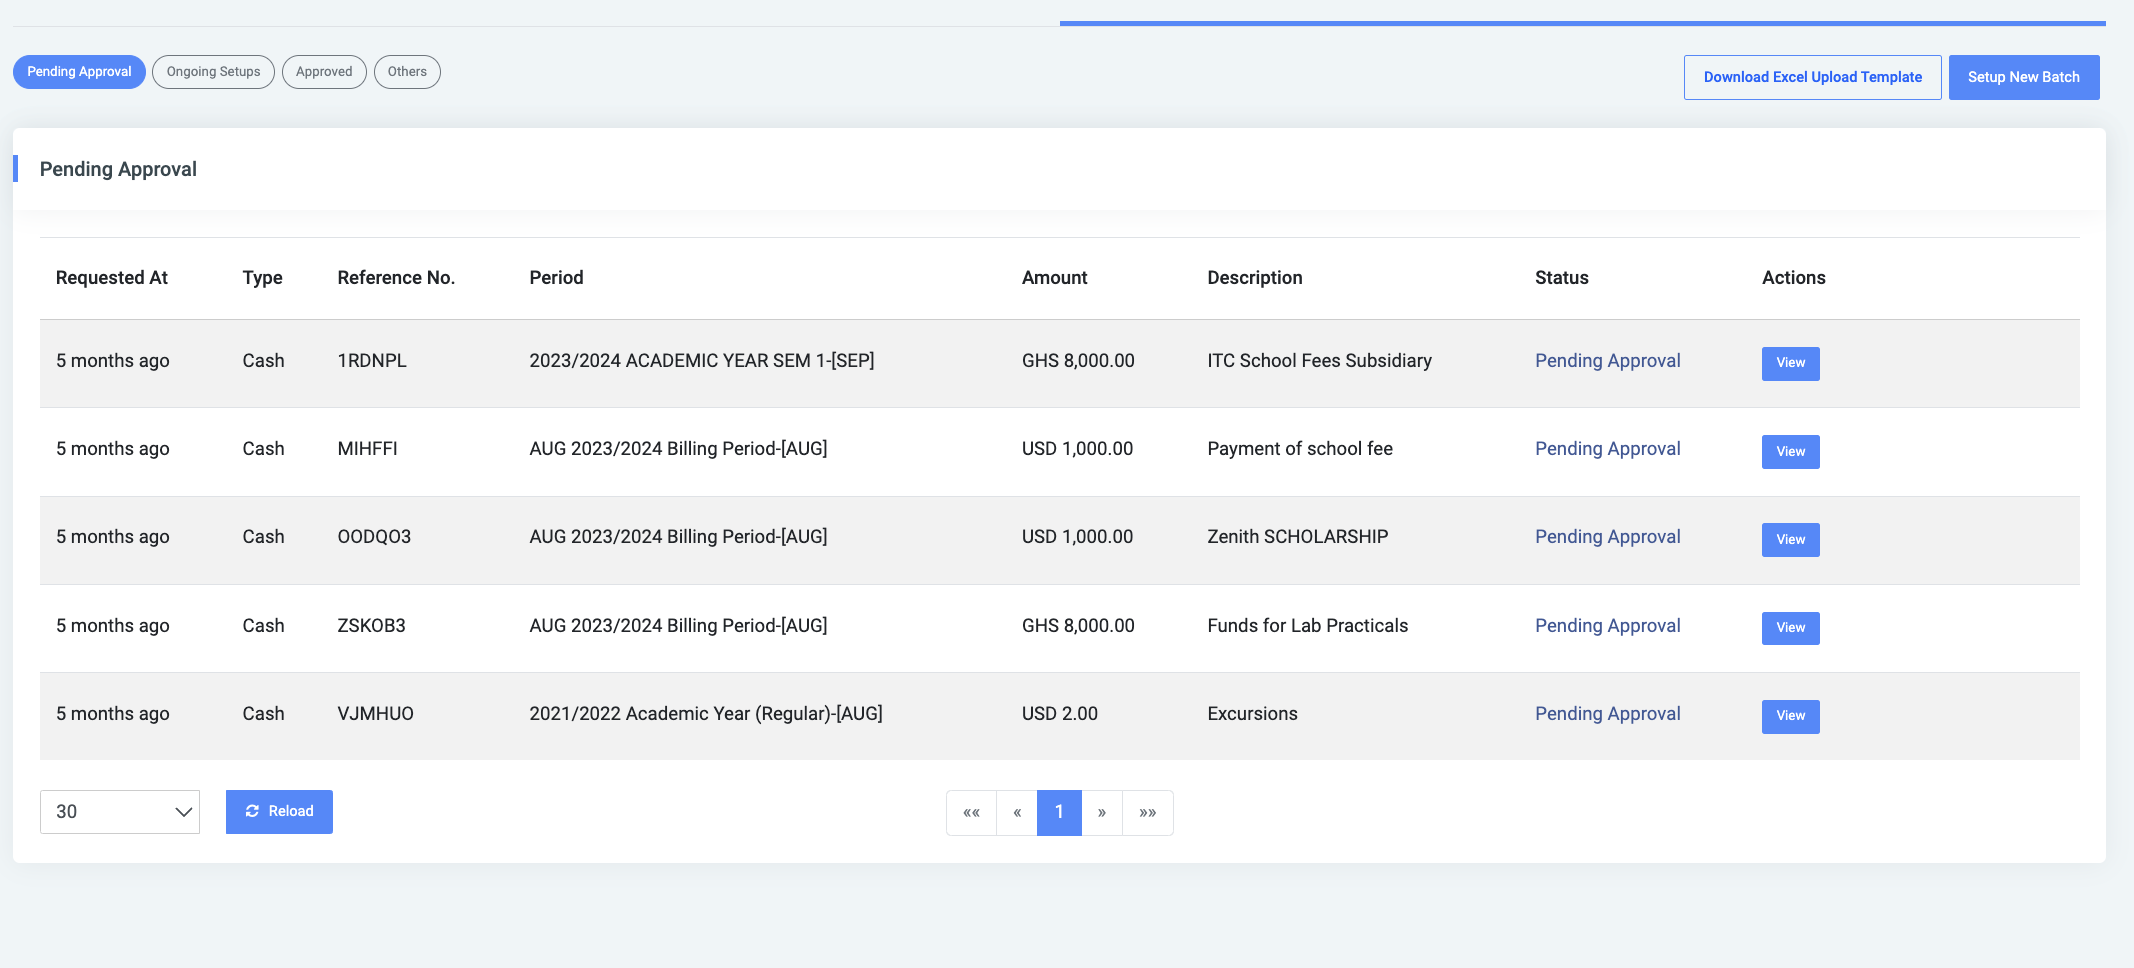
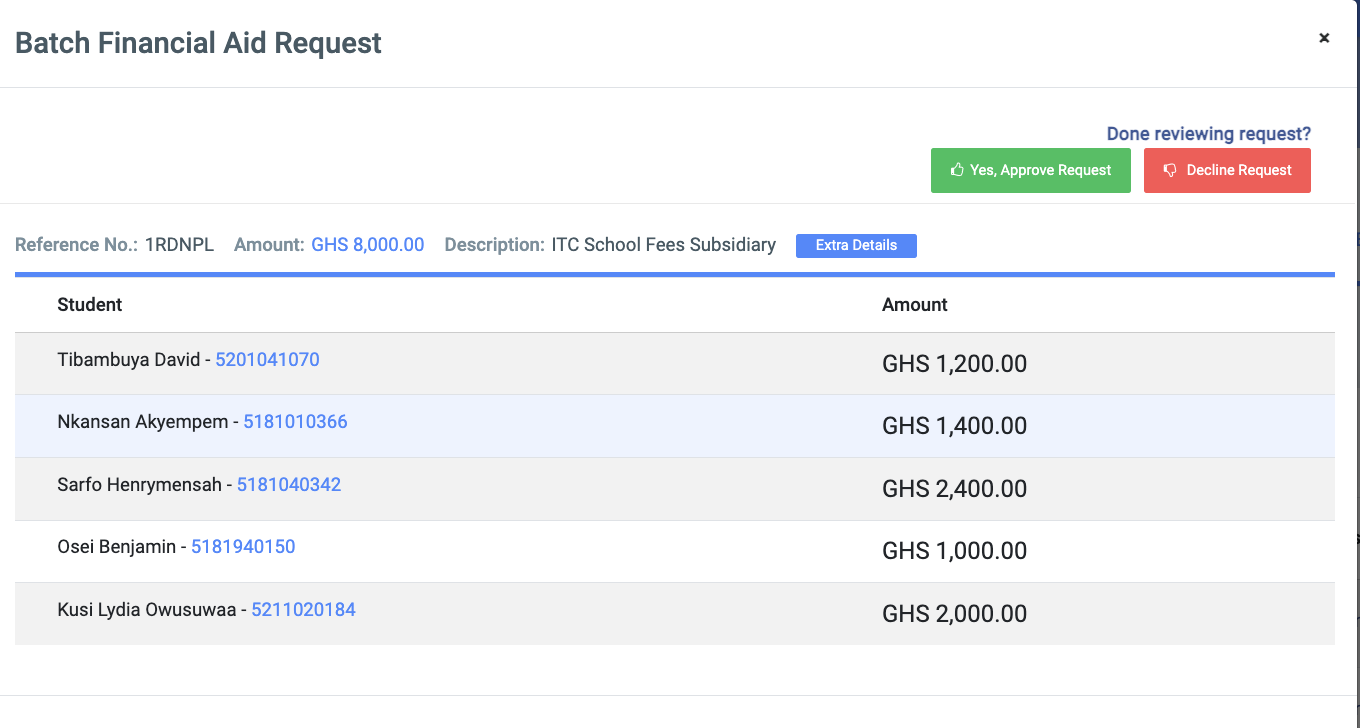
✑ To approve a request, move to the Pending Approval section.
✑ Click on the view button and select Yes, Approve Request to approve it or click on Decline Request to decline a request.
✑ To view ongoing setups, click on the Ongoing Setups tab.
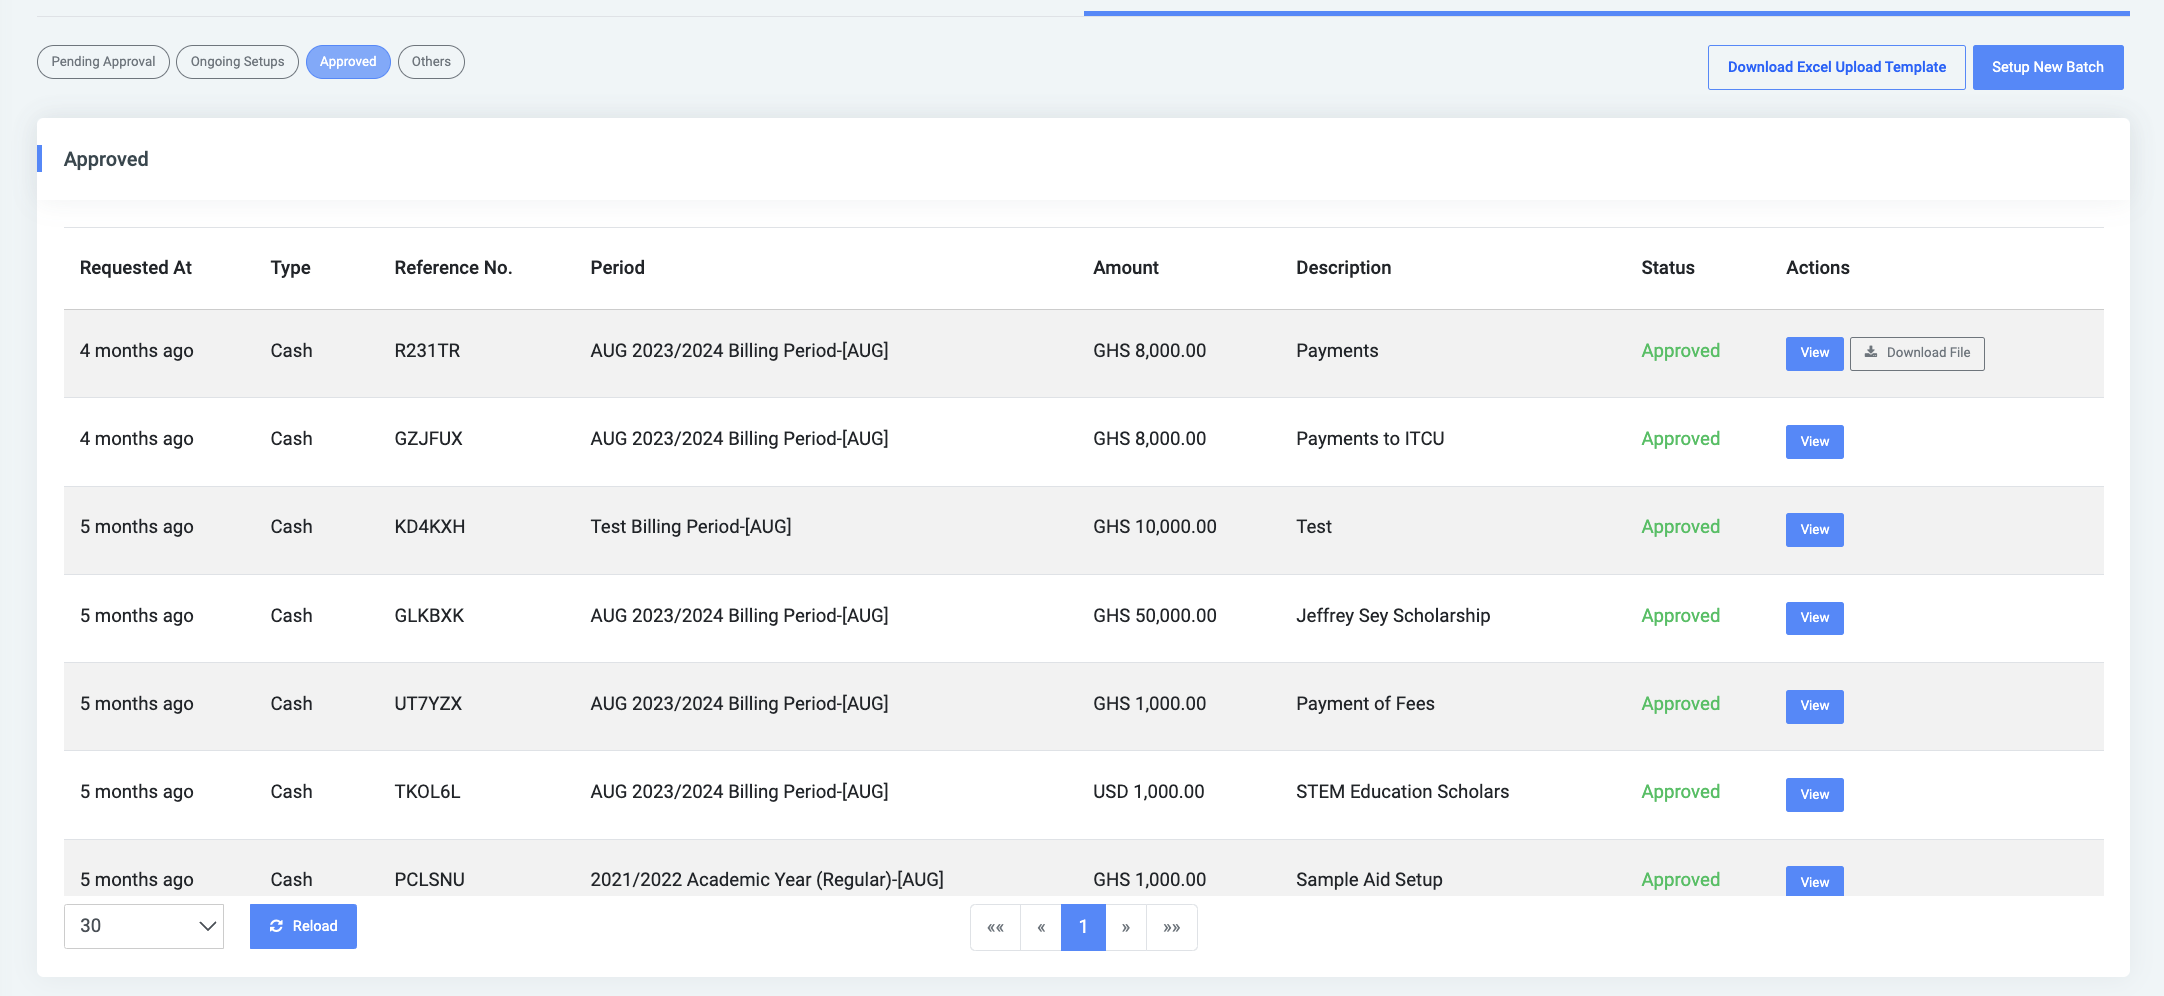
✑ To view approved requests, click on the Approved tab.
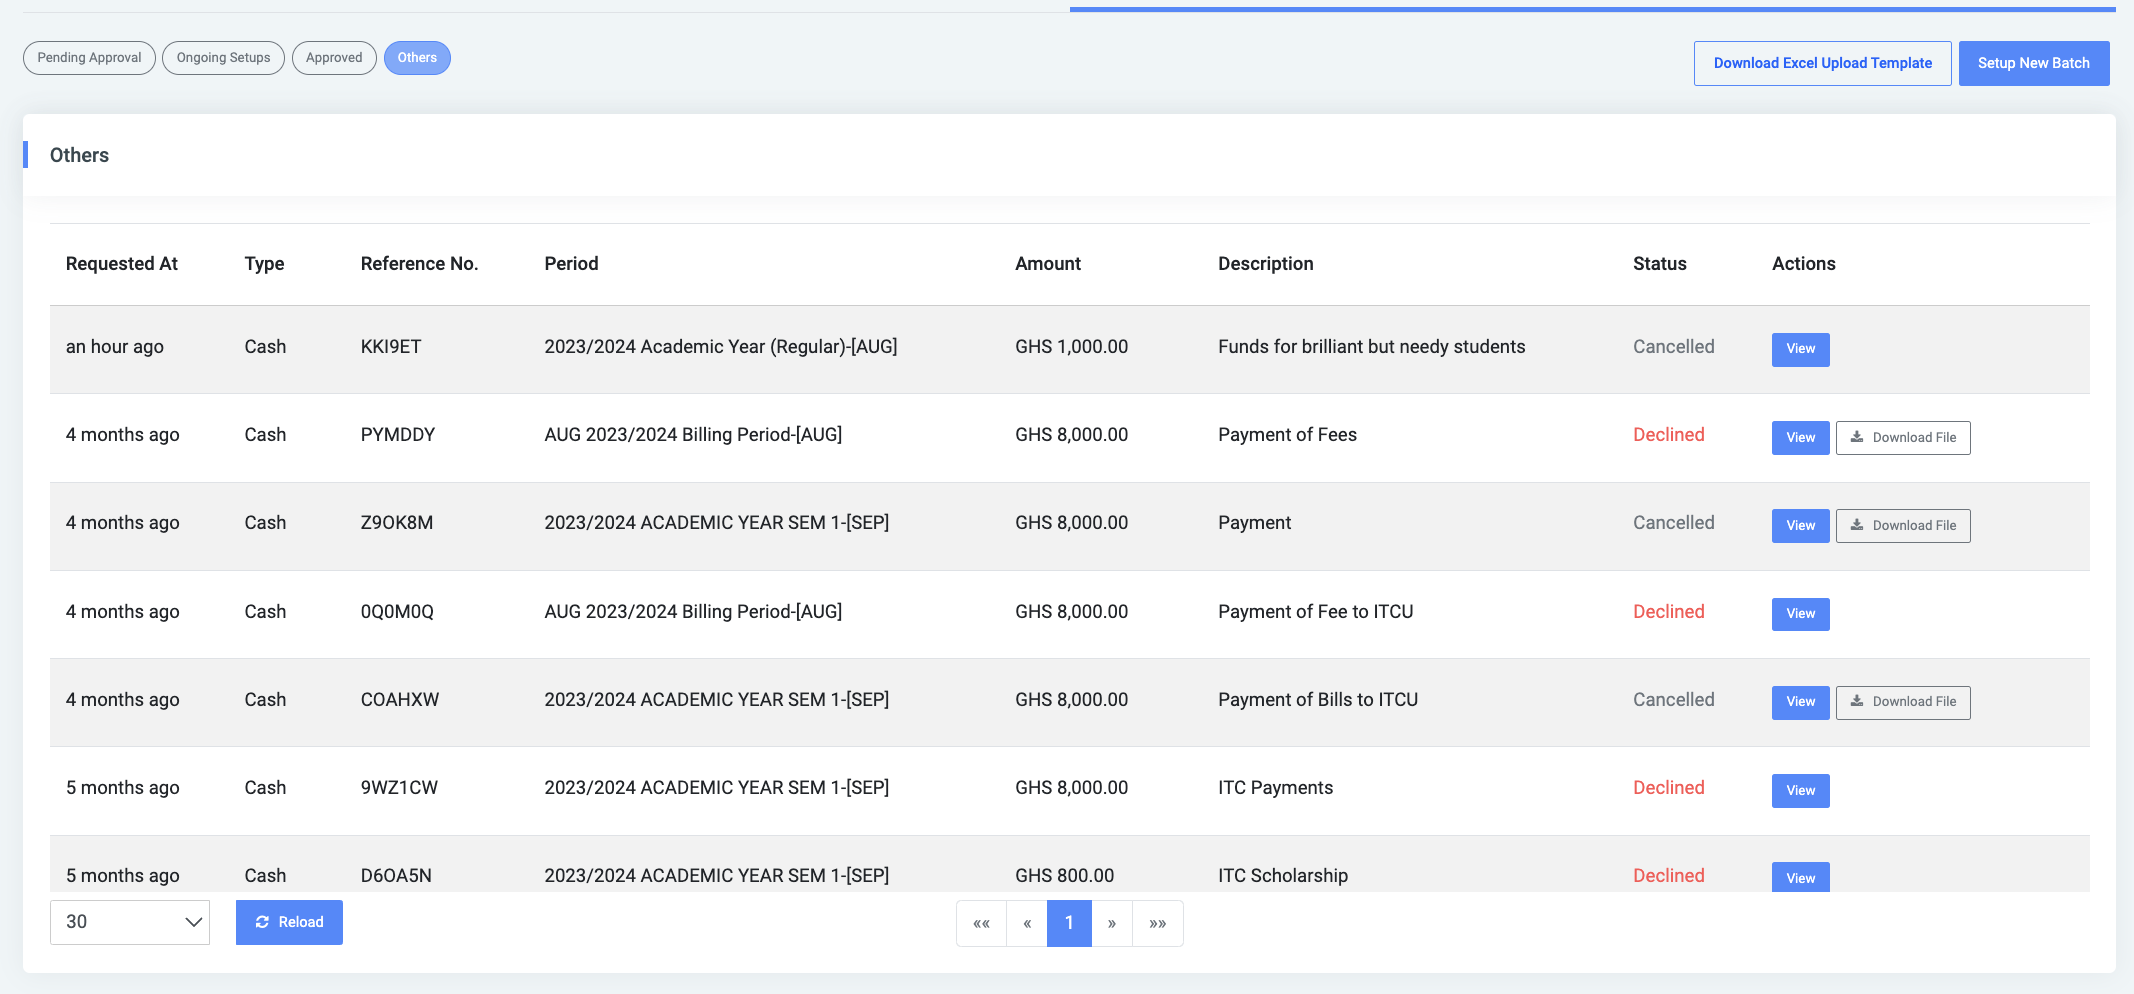
✑ To view other request like: declined or cancelled, click on the Others tab.