Admission Form
This feature enables the Admissions Admin to set up admission forms for applicants.
From the OSIS sidebar, Click on Admission Management to find the Setups. Click the Admission Form link, and click on it.
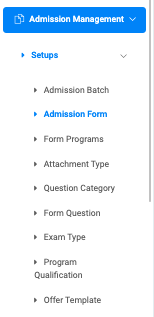
At the top right of the Admission Form page, you will see two buttons, Add Admission Form and Find Admission Form.

To add a new admission form, click on the Add Admission Form button, which comes with the following fields namely;
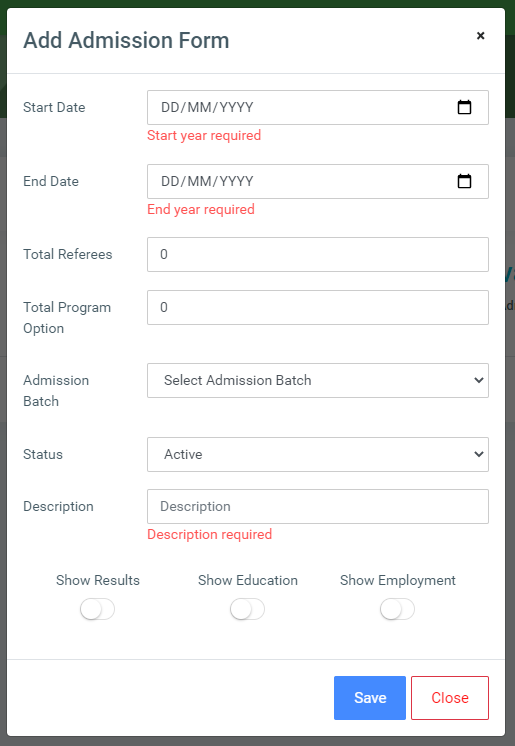
- Start Date: Select the beginning date of the admission form.
- End Date: Select the end date of the admission form.
- Total Referees: Enter the total number of referees needed on the form for applicants.
- Total Program Option: Select the total number of program options needed on the form for applicants.
- Admission Batch: Select from the dropdown the admission batch for the form.
- Status: A dropdown to select whether the academic year is Active or Inactive.
- Description: Enter a brief description of the form.
- Show Results: Check this if you want the admission form to display result fields.
- Show Education: Check this if you want the admission form to display education entry fields.
- Show Employment: Check this if you want the admission form to display employment entry fields.
Click on Save Changes to confirm actions.
To search for a particular admission form, click on the Find Admission Form button and fill in the details for that academic year by;
To search for a particular admission form, click on the Find Admission Form button and fill in the details for that academic year by;
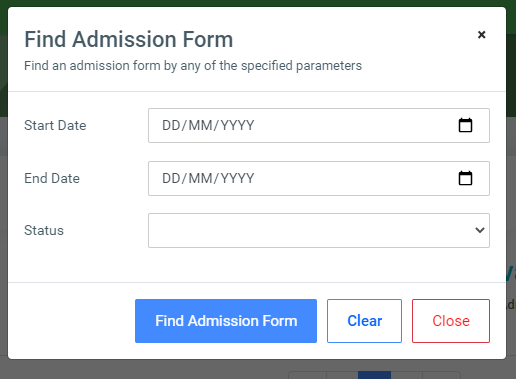
- Start Year.
- End Year.
- Status.
Click on Find Admission Form on the bottom of the search form to confirm your actions.
You may click on Clear to clear all fields, or on Close to close the modal.
NB: The Find Admission Form fields are not required. Simply click the Find Admission Form button to show all added academic years.
For each added admission form, the user can Edit, Delete, and view Programs for the form.

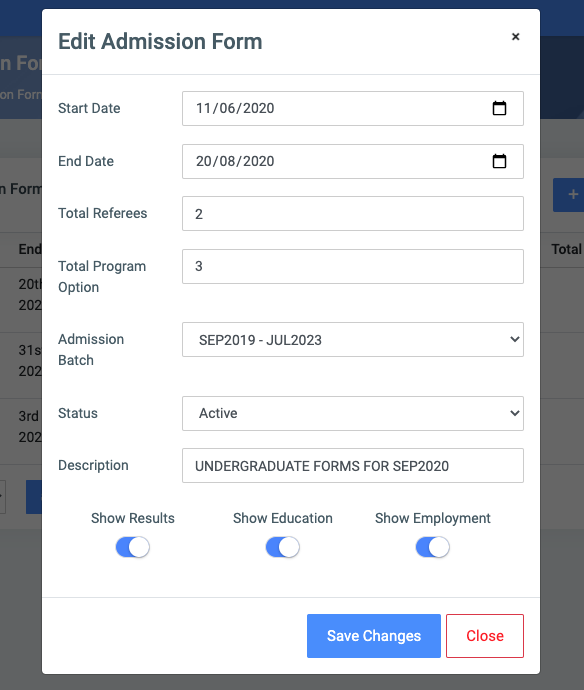
To edit an admission form, click on the Edit button.
Change the old entries from the Edit Admission Form form and click on the Save Changes button.
To delete an academic year, click on the Delete button icon.
Click on the Delete Admission Form button from the modal popup to confirm your actions.
To view, all programs for an admission form click on the Program button. This opens a modal listing all programs selected for the form.
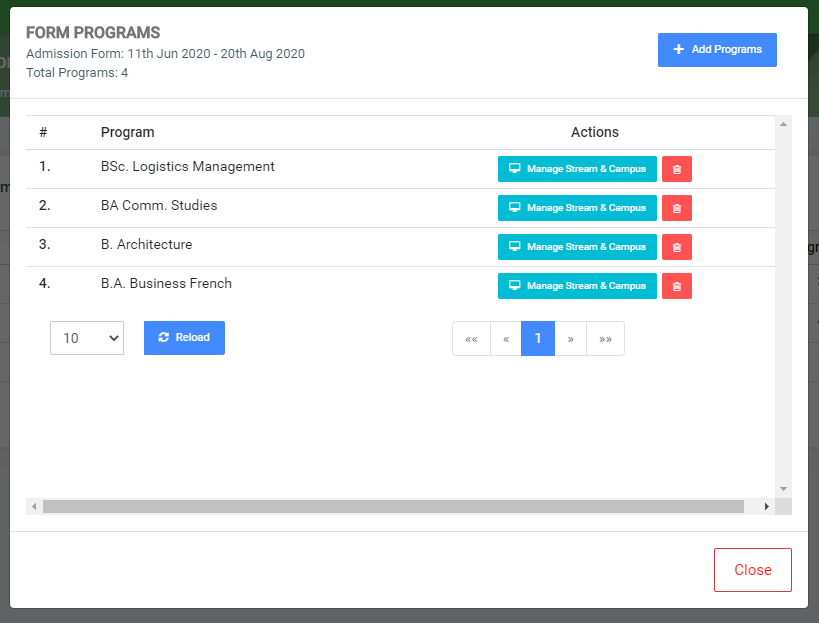
Users can add more programs to the form by clicking Add Programs at the top right of the modal.
Check the programs you want to add in Available Programs and click the greater-than sign(>) to move the check programs to Selected Programs.
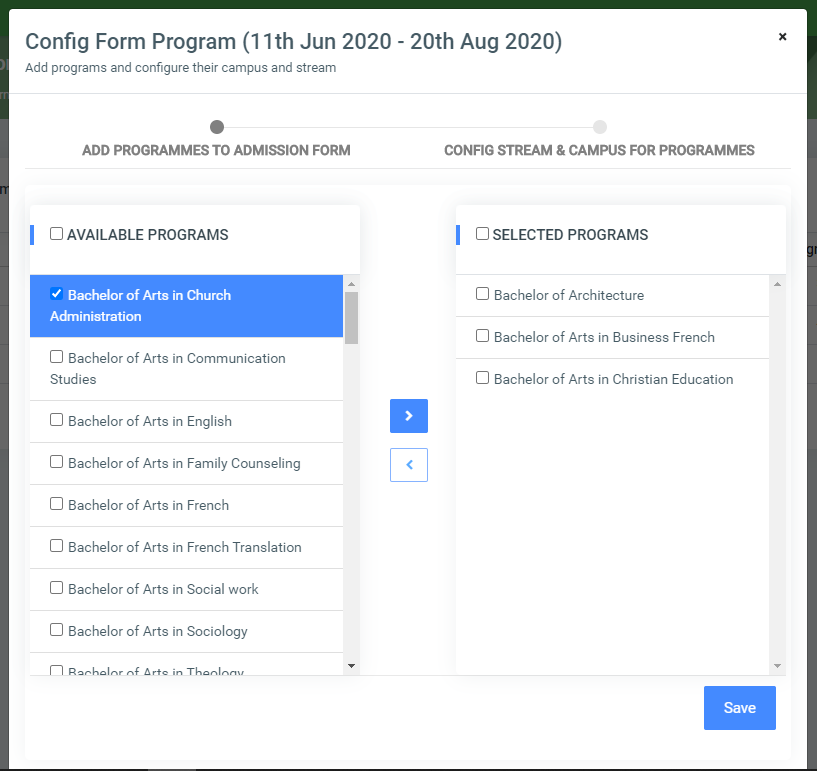
Click on the Save button to confirm adding new programs.
NB: For each added program the user can Config Stream & Campus or Manage Stream & Campus and Delete a program.
To add campuses to available streams click on the Config Stream & Campus button and check the campus from the drop-down menu.
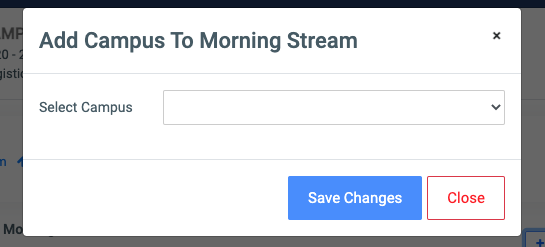
To configure a program to an available stream or campus, click the Program button, this presents a modal listing the programs selected for that particular form.
NB: Any program that has not yet been assigned a stream or campus will have the Config Stream & Campus button in its actions field.
Click on it to add the available program to the available streams and campuses.
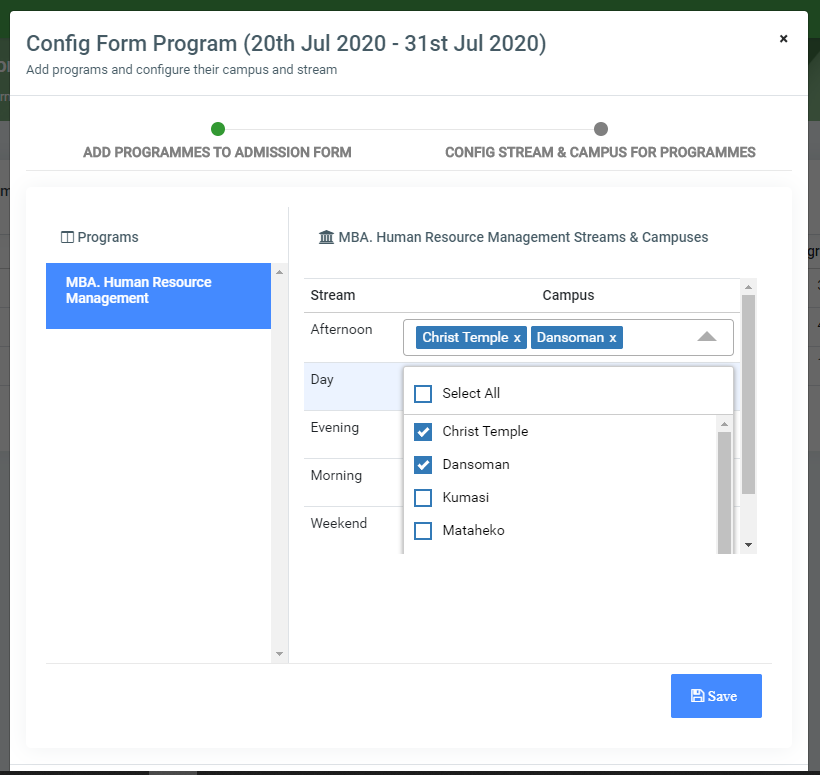
NB: Note multiple campuses can be selected for a stream.
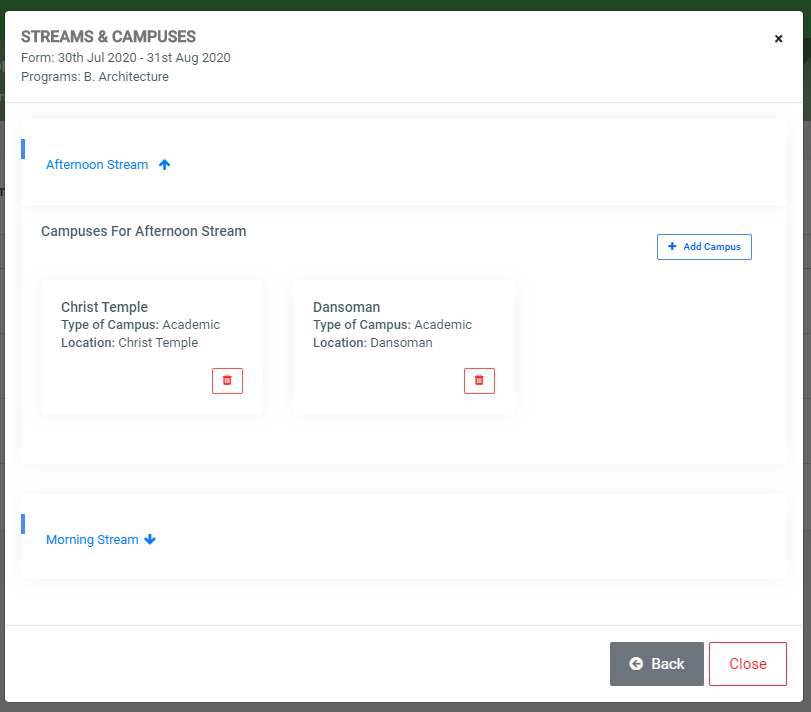
To edit campuses for streams, click on Manage Stream & Campus button. Click on the stream to drop down the campuses available.
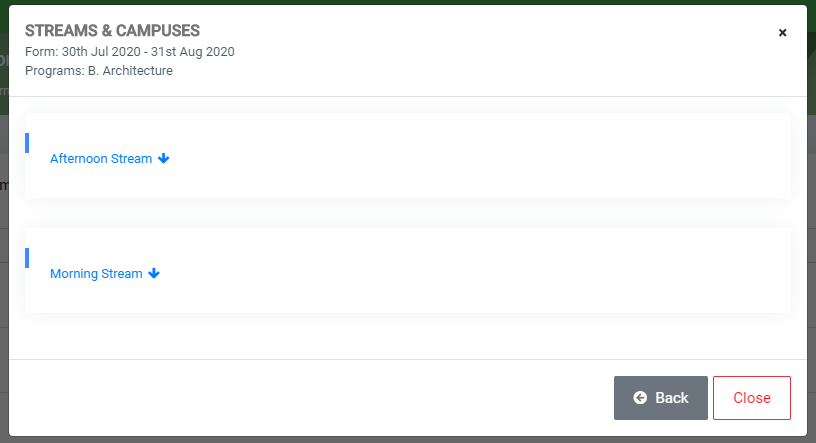
Users can delete campus by clicking the delete icon below or add new campuses to it.
To delete Programs, simply click on the trash icon for the program.
