
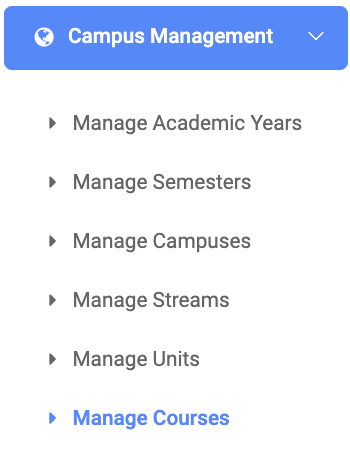
Manage Courses
✑ From the OSIS sidebar, Click on the Manage Courses link under Campus Management.
From the top right of the Manage Courses page, there are two (3) buttons, Add Course button and Find Course and Export button.

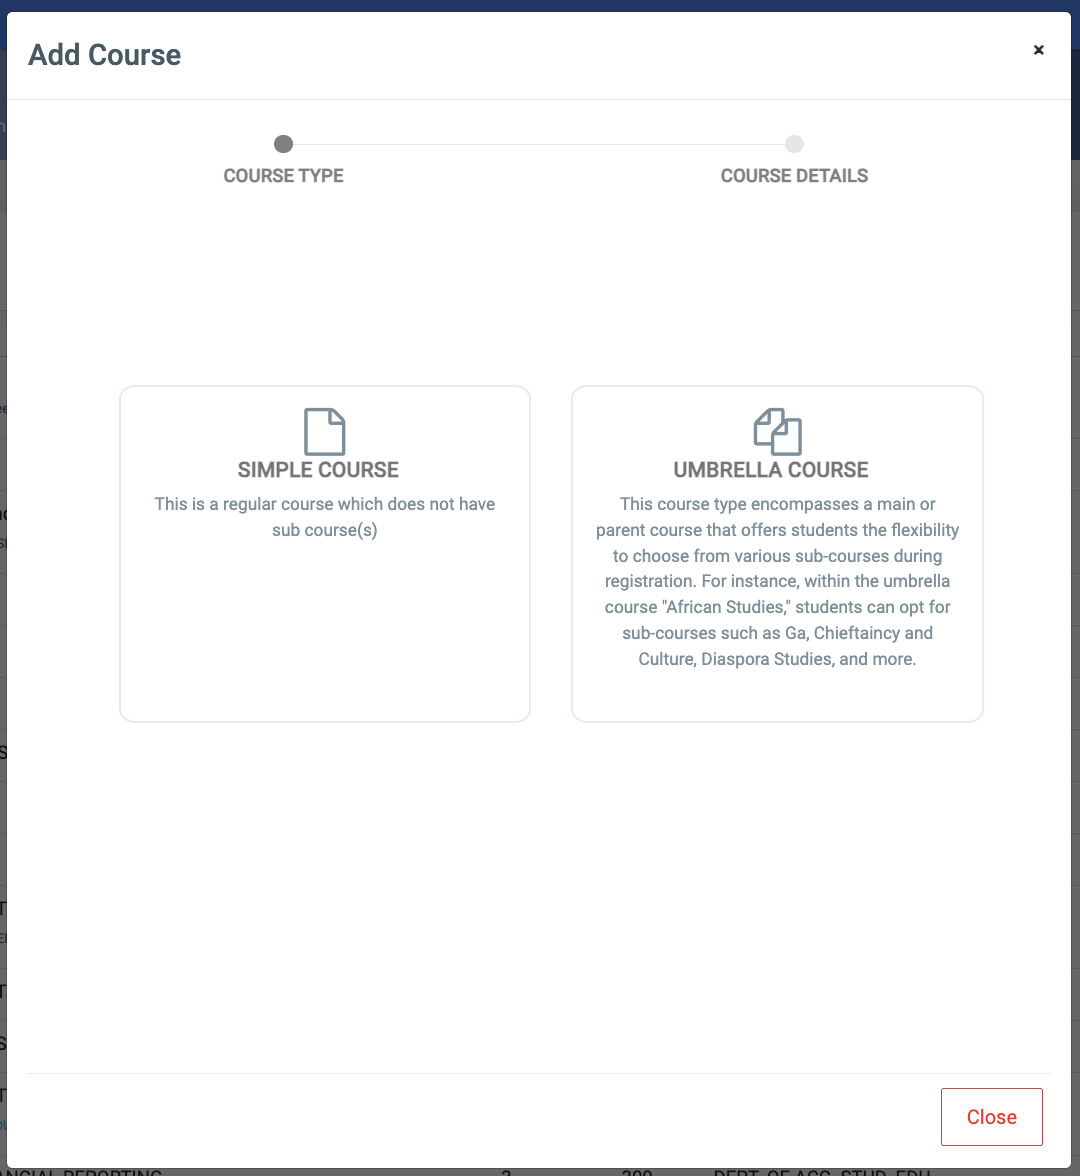
✑ There are two types of courses the user can add in OSIS. They can either add a SIMPLE COURSE or an UMBRELLA COURSE.
NB: An umbrella course is also known as a university-wide course.
To setup a SIMPLE COURSE,
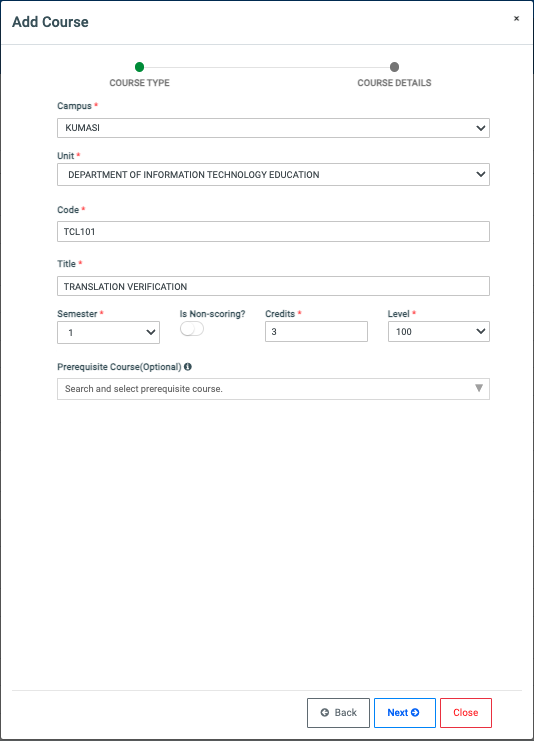
✑ Click the Add Course button and select the SIMPLE COURSE option. The SIMPLE COURSE option brings up the following fields;
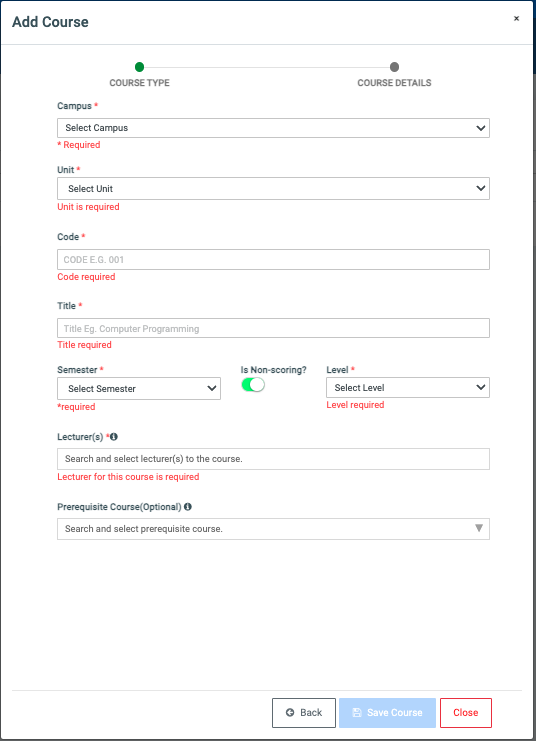
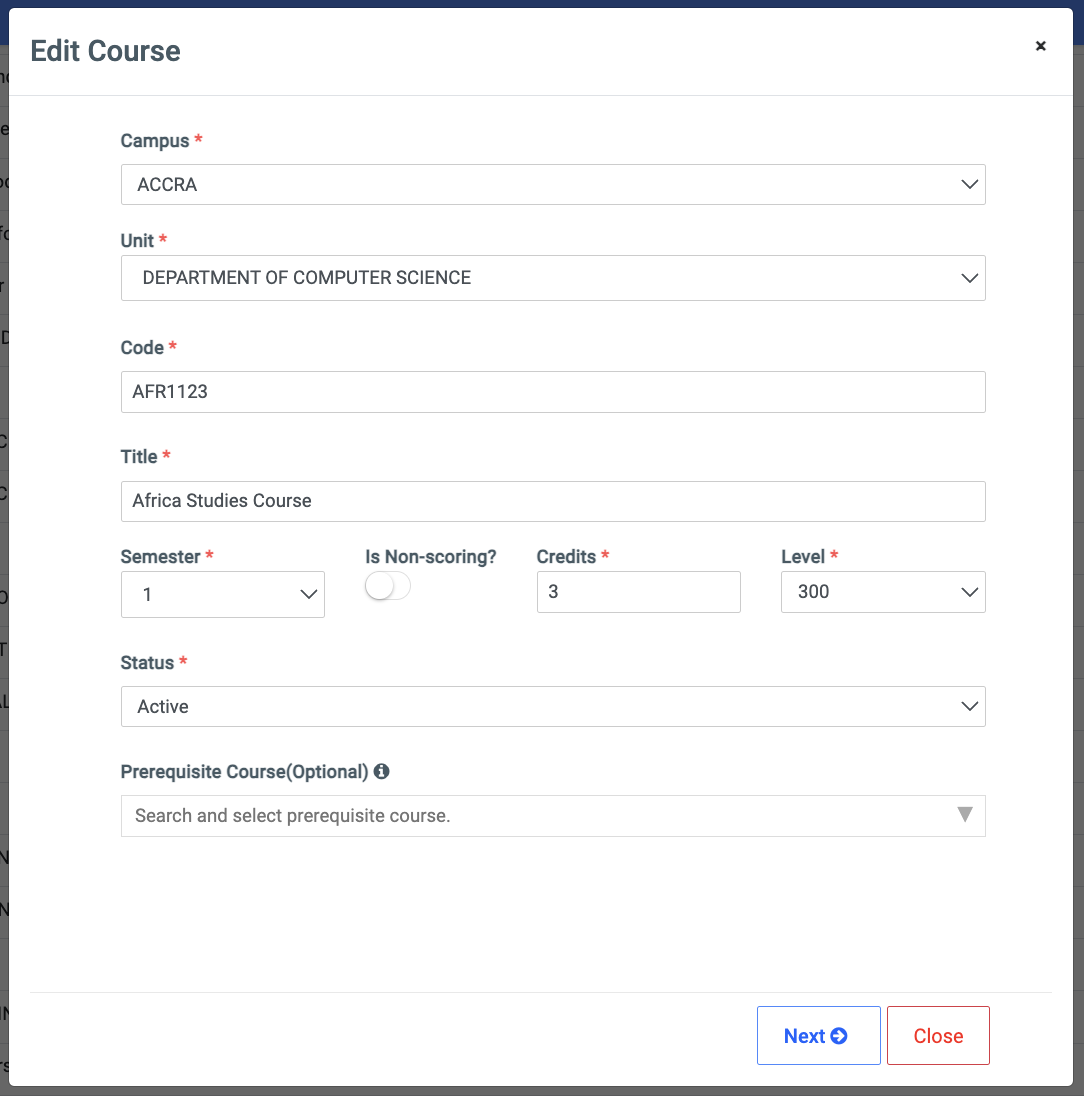
- Campus: This shows a dropdown list of all added campuses in the institution.
- Unit: This shows a dropdown list of all added units. Please check Manage Units for more details. For a user to select which department is aligned to the course.
- Code: The course code.
- Title: The course name. Eg. Computer Science.
- Semester: This provides a dropdown of semester numbers to select which semester the course belongs to. Eg. 1 for 1st semester, 2 for 2nd semester.
- Credit: A dropdown to select the credit hours of the course.
- Level: A dropdown to select the year level the course is for.
- Lecturer: A dropdown of all the lecturers in the institution.
- Is Non-scoring?: This toggle button allows the user to change settings between recording scores for a particular course or not.
- Prerequisite Course (Optional): This is a required course. A student must have registered and passed a course (usually taken in a previous semester) to take this course. These courses are usually linked.
NB: When a lecturer is assigned to a simple course, a sheet is created and automatically assigned to them. However, in the case of assigning multiple lecturers to a course, if there is one sheet that is tied to it, it is randomly assigned to one of them. As multiple sheets are created, they are assigned to the rest.
✑ Click on Save Changes to confirm actions.
To set up an UMBRELLA COURSE, select the UMBRELLA COURSE option. This brings up the following fields;
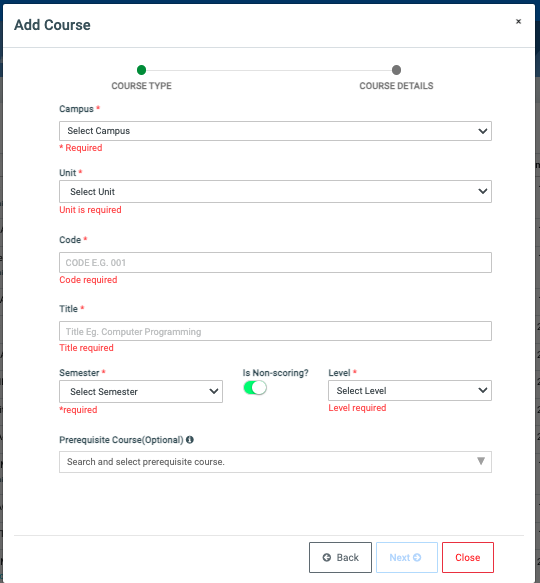
- Campus.
- Unit.
- Code.
- Title.
- Semester.
- Is Non-Scoring?
- Level.
- Prerequisite Course (Optional).
✑ Fill in the required fields and click on the Next button
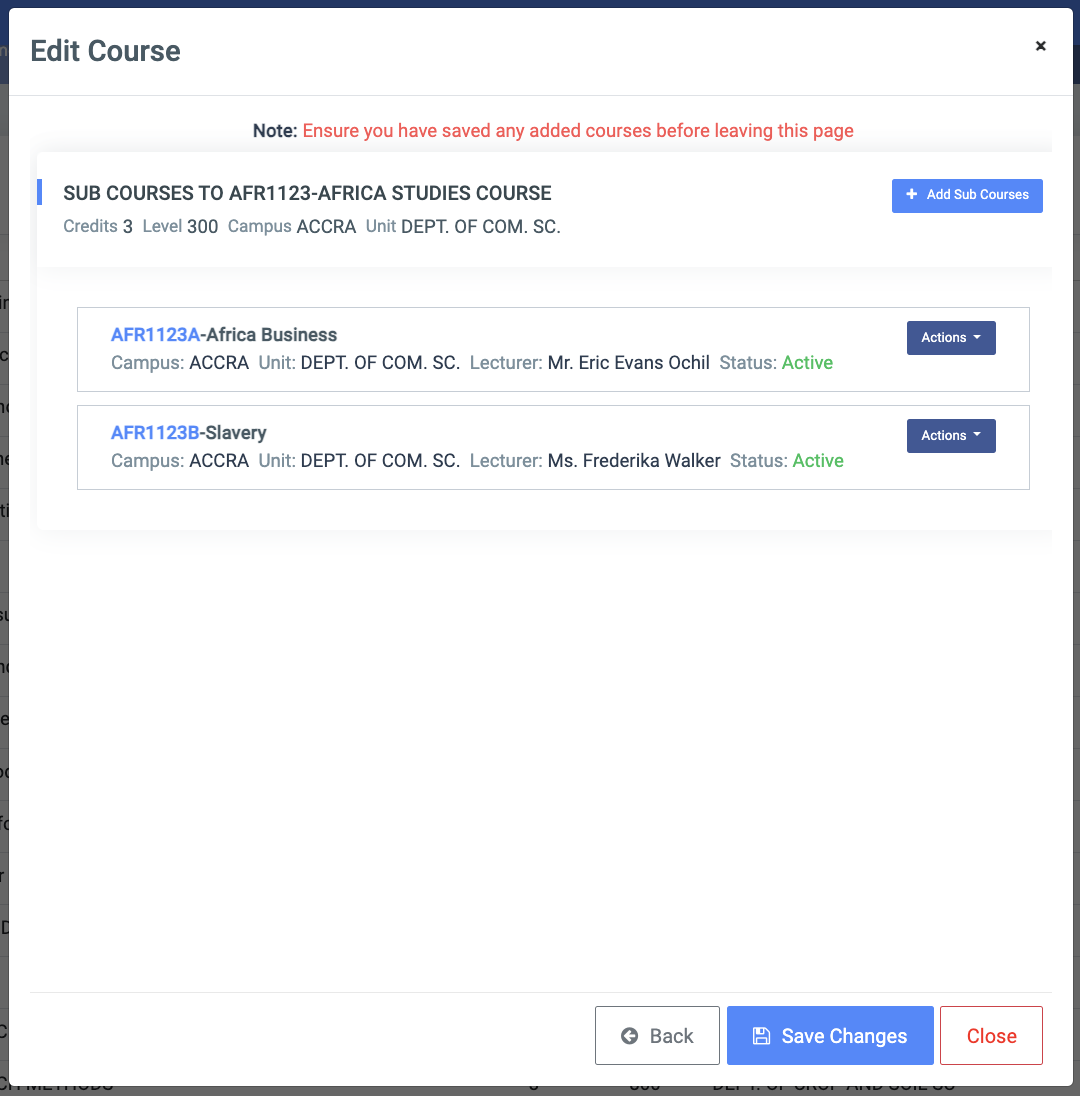
The ‘Next’ button directs the user to a page where they can add sub-courses to the umbrella course.
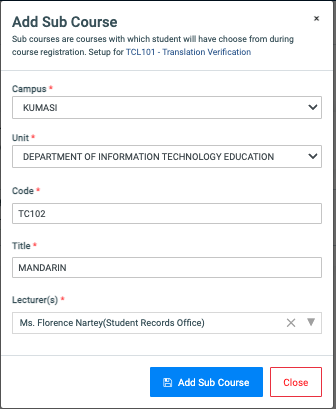
✑ Click on the Sub Courses button to add sub-courses. The sub-courses button brings up the following fields:
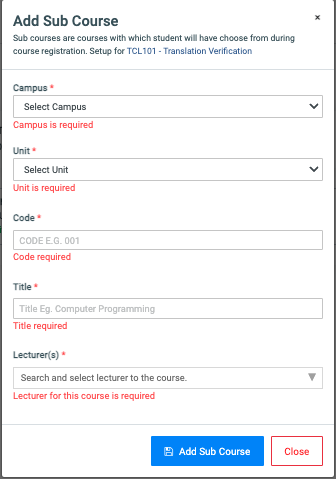
- Campus:
- Unit:
- Code
- Title
- Lecturer(s): The user can assign a lecturer or more to a single course.
Fill in the required fields and click on the Add Sub Course button.
For each sub-course, the user can edit, delete, or make it inactive. To edit a sub-course, click on the Edit button on the manage courses page. Typically, courses with sub-courses would have a “sub courses” button by them.

Once the user clicks on the edit button, a form is displayed. Click on the ‘Next’ button to proceed.
There are three options under the action button. They are: Set Inactive, Edit, and Remove.
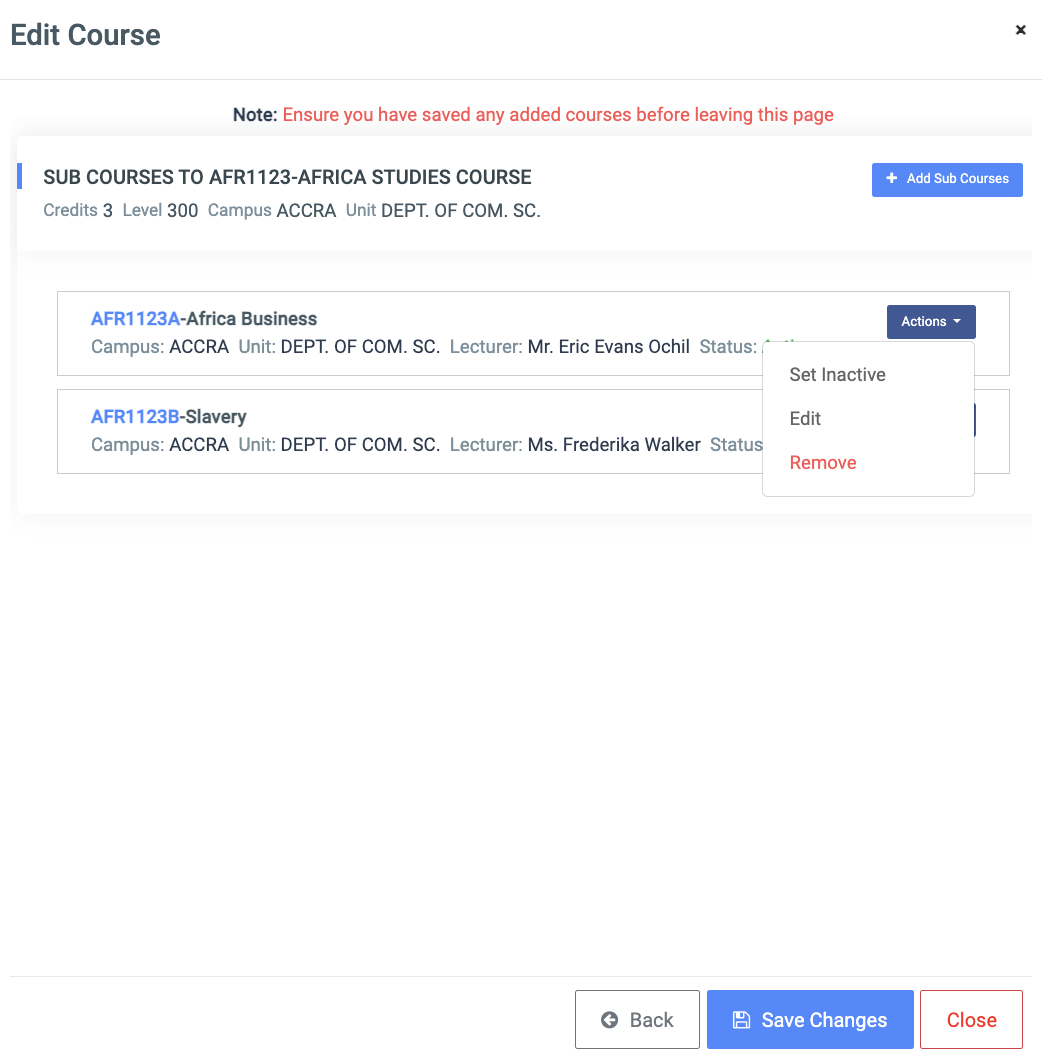
✑ Click on Set Inactive to deactivate the course. This will not be assigned to students during registration.
✑ Click on Edit to change the entries made while creating the sub-course.
✑ Click on the Remove button to Delete the sub-course from the sub-course list
NB: During registration, sub-courses are randomly assigned to students on a first come first served basis. Only active sub-courses are assigned to students. There is an option under edit courses to make a sub-course active or inactive. Sub-courses that have been assigned to students cannot be deleted; aside from that, they can be eliminated when they are not found useful.
✑ To search for a particular course, Click on the Find Course button and fill in the details for that course using;
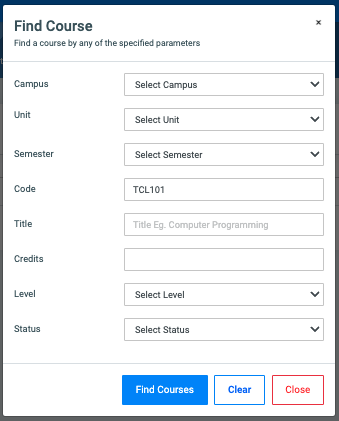
- Campus.
- Unit.
- Semester.
- Code.
- Title.
- Credits.
- Level.
- Status.
✑ Click on the Find Courses button to confirm your actions,
✑ Click on Clear to clear all fields.
✑ Click on Close to close the modal.
☛ Find Courses fields are optional. Fill in as many as can help in narrowing down and click the Find Courses button. Clicking the Find Courses button with no entries will show all existing Courses.
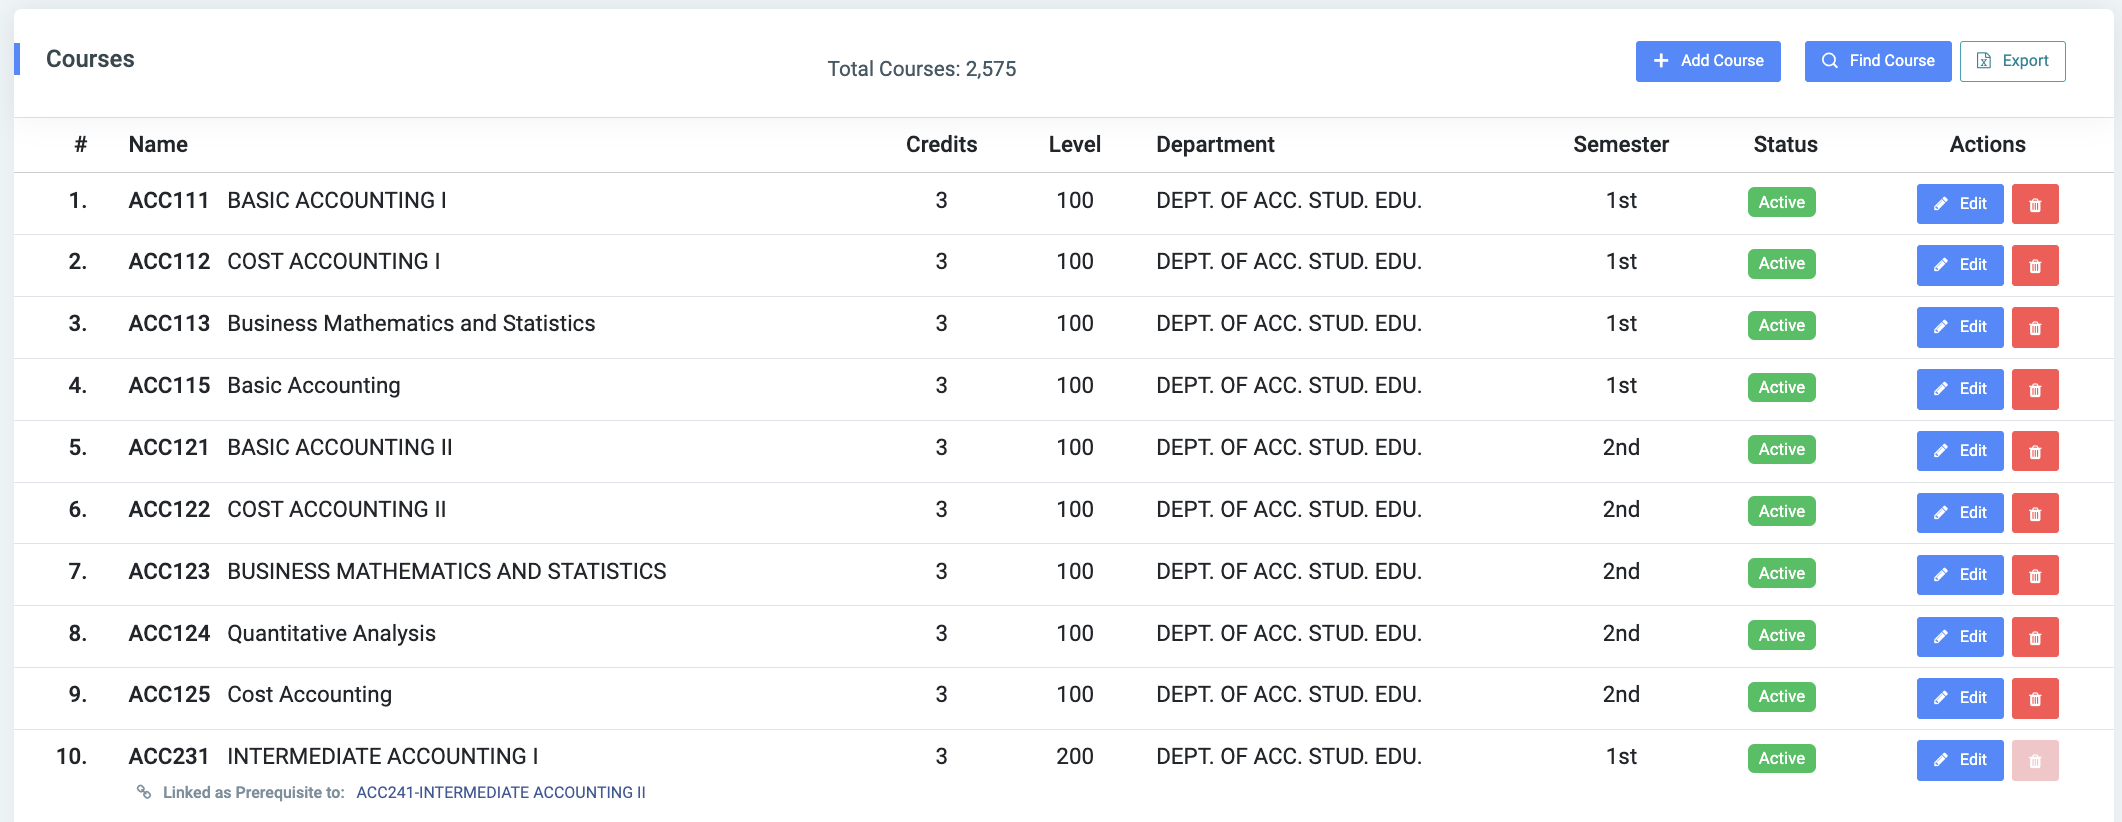
For each added course, the user can Edit or Delete them.
✑ To Edit a course, click on the Edit button. 
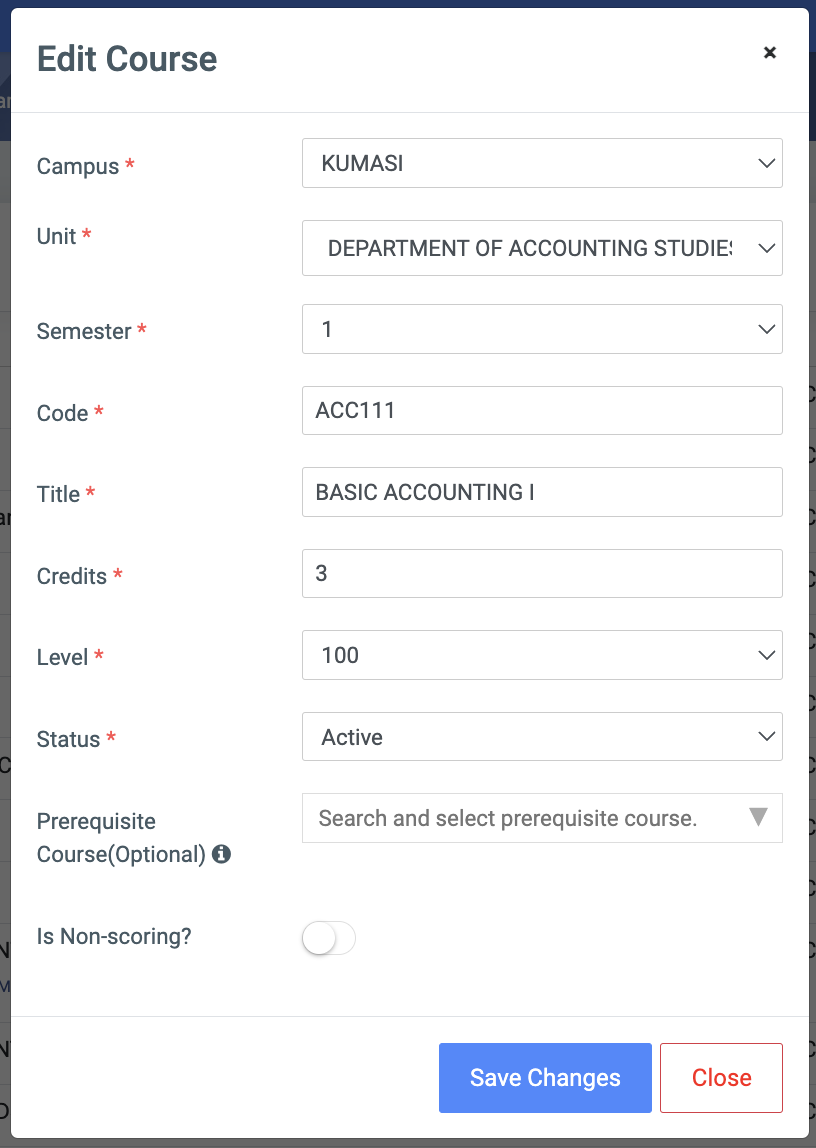
Change the old entries from the Edit Course form and click on the Save Changes button.
✑ To Delete a course, click on the Delete button icon. 
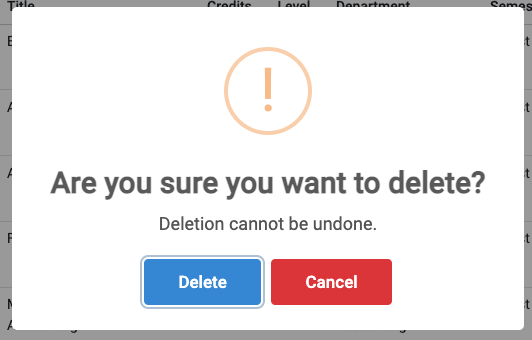
✑ Click on the Delete button from the modal popup to confirm your actions.
☛ Select Export to export results to Excel