
Manage Programs
✑ From the OSIS sidebar, Click on the Manage Programs link under Program Management.

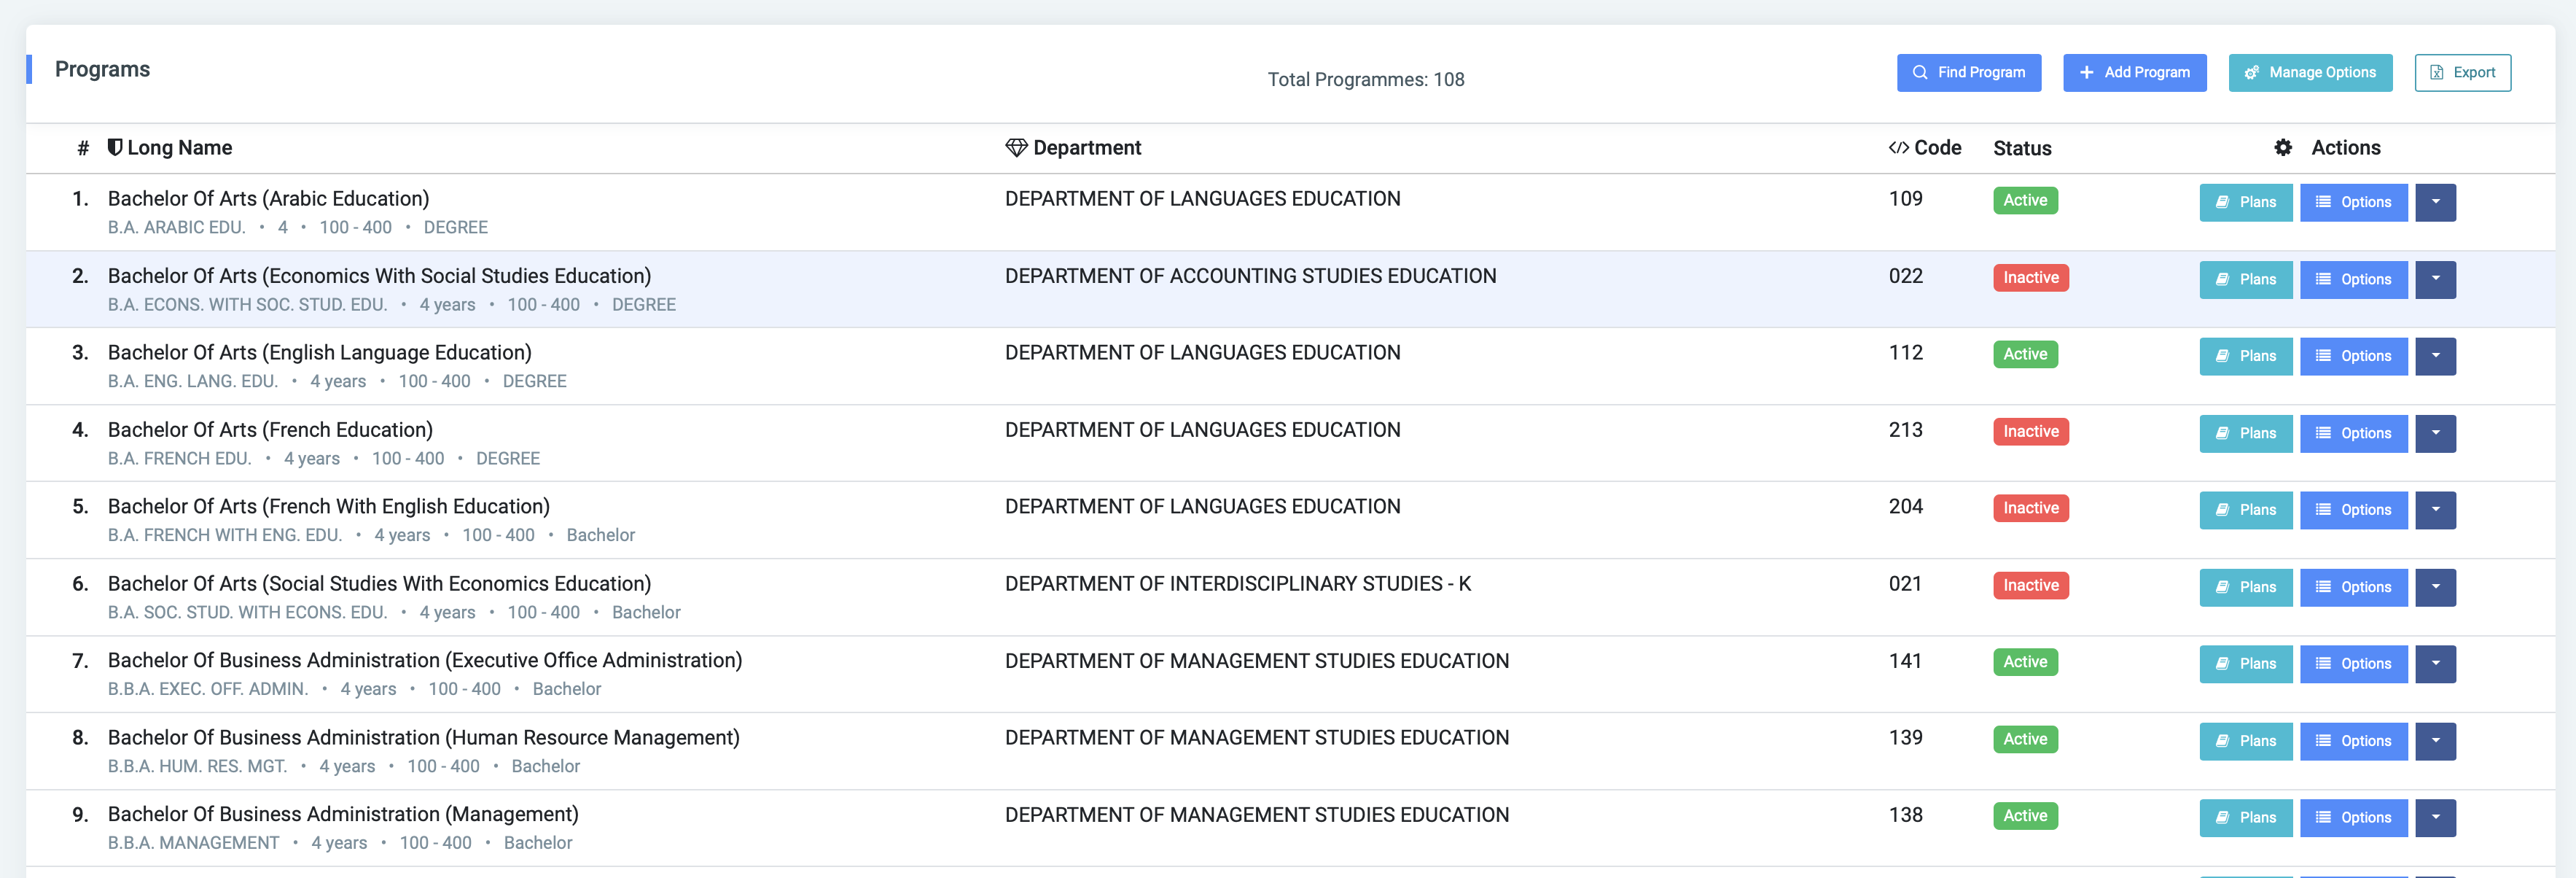
From the top right of the Manage Programs page, there are Four(4) buttons, Find Program, Add Program, Manage Options, and Export.

✑ Click on the Add Program button to add a new program. It has the following fields;

- Units: This is a dropdown list showing all units(Faculty/departments etc.) available in OSIS. It is populated from Manage Units.
- Short Name: Short name of the program. Eg. BSCOM.
- Long Name: Full name of the program. Eg. BSc in Computer Science.
- Code: Code of the program (Program codes come in handy when setting up regnumbers) .
- Type: The category under which the program falls. Eg. Masters, Undergraduate.
- Duration: The time range value for the program.
- Period: The period the program runs. Eg. months, years
- Levels: There are two main levels, namely;
- Entry Level: The start level of the program
- Exit Level: The end level of the program.
- Status: Status of program (active or inactive)
- Grading Scheme: The grading scheme the program should be tied with.
✑ Click on the Save Changes button to confirm actions.
✑ Click on Find Program button which users help search for a particular program with the following fields.

- Unitt.
- Short Name.
- Long Name.
- Duration.
- Period.
- Type.
- Entry Level.
- Exit Level.
- Status
✑ Click on Find Program button to confirm your actions,
✑ Click on Clear to clear all fields,
✑ Click on Close to close the modal.
☛ Find Program fields are optional. Fill in as many as can help in narrowing down and click the Find Program button. Clicking the Find Program button with no entries will show all existing Programs.
✑ Click on the Manage Options button to add course subjects to created programs for majors and minors. On the manage options form, Click on Add Subject to add new major or minor courses.

Enter the course name in the Subject Name field and click on Add Option. The Manage Modal also displays a list of all added courses with Edit button and Delete icon for easy editing and deletion of courses with user agreed confirmation.
For each added program, users have the Plans button, Options button, and a dropdown Icon button.
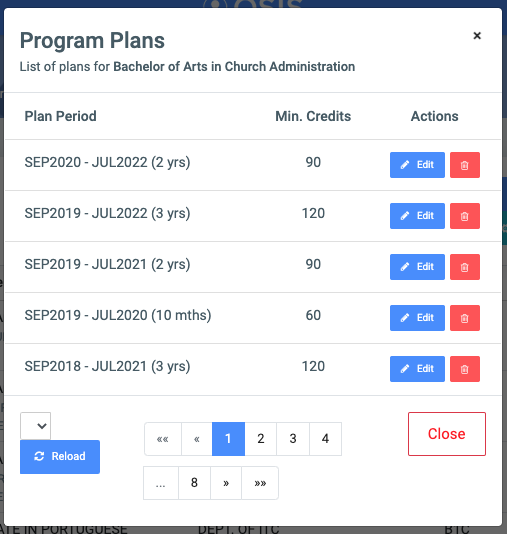
I. Plans button: Displays the list of all plans created for the selected program. Please check Manage Plans. It also provides you with an Edit button, a Delete button icon for altering and deleting plan with a confirmation.
II. Options button: This setting displays all added Majors and Minors of the selected program. It allows the user to Edit and Delete the Major and Minor courses added to the program. Click on the edit icon to edit and delete icon to delete with confirmations.

III. Dropdown icon: Click on the dropdown icon to perform the following actions.
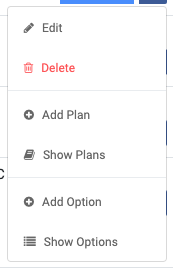
- Edit: This will edit the added program.
- Delete: This will delete the selected program.
- Click on the Delete Program button from the modal popup to confirm your actions.
- Add Plan: This creates a new plan for the program. Please check Manage Plans for more details.
- Show Plan: This displays all the plans added to the selected program.
- Add Option: This opens Add Options modal with two main dropdown options as follows,
- Major Option: Helps select a Major course. Please check Manage Options for more details.
- Minor Option: Helps select a Minor course. Please check Manage Options for more details.
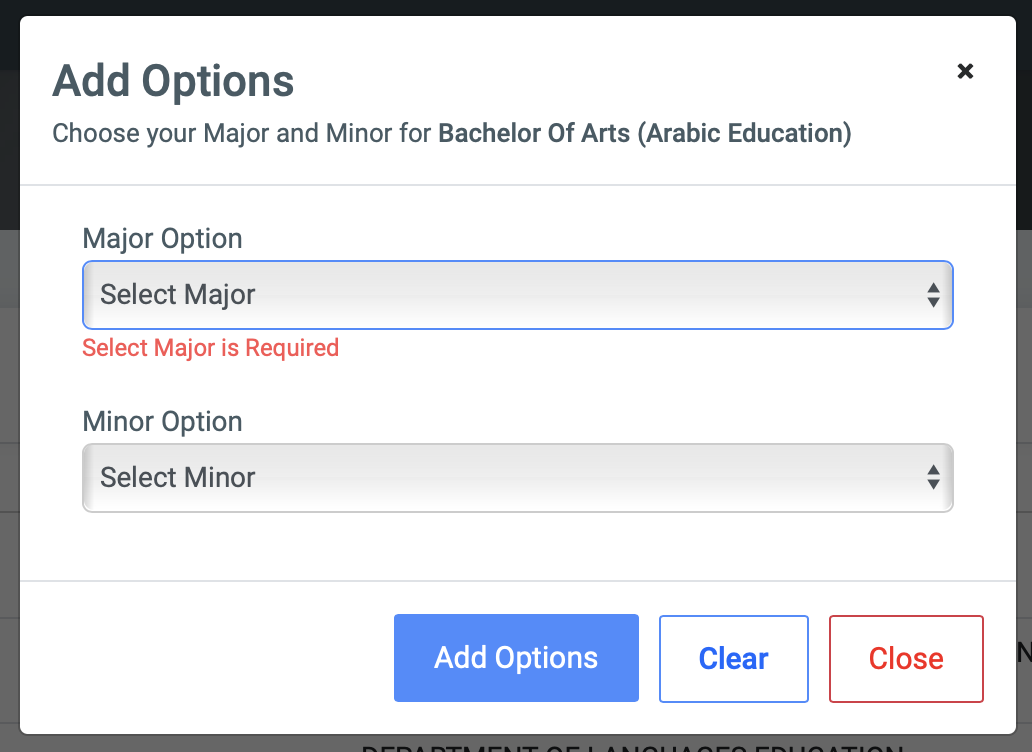
✑ Click on the Add Options button to save.
- Show Options: This setting displays all added Majors and Minors of the selected program. It allows the user to Edit and Delete the Major and Minor courses added to the program. Click on the edit icon to edit and delete icon to delete with confirmations.
☛ Select Export to export results to Excel