
Allotments
This feature enables the user to assign priorities to bill items.
This feature typically relates to student payments.
Payments, when received are allocated to bill items according to the priorities set for them.
Bill items with higher priorities are satisfied first and this follows a hierarchical order i.e., an item with a priory of one is satisfied before the subsequent ones.
✑ From the OSIS sidebar, Click on the Allotments link under the Reports link of the Finance Module.
The Allotments page has three(3) different buttons. Find Allotment button, Print Allotment Statement button, and Export button.

To search for reports of specific allotments, click on the Find Allotment button and fill in the details for that report by;

- Billing Period:
- Program:
- Start Date:
- End Date:
- Bill Item Type:
- Receipt No: Enter the receipt of payment.:
- Student Reg Num: Enter a Student’s registration number.:
- Select Faculty:
- Select Department:
- Select Stream:
NB: Search fields are optional. Fill in as many as can help in narrowing the search and click on Find Allotments to confirm your actions.
✑ Click on Clear to clear all fields,
✑ Click on Close to close the modal.
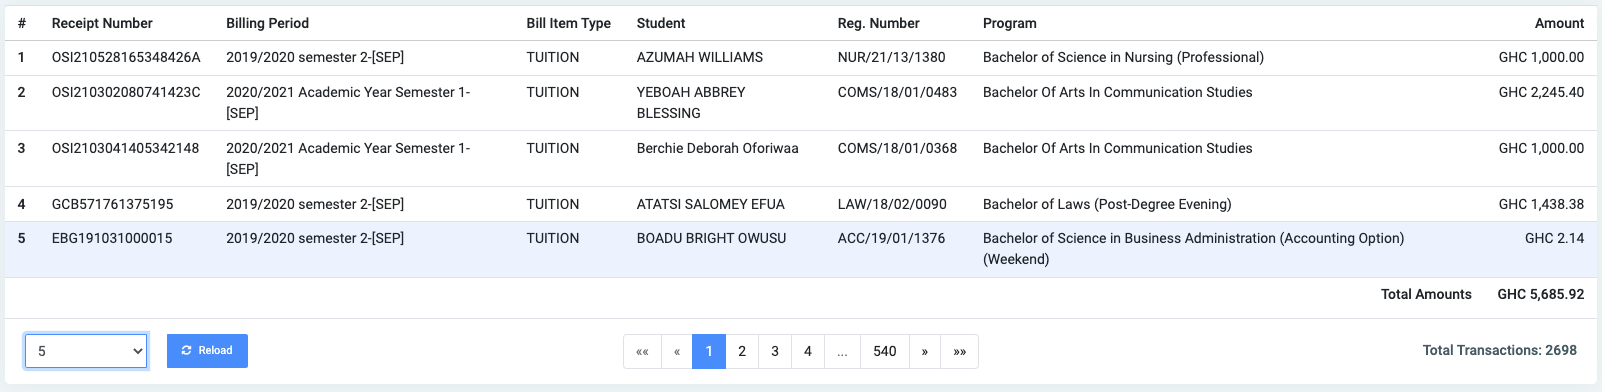
For every Find Allotment result, the user can view or see the following fields;
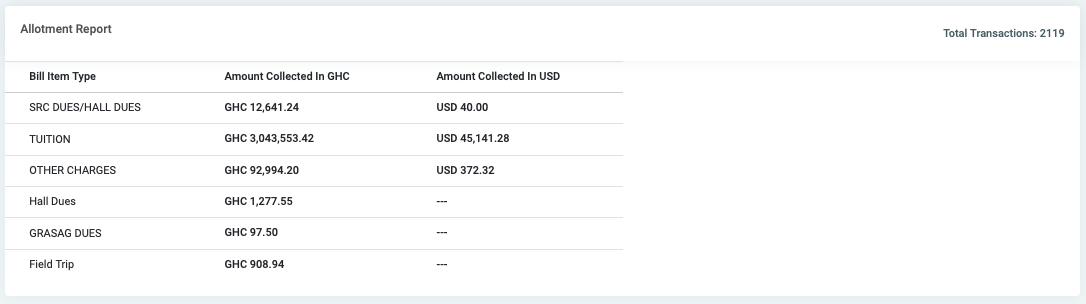
- Bill Item Type
- Amount collected in GHC
- Amount collected in USD
- Receipt Number
- Billing Period
- Bill Item Type
- Student
- Reg. Number
- Program
- Amount
NB: The first three fields can be found at the top section of the page. This is a summary of all the allotments based on the specified date range.
✑ Click on the Print Allotment Statement button on the extreme right of the page to print the results of the Find Allotments.
✑ Click on Export to convert and download the report as an excel sheet.
✑ Click on the Reload button to refresh the result of the Allotments fields.