
Applicants List
This feature enables OSIS users to find all applicants by their admission batches and also gives an option to view their profile information.
From the OSIS sidebar, Click on the Applicants List link under Admission Management.

At the top right of the Applicant List page, there are four buttons: Find Applicants, Compute Aggregate, Send Bulk Letters, and Export.

To search for a particular batch of applicants, click on the Find Applicants button and select the Admission Form from the dropdown. It comes with the following fields;
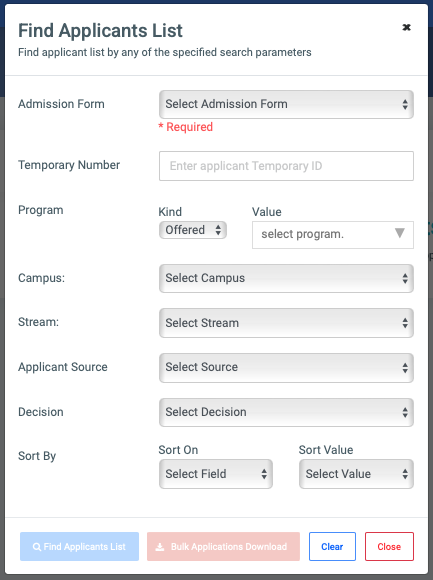
- Admission Form: Select the desired admission form from the dropdown list.
- Temporary Number: Enter the applicant’s identification number to perform a search.
- Program: Select a program to filter results. You may also search by program choice (e.g., 1st choice, 2nd choice).
- Campus: Filter applicants based on the campus they are applying to.
- Stream: Search by the academic stream applicants are entering with.
- Study Center: Filter results by the study center selected by the applicant.
- Applicant Source: Choose the source of the application—either Paper or Online (applications submitted through the OSIS admission system).
- Decision: Search by specific admission decisions.
- Sort By: Choose the sort order (ascending or descending) based on available criteria such as Aggregate or Entrance Exam Score.
NB: The Admission Form field is required. Fill in as many as can help in narrowing the search.
You may click on Clear to clear all fields, or on Close to close the modal.
✑ Click on the Find Applicant List button to query for your list of applicants.
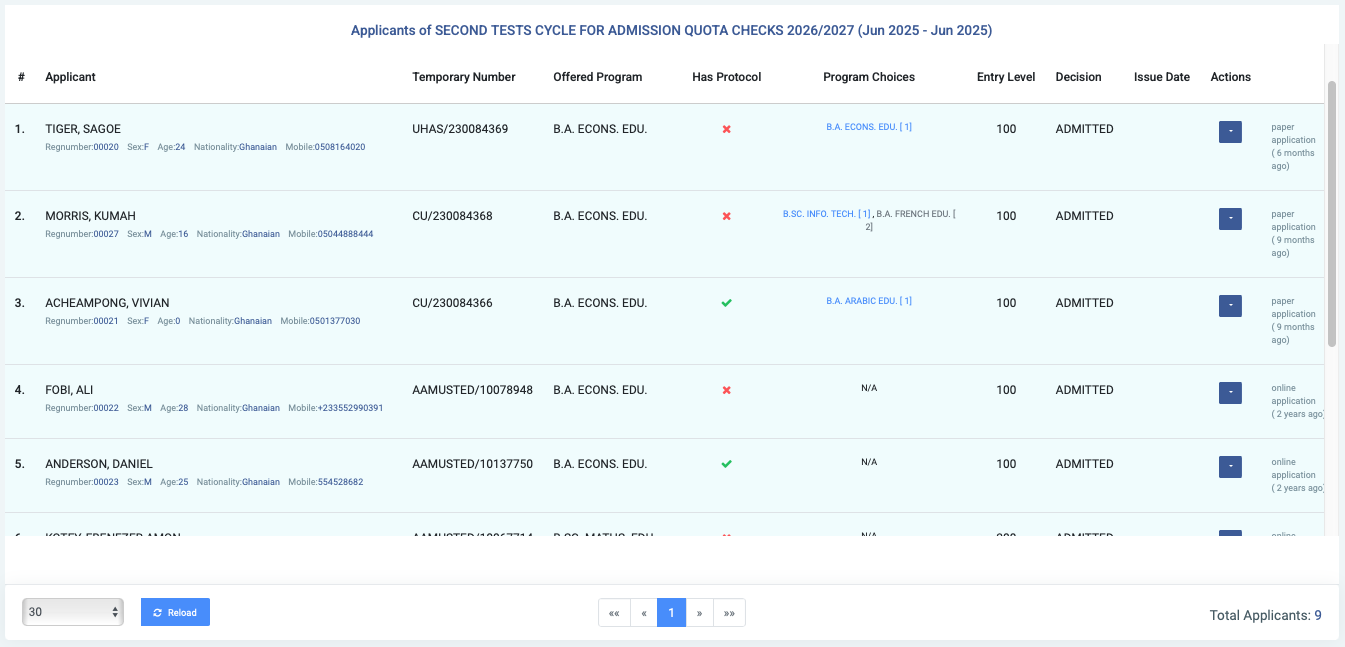
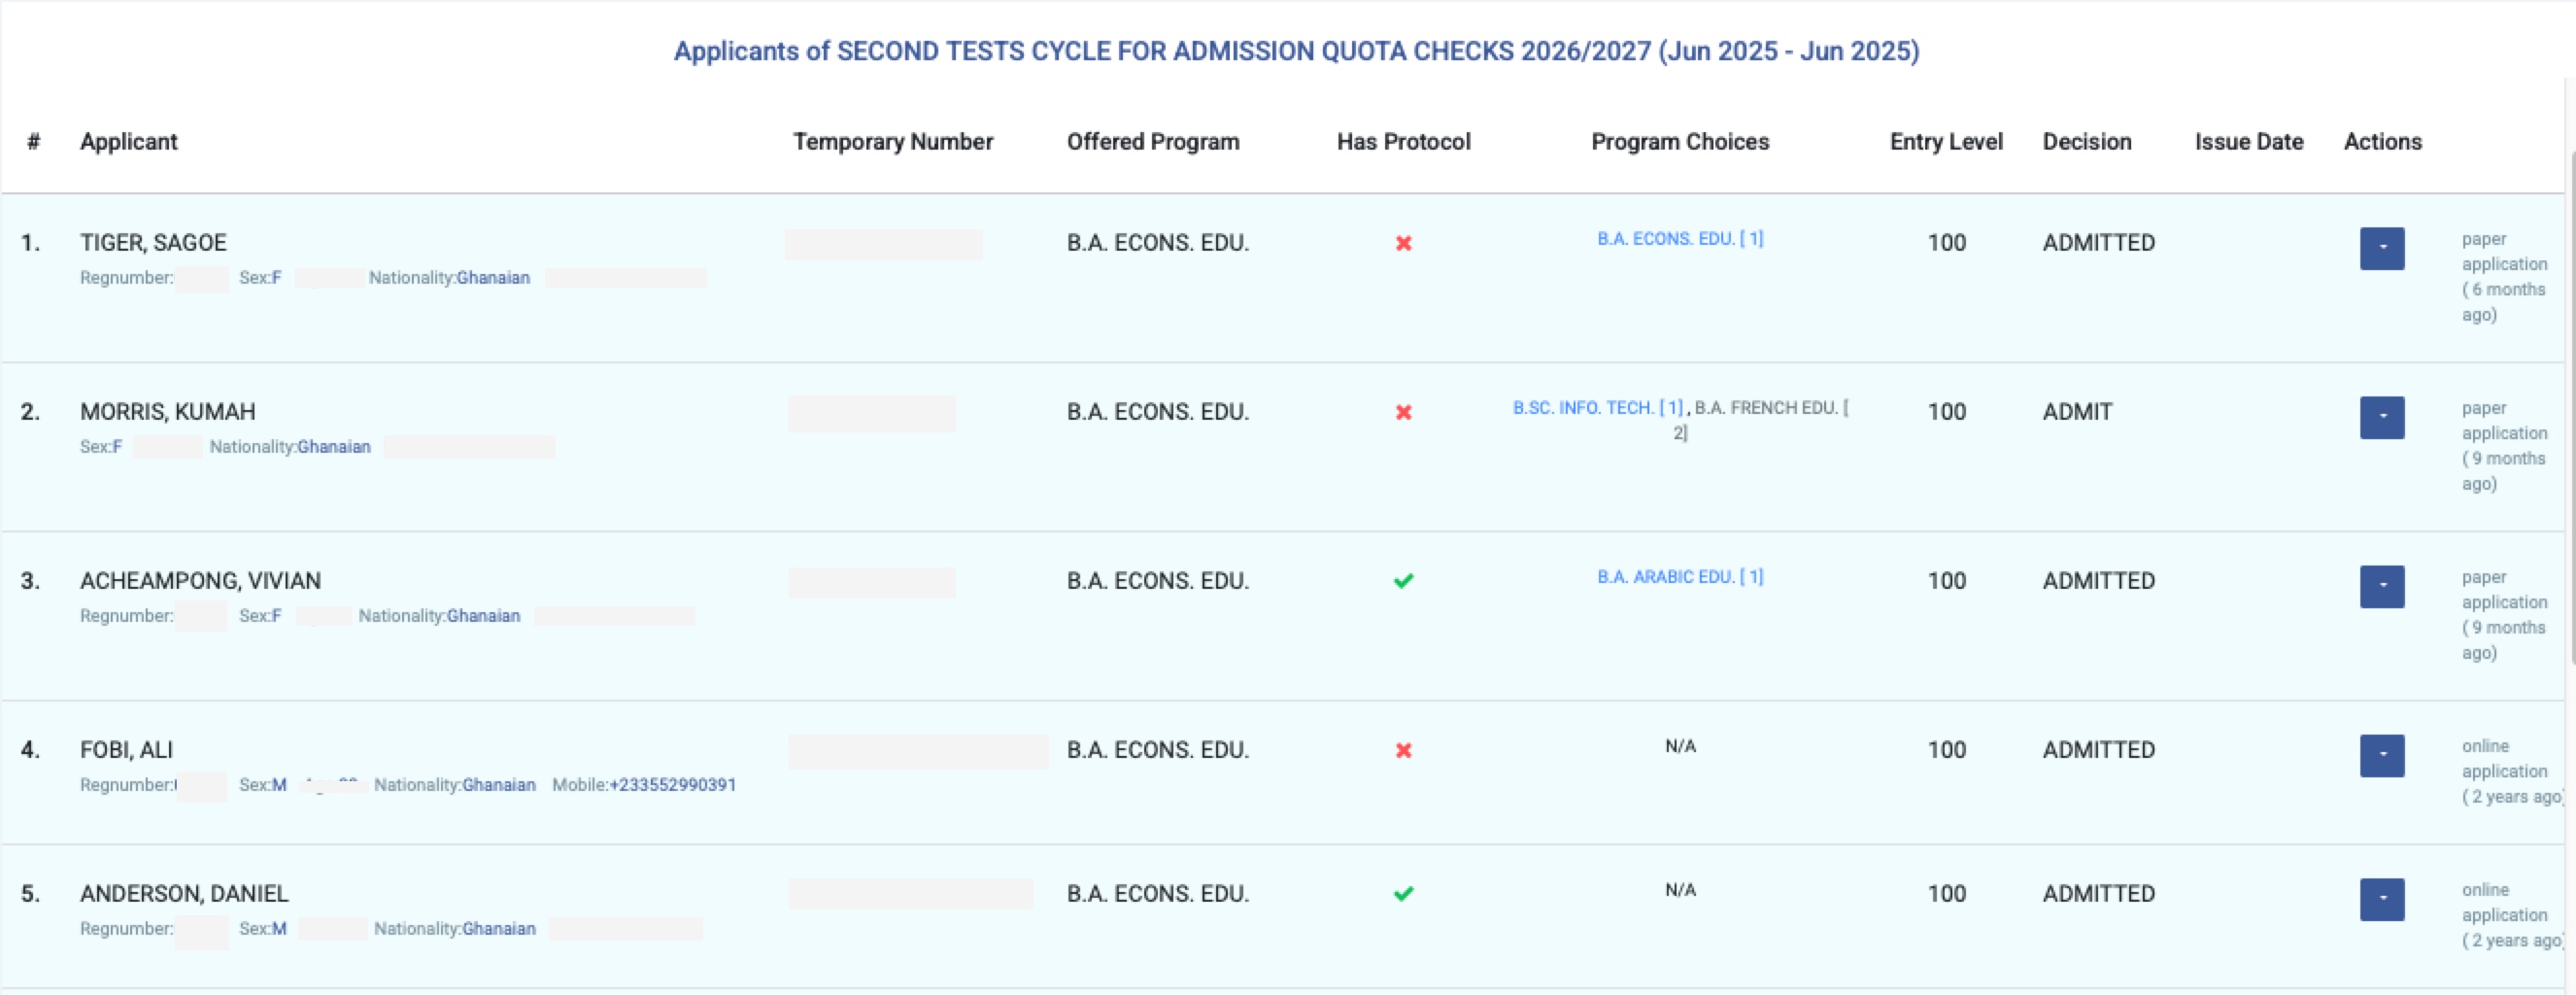
In the case where there are applicants that match the criteria specified in the search modal prior, you can view that list of applicants with their relevant information and take certain actions on them.
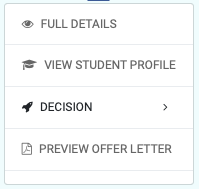
For each applicant, the actions that can be taken are;
- Full Details: You can view the profile of the applicant here. The details show all the information about the applicant.
- Decision: (explain)
- Preview Offer Letter: (explain)
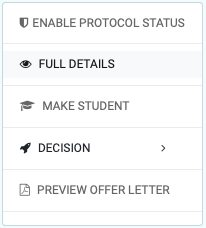
If the decision on the applicant is ‘ADMIT‘ there are two items to the list of actions. These items are:
- Enable Protocol Status: (explain)
- Make Student: (explain)
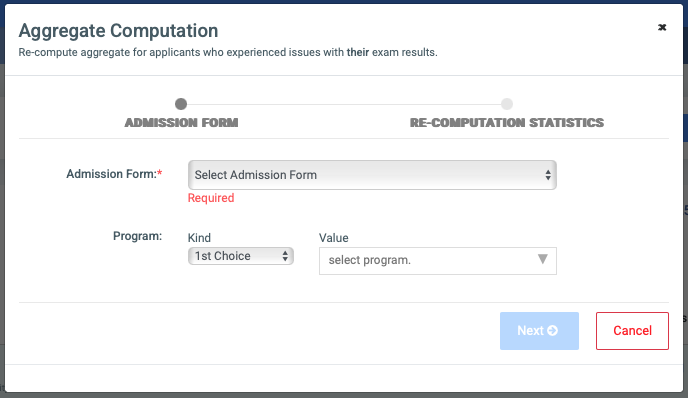
Also from the search bar, click on the Compute Aggregate button. It opens up a modal that computes the aggregate in two processes.
The first process entails the selection of the admission form.
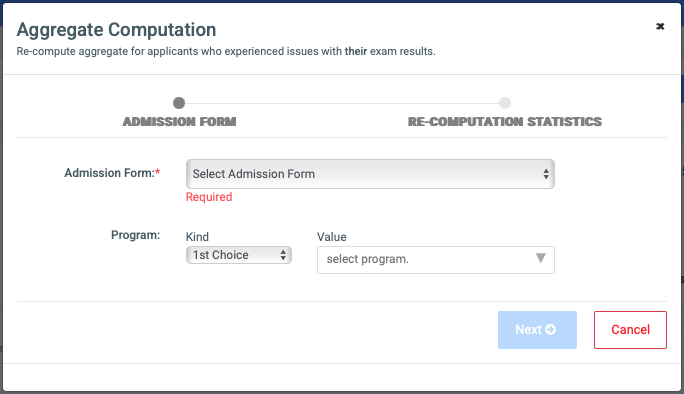
The first process is the Admission Form and it has two inputs.
- Admission Form: This is a dropdown listing all the admission forms. It is required that an admission form is selected.
- Program: This input is in two parts.
- Kind: Specify the program type i.e.; 1st Choice or 2nd Choice.
- Value: This is where the specific program is selected.
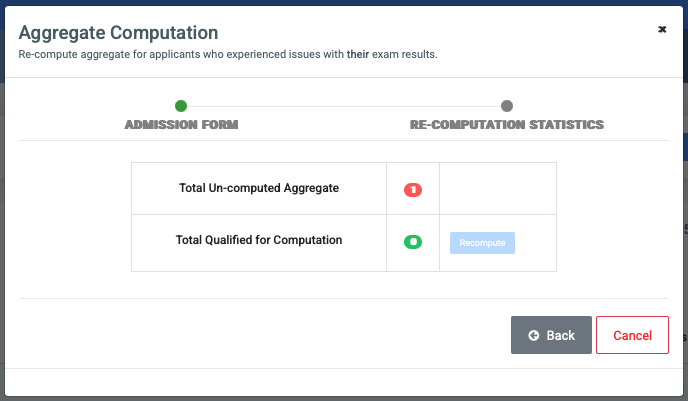
The second process is the Re-Computation Statistics. The statistics show a table that highlights the statistics.
- Total Un-computed Aggregate
- Total Qualified for Computation
Click on the Recompute button to compute or on the Prompt Applicant(s) button to prompt the affected applicants.
The third button on the Applicants List Page is the Send Bulk Letters.
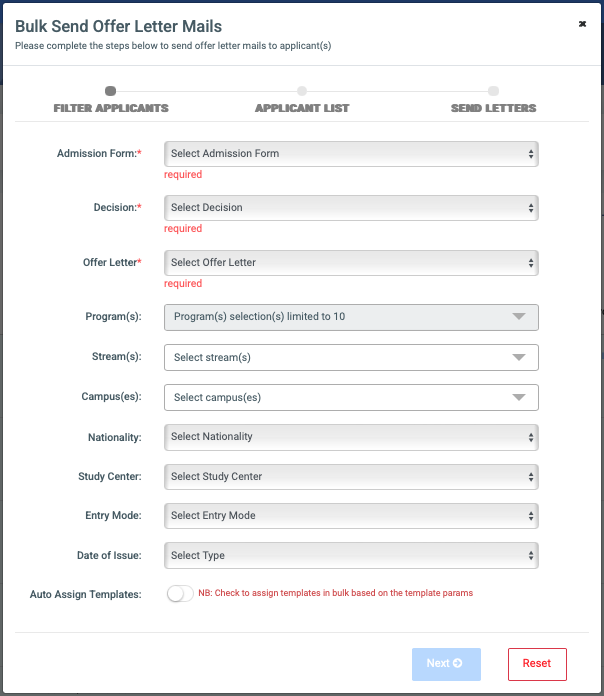
Clicking on the button bring up a popup modal. This modal has a mixture of different types of inputs with some being required. These inputs include:
- Admission Form
- Decision
- Offer Letter
- Programs(s)
- Stream(s)
- Campus(es)
- Nationality
- Study Center
- Entry Mode
- Date of Issue
NB: The Auto Assign Template (explain)
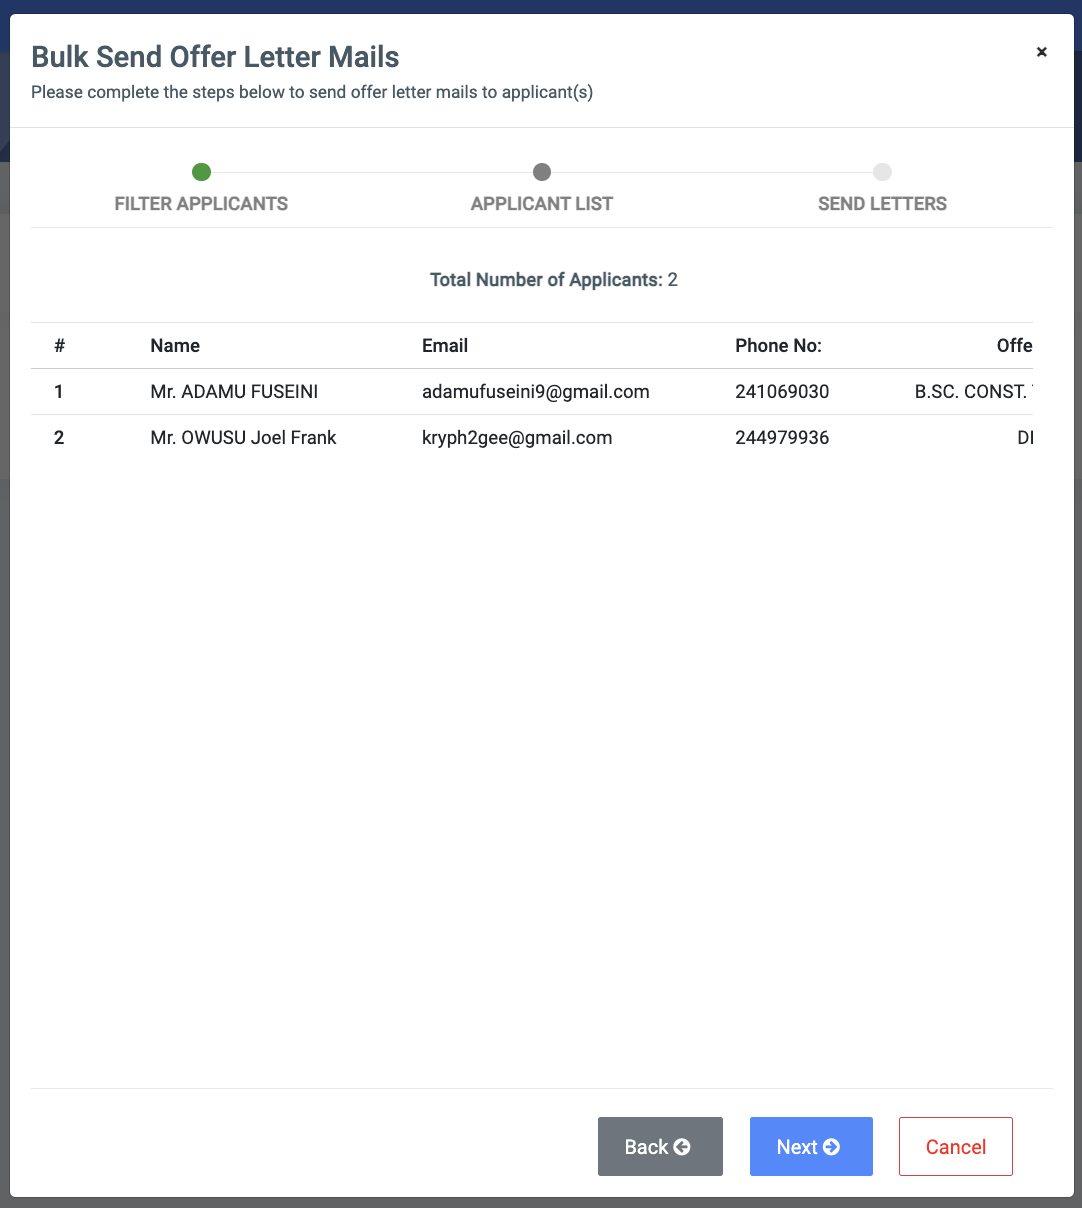
After filtering the applicants and clicking next, the filtered list of applicants will now be displayed for confirmation.
Ince you are satisfied, you can proceed to the last tab to send the letters.
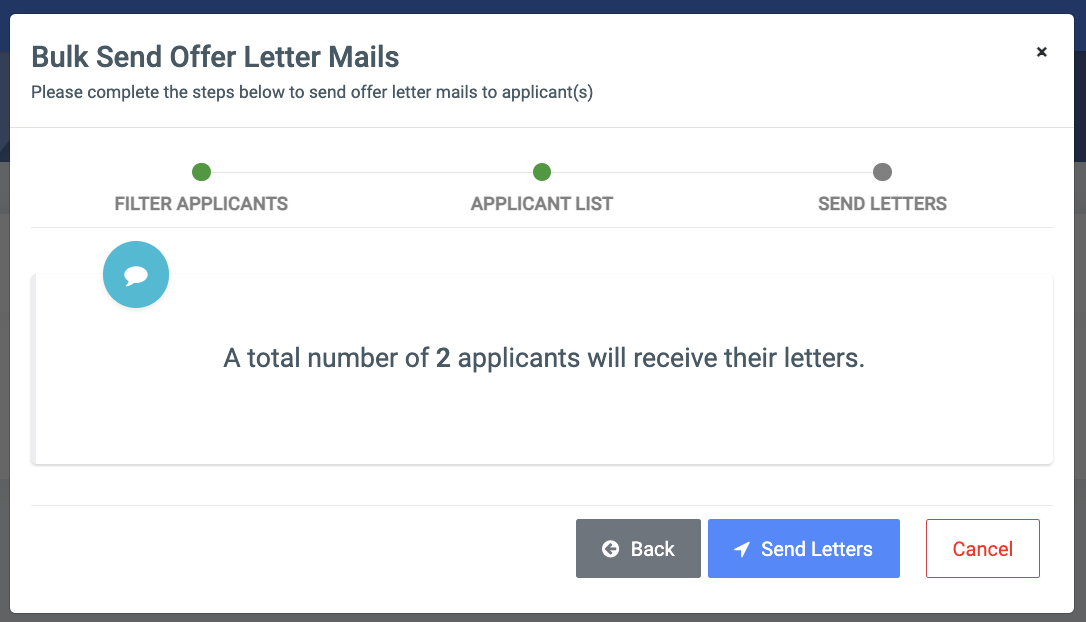
This step gives you the total number of applicants who will receive the offer letter. On this tab section, you can go Back to the previous tab, Confirm your actions and Cancel to revert your actions.
The last button on the page is a dropdown button.
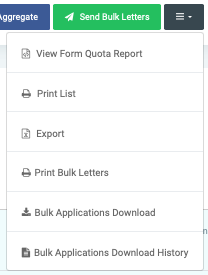
The list item in the dropdown include:
- View Form Quota Report
- Print List
- Export
- Print Bulk Letters
- Bulk Application Download
- Bulk Application Download History
For each applicant, the user can view the Applicant Profile, Make a student, decide on the status of the applicant (Decision), and view their Offer Letter.
✑ Click on Save Changes to confirm your actions.
To admit an applicant into their program, click on the blue down arrow button on the far right of their record and click on the DECISION button.

To admit, click on the Admit Into from the decision dropdown.

NB: By default, all applications come in with the decision of NONE.
This will open a modal window for the user to select the applicants’ program choice and entry-level.

✑ Click on the Admit button to admit.
NB: Users can also re-admit an admitted applicant. Click on the Re-admit Into for admitted applicants.
Also, to compute aggregate, click on the Compute Aggregate button. This opens a modal window with two(2) main steps.
Step One(1) – Admission Form:
Select from the dropdown list the admission forms.
Click on the Next button.
Step Two(2) – Re-computation Statistics:

This step gives statistics of,
- Total Un-computed aggregate.
- Total Qualified for computation.
- Total Unqualified (incomplete exams qualification).
✑ Click on the Recompute button to compute or on the Prompt Applicant(s) button to prompt the affected applicants.
✑ Click on the Back button to go to the previous page.
NB: An SMS functionality has been implemented in the Admissions Module under the offer letter template set up on OSIS. This will enable text messages to be sent to applicants during the admission process. The SMS service is prepaid and the institution account has to be funded before SMSs can be sent out to applicants.
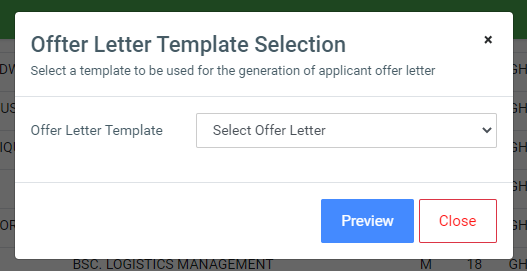
✑ To send an SMS to applicants, click on the Preview Offer Letter button by an applicant’s record

✑ Click on the Offer Letter Template dropdown and select the template you want to work with.
Once on the template, click on the SMS Content tab. A preview of a sample SMS content page will follow.

✑ To send the SMS to the applicant, click on the Send SMS button.
NB: This setup is from the SMS content setup under the Offer Letter Template setup.
✑ To view the offer letter of admitted applicants, click on the Preview Offer Letter button and select the template from the dropdown list.
An image of a sample offer letter will follow;
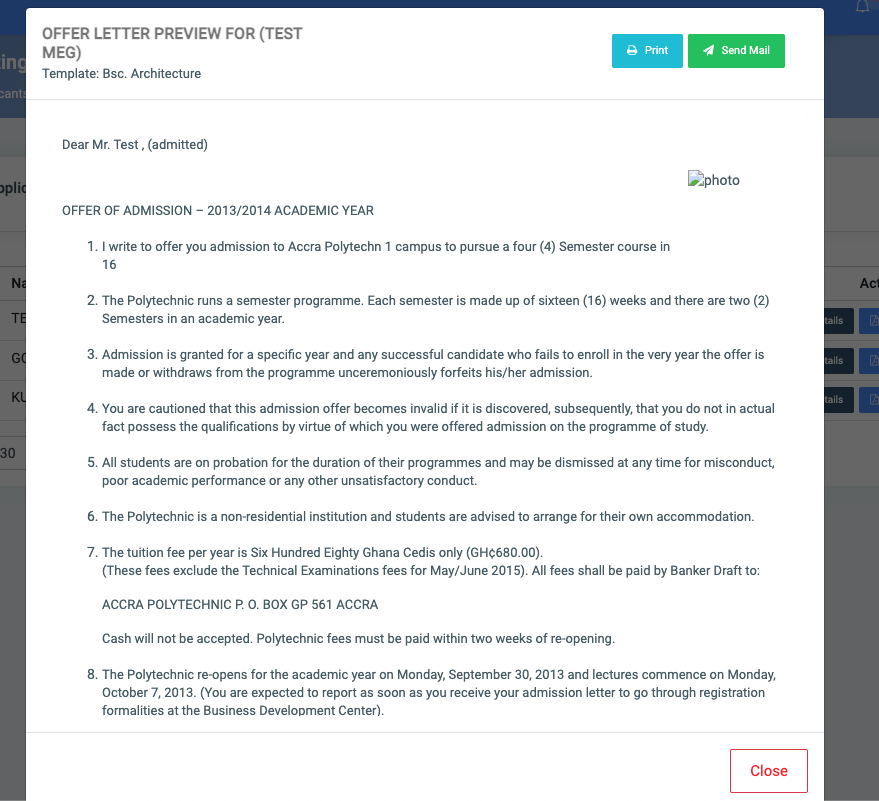
✑ Click on Print to print the offer letter or, Send Mail to send to the applicant as an email.
To view the applicant profile, click on the blue button with the down arrow then, click on the Full Details link to take you to the applicant’s profile.
Send Bulk Letters
This feature allows the user to send offer letters in bulk to applicants via email.
Once the Send Bulk Letter button is clicked on, a form is brought up with three sections:
- Filter Applicants
- Applicant List
- Send Letters
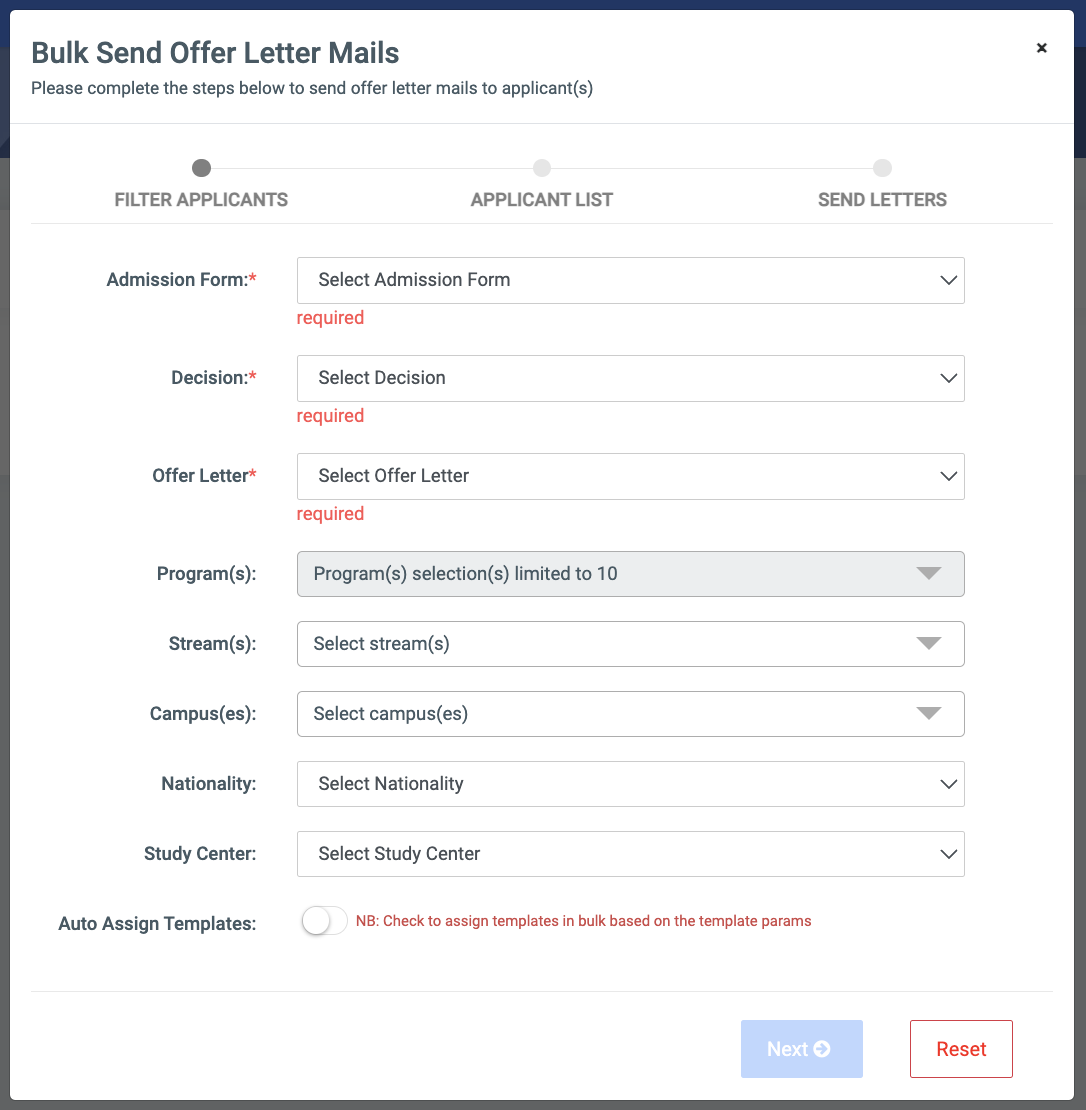
A. Filter Applicants:
This section contains the following fields:
- Admission Form: A dropdown of all admission forms set up by the institution.
- Decision: A list of admission decisions available in the institution.
- Offer Letter: The list of offer letters is set up based on the admission decisions.
- Program(s): The list of available programs in the institution. The limited number of programs that can be selected is ten(10).
- Stream(s): The available streams in the school.
- Campus(es): The available campuses in the school.
- Nationality: The nationality types in OSIS. Choose either local or foreign.
- Study Center: The study centers available in the school.
- Auto Assign Templates: Toggle this button on to automatically offer templates to applicants in each batch based on the template parameters. (eg. program, campus, etc. ). Not toggling this button will include applicants who have been assigned templates in the search as well.
B. Applicant List:
This list contains applicants who were fetched based on parameters selected in the Filter Applicants section.
It presents the following details of the applicant(s):
- Name: The full name of the applicant(s).
- Email: The email of the applicant(s).
- Phone No: The phone of the applicant(s).
- Offered Program: The program offered to the applicant(s).
- Campus: The campus of the applicant(s).
- Stream: The stream of the applicant(s).
C. Send Letters: This step gives you the total number of applicants who will receive the offer letter.
✑ Click on the Send Letters button to confirm your actions.
✑ Click on the Back button to go back to the previous step.
✑ Click on the Cancel button to revert your actions.
Export
The export button contains three options.
- Print List
- Export
- Print Bulk Letters
✑ To Print a particular applicant list, click on the Print button.
✑ To export an applicant list to Excel, click on the Export button.
✑ To print offer letters in bulk, click on the Print Bulk Letters button. It brings up three sections. They are:
- Filter Applicants
- Applicant List
- Print Letters
A. Filter Applicants. It has the following fields:
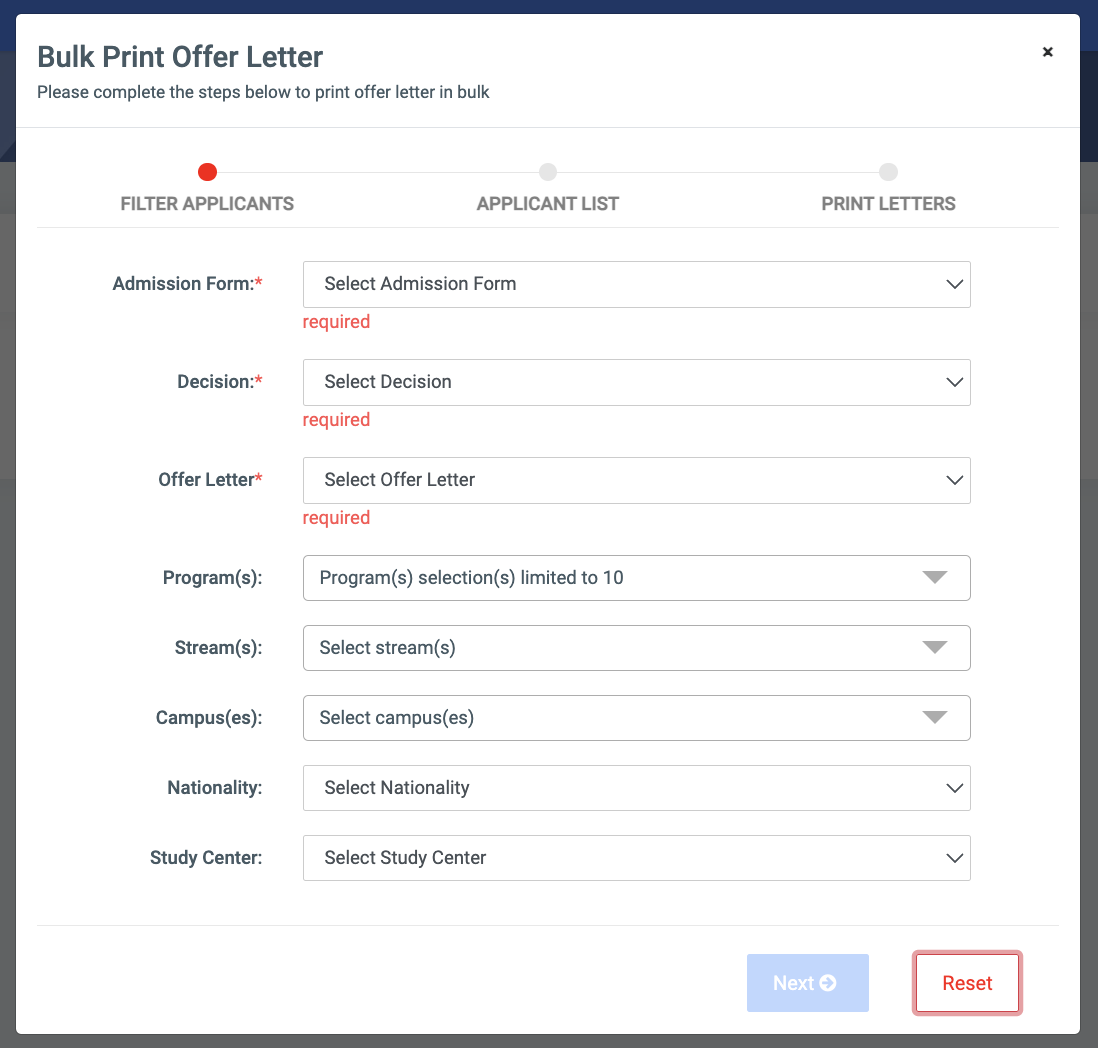
- Admission Form.
- Decision.
- Offer Letter.
- Program(s).
- Stream(s).
- Campus(es).
- Nationality.
- Study Center.
B. Applicant List:
This list contains applicants who were fetched based on parameters selected in the Filter Applicants section.
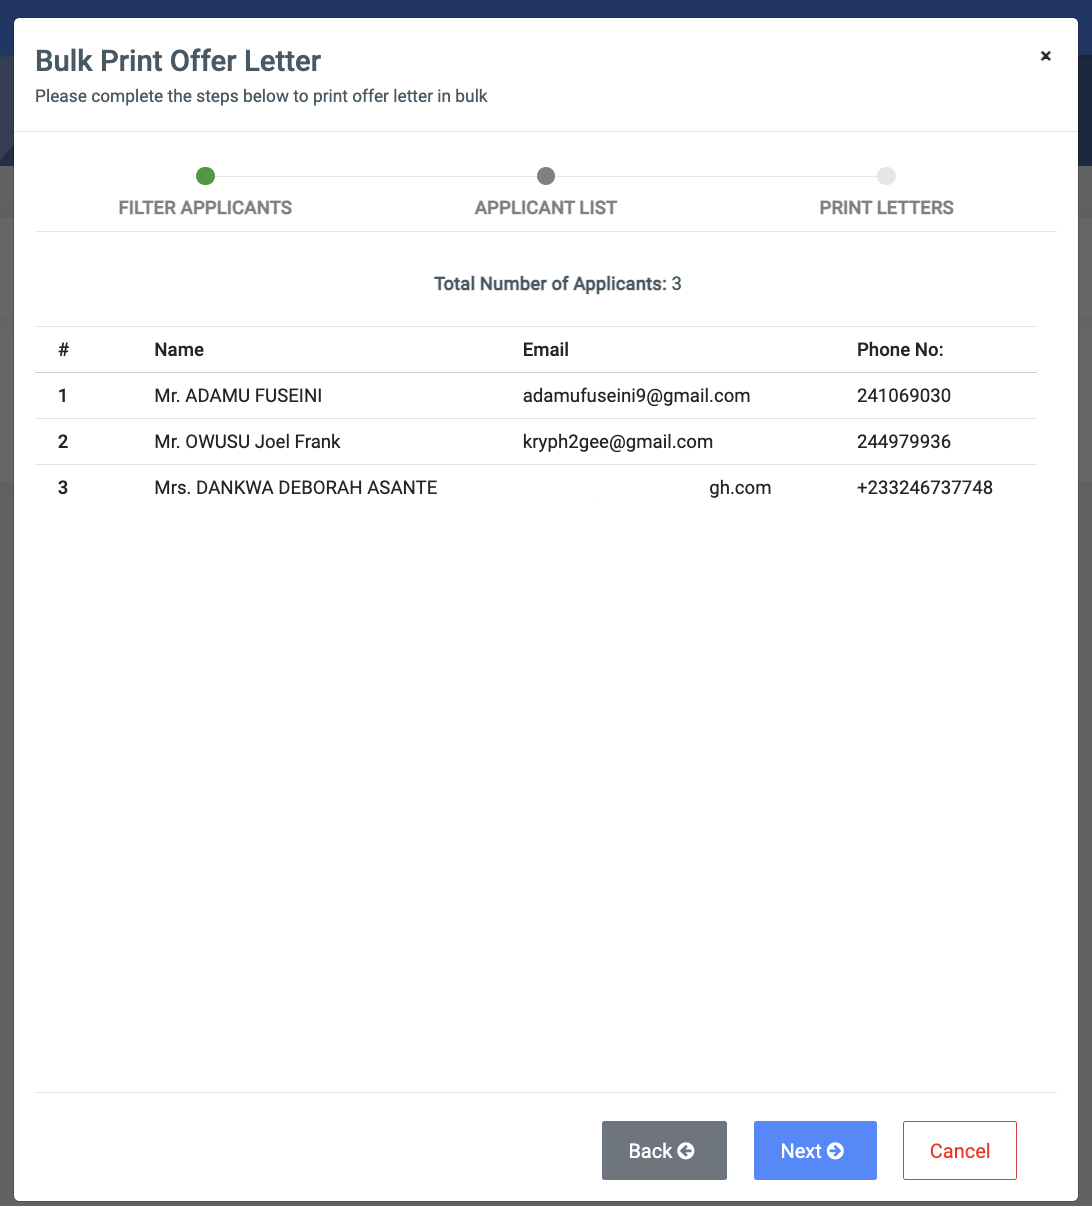
It presents the following details of the applicant(s):
- Name: The full name of the applicant(s).
- Email: The email of the applicant(s).
- Phone No: The phone of the applicant(s).
- Offered Program: The program offered to the applicant(s).
- Campus: The campus of the applicant(s).
- Stream: The stream of the applicant(s).
C. Print Letters: This step gives you the total number of applicants who will have their offer letters printed.
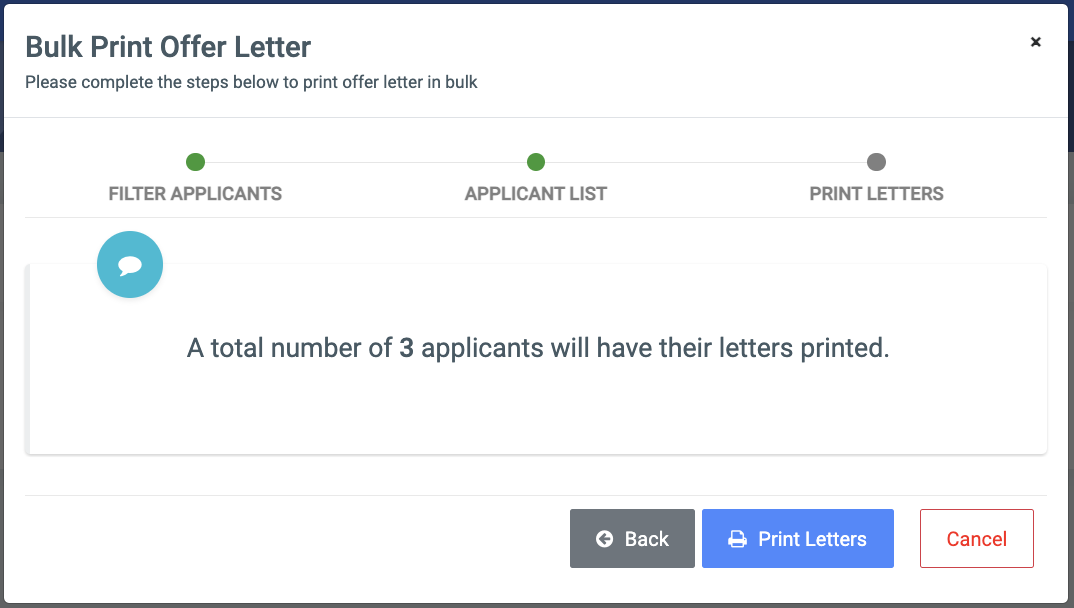
✑ Click on the Print Letters button to confirm your actions.
✑ Click on the Back button to go back to the previous step.
✑ Click on the Cancel button to revert your actions.