
Offer Template
This feature enables users to set up offer letters for applicants. This can be an Admit, Deny, or Waiting letter in the form of email, SMS, or printouts.
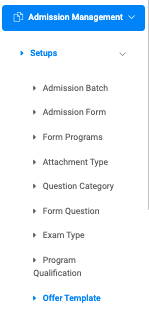
From the OSIS sidebar, Click on Admission Management to find the Setups. Click on the Offer Template link.
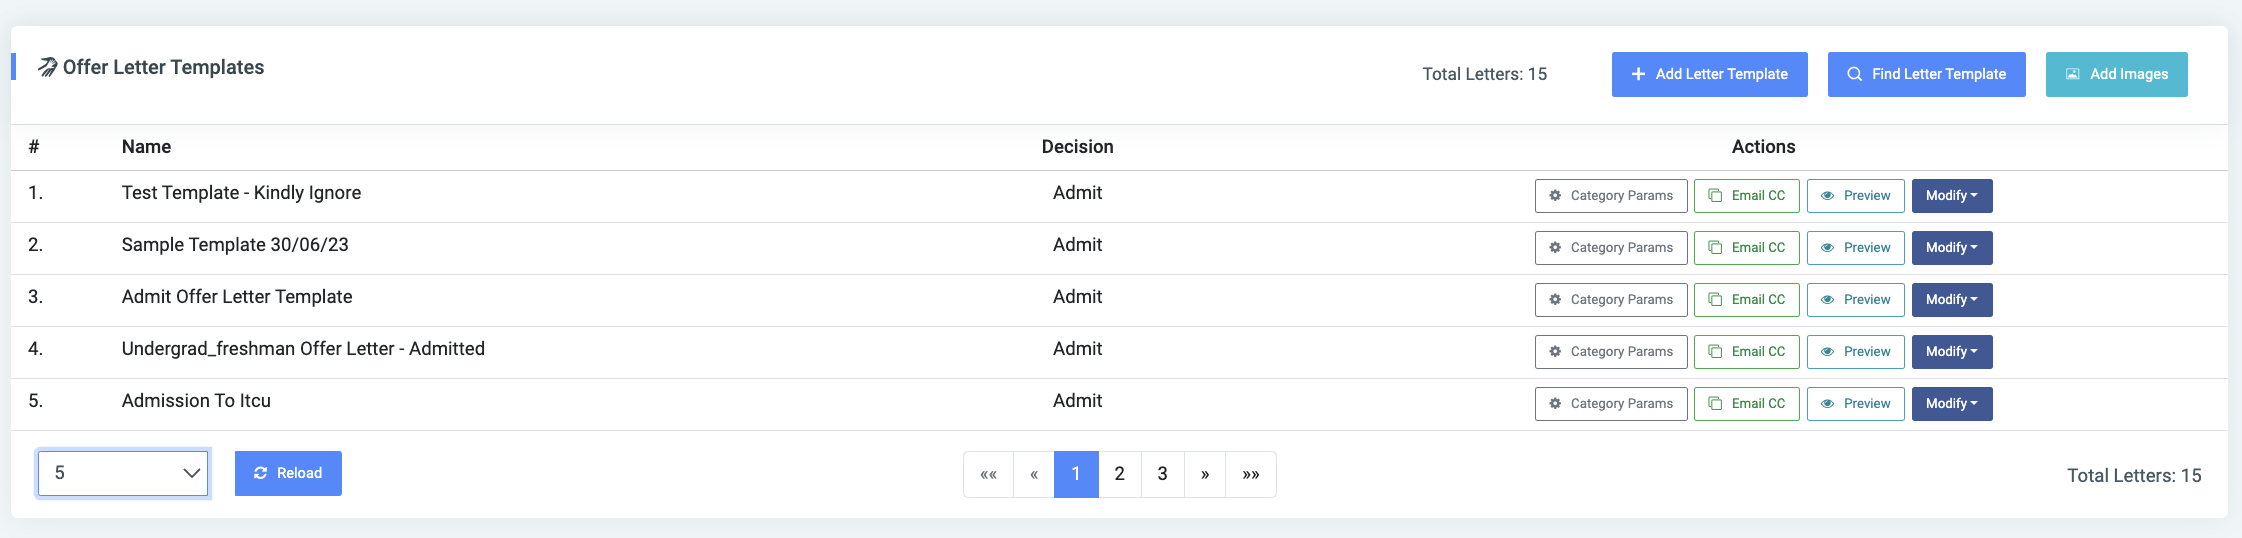
At the top right of the Setup Offer Letter Template page, there are three(3) buttons, Add Letter Template, Find Letter Template, and Add Images.

To create a new letter template, click on the Add Letter Template button, which comes with four(4) main steps, each with fields to fill;
Step One(1) – Basic:
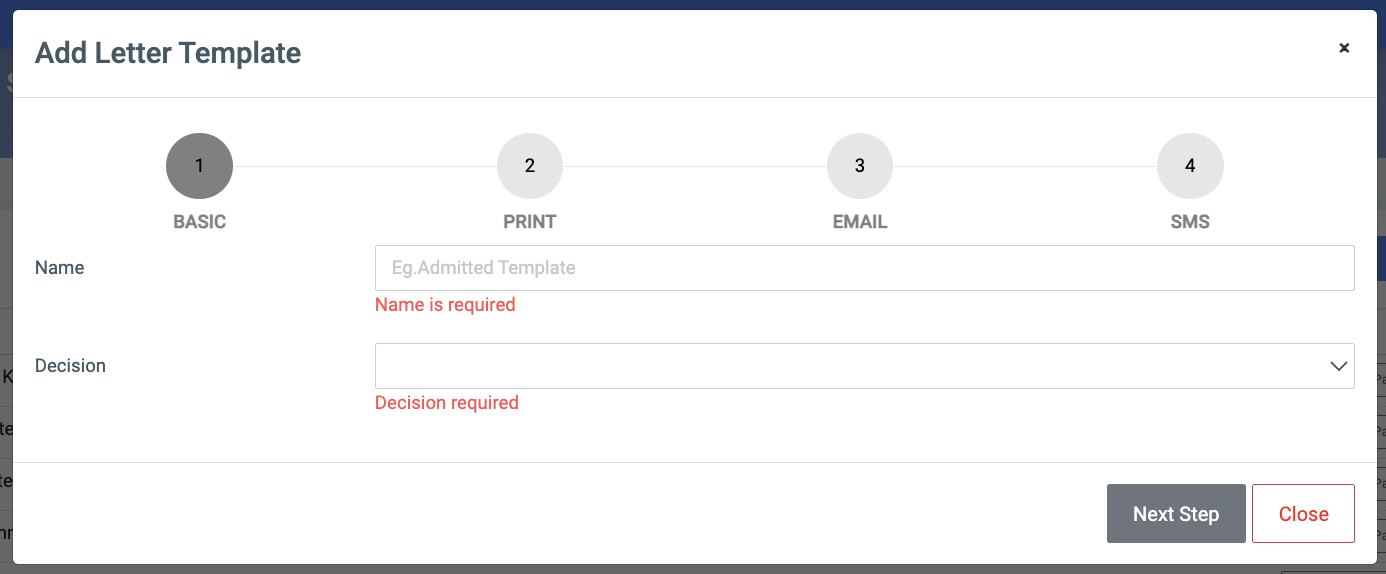
- Name: Enter a name for the offer letter.
- Decision: Select from the dropdown menu the decision for the offer letter. This can be Waiting, Deny, Offer, or None. Click on the Next Step button.
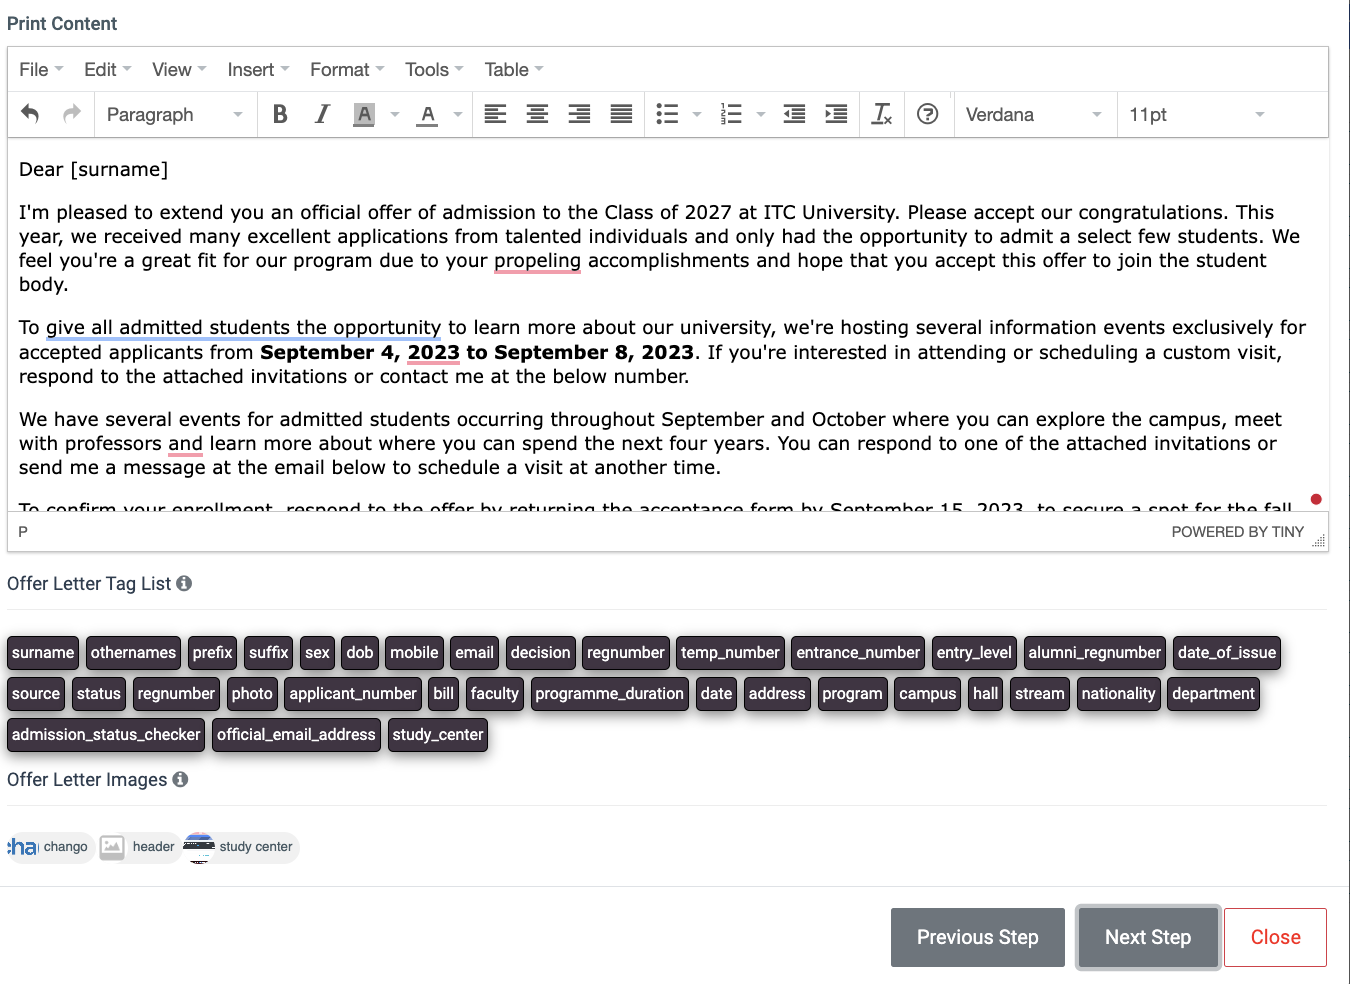
Step Two(2) – Print Content:
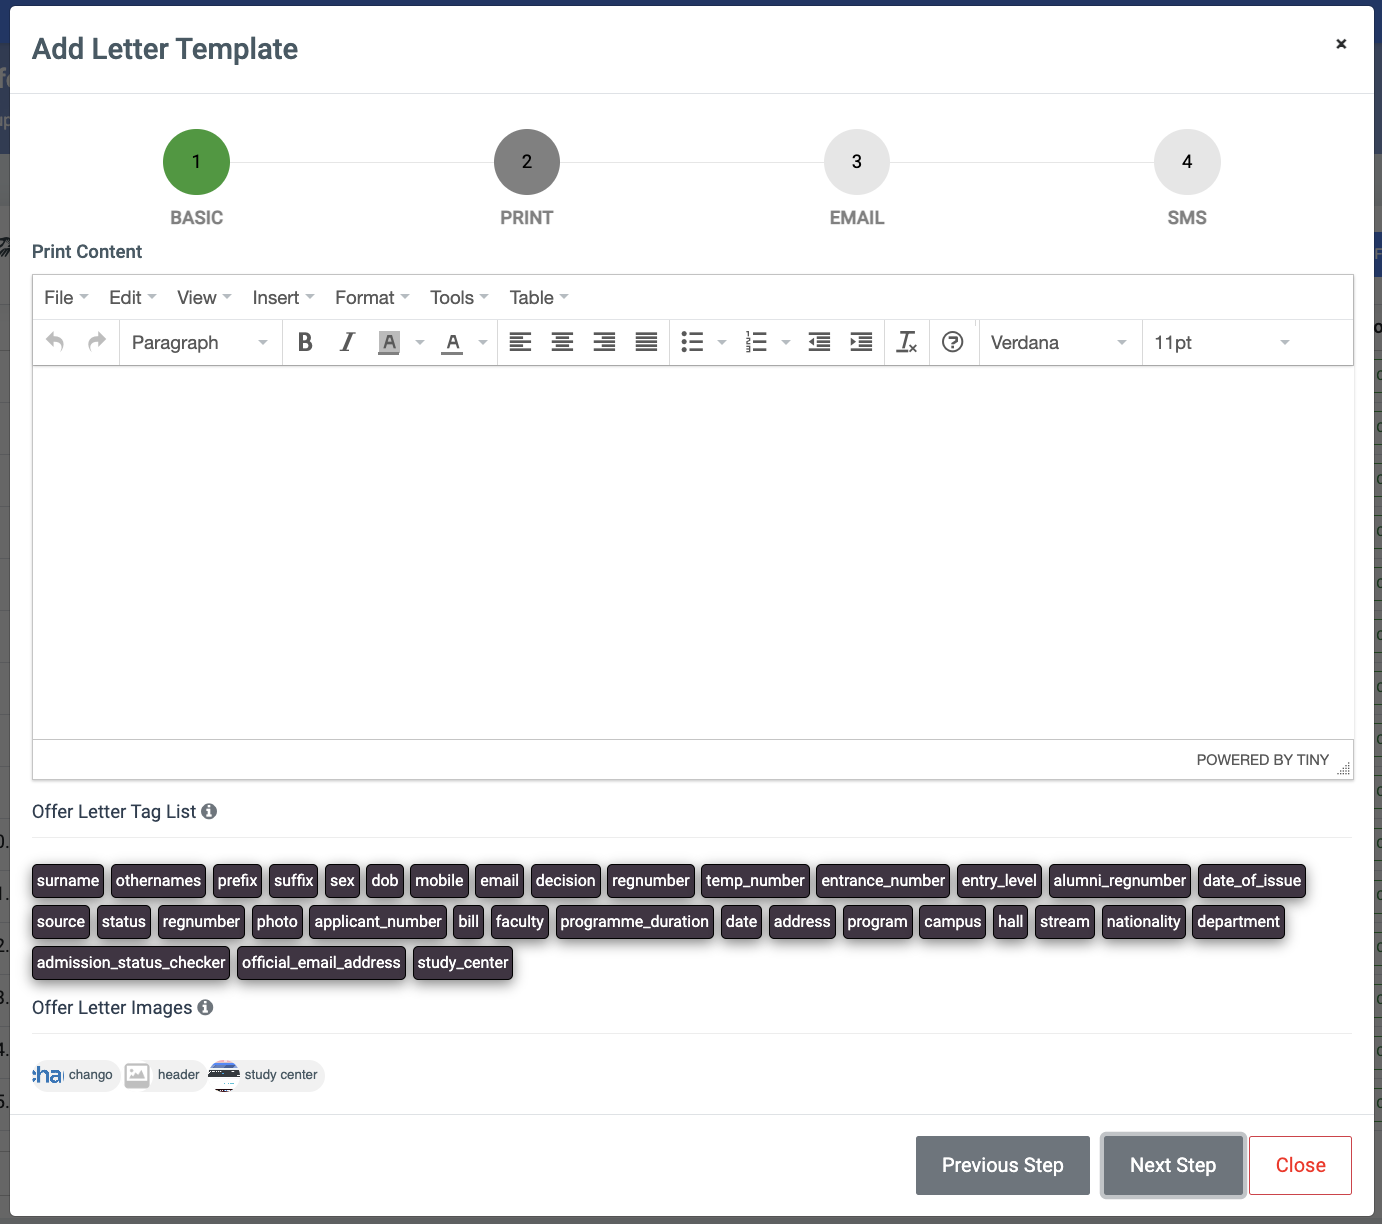
Enter the letter content for printout. The message box also has applicant tags below eg. surname, othernames, prefix, regnumber, email, etc to users create dynamic letters for all applicants print outs.
NB: To add tags to letters, simply drag them onto the message content.
✑ Click on the Next Step button.
✑ Click on the Previous Step button to go back.
It is also important to note that fonts can be customized to suit the user’s preference.
Step Three(3) – Email Content:
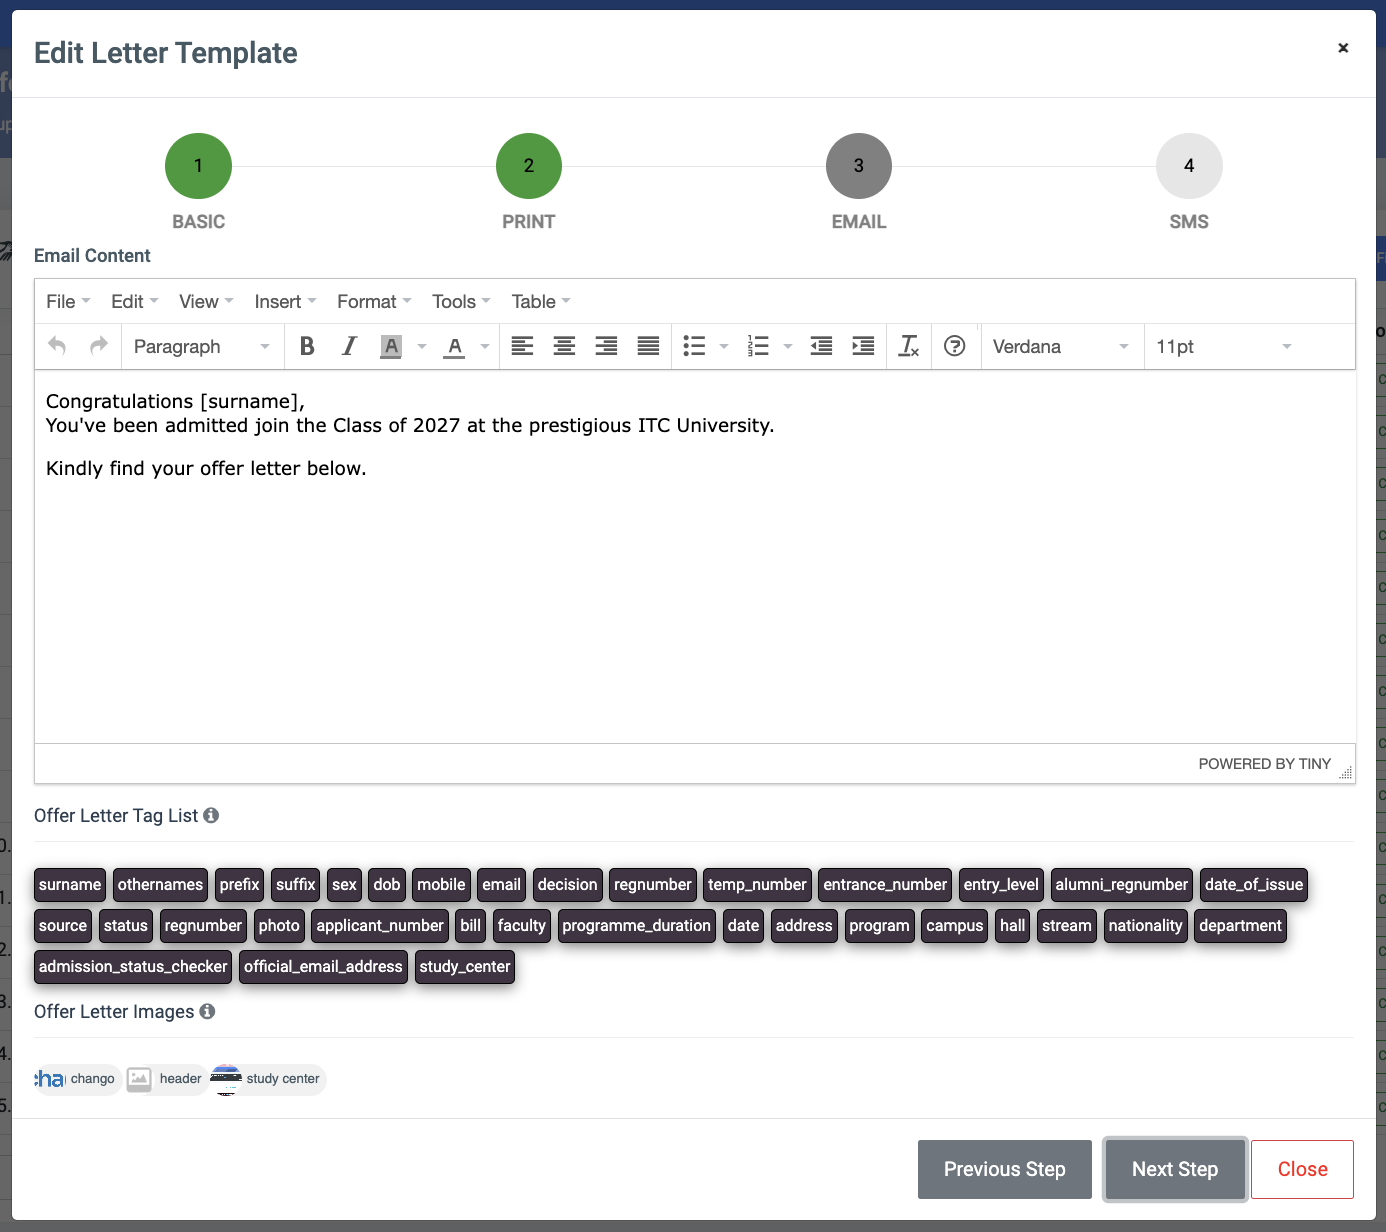
Enter the letter content for emails. The message box also has applicant tags below eg. surname, othernames, prefix, regnumber, email, etc to users create dynamic letters for all applicants’ emails.
NB: To add a tag to letters, simply drag them onto the message content.
✑ Click on the Next Step button.
✑ Click on the Previous Step button to go back.
Final Step(4) – SMS Content:
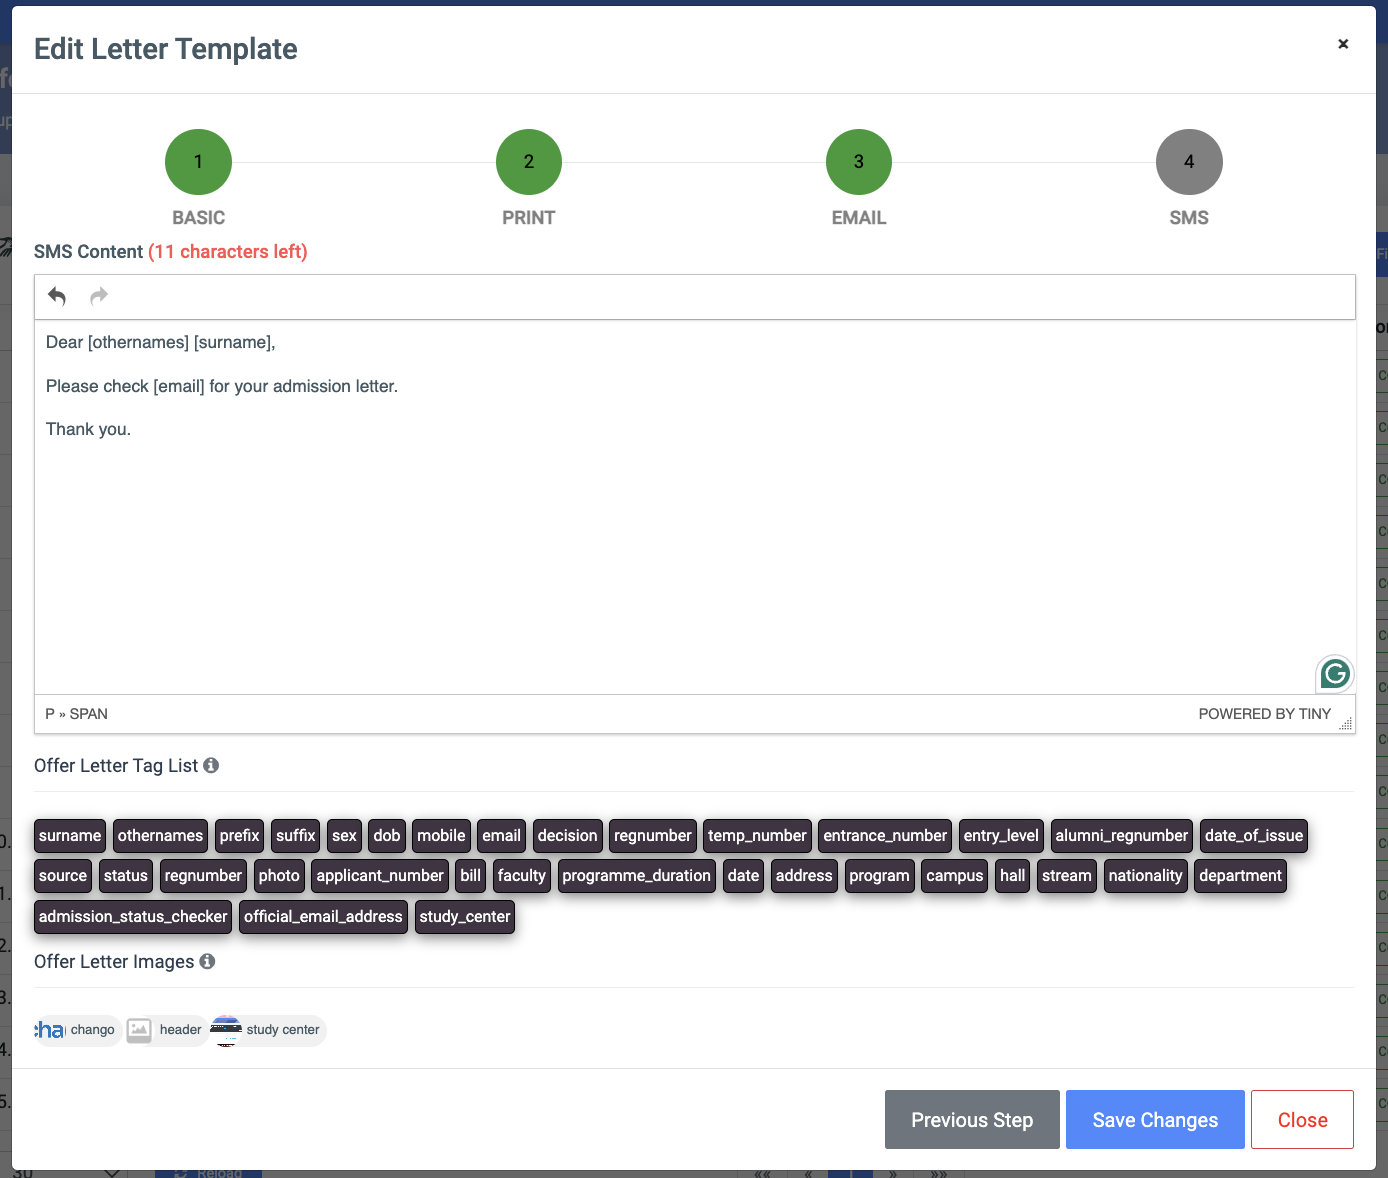
Enter the letter content for SMS. The message box also has applicant tags below eg. surname, othernames, prefix, regnumber, email, etc to users create dynamic letters for all applicants’ SMS.
NB: To add a tag to letters, simply drag them onto the message content.
Click on the Previous Step button to go back.
Click on Save Changes to confirm actions.
To search for a particular letter template, click on the Find Letter Template button and fill in the details for that letter by;
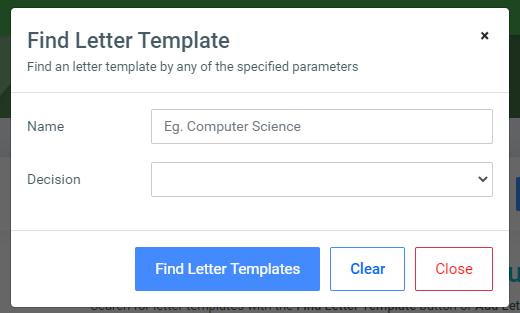
- Name.
- Decision.
✑ Click on the Find Letter Template button to confirm your actions.
You may click on Clear to clear all fields, or on Close to close the modal.
NB: The Find Letter Template fields are not required. Simply click the Find Letter Templates button to show all letters.
For each added letter template, the user can copy the staff of the school while sending the emails to the applicants, assign a category of programs, Edit, Delete the template, and Preview the letter contents as well.
To assign a category of programs to an offer letter template, click on the Category Params button. This feature is most useful for applicants with the admit and admitted statuses. When this is set up, the programs that are being offered to the applicants or the programs the applicants are being admitted into will be automatically selected once the program tag is placed on the offer letter template. It comes with a form which gives you two options;
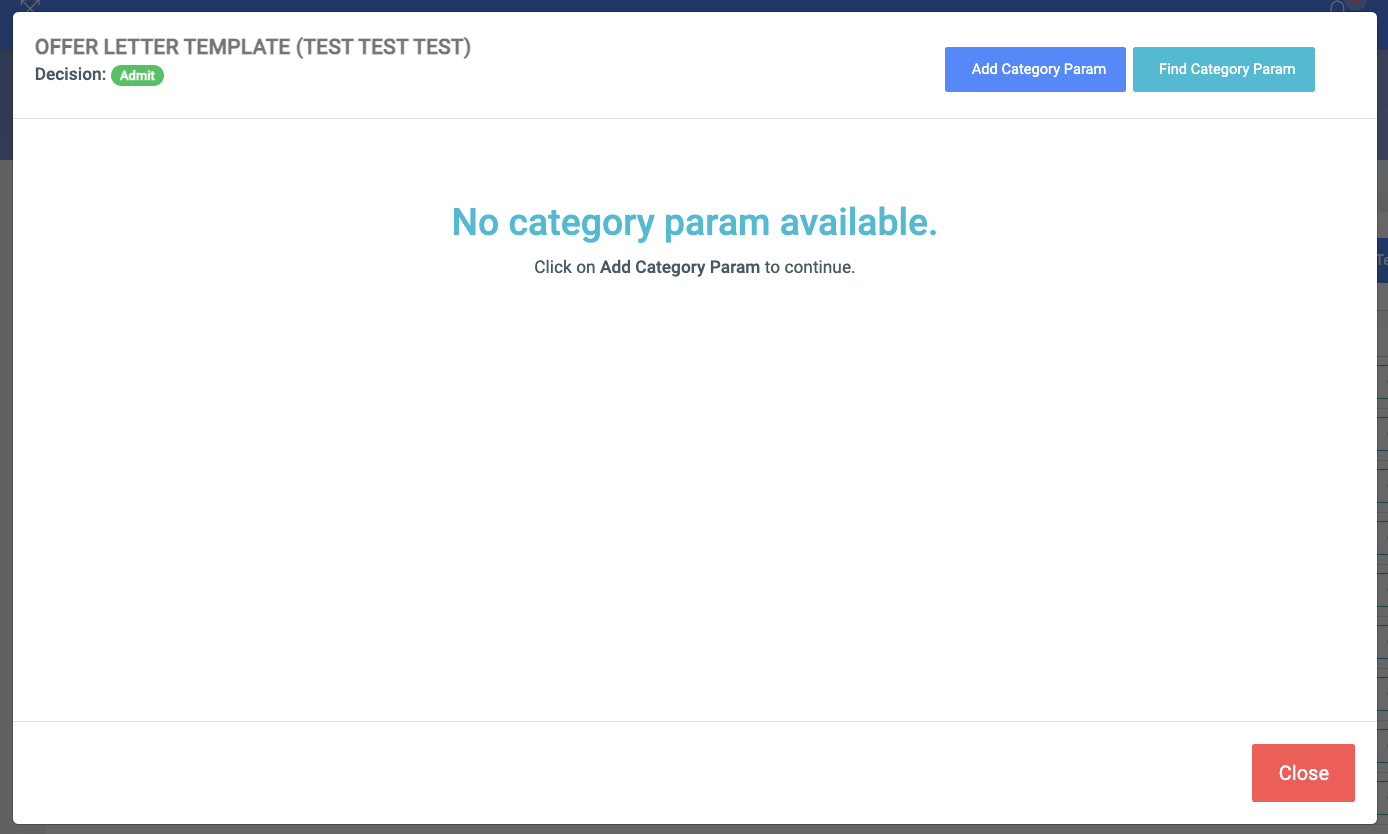
- Add Category Param: This presents a form to allow the user to select;
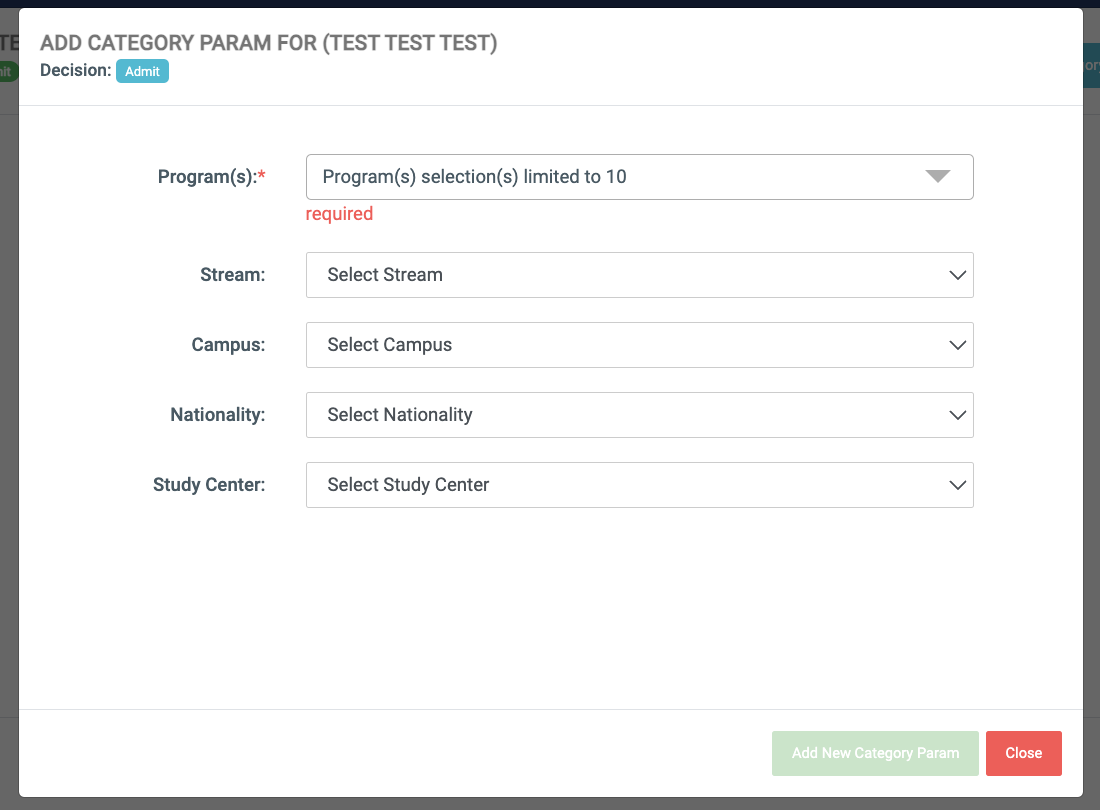
- Program: The list of all programs in the institution. It is a multi-select field which is limited to 10 programs.
- Stream: All available streams in the institution.
- Campus: A list of all available campuses in the institution.
- Nationality: This presents two types of nationalities: You can either choose local or foreign.
- Study Center: A dropdown of all available study centers.
NB: All fields aside from the program field are optional.
To find a category param, click on the Find Category Param button.
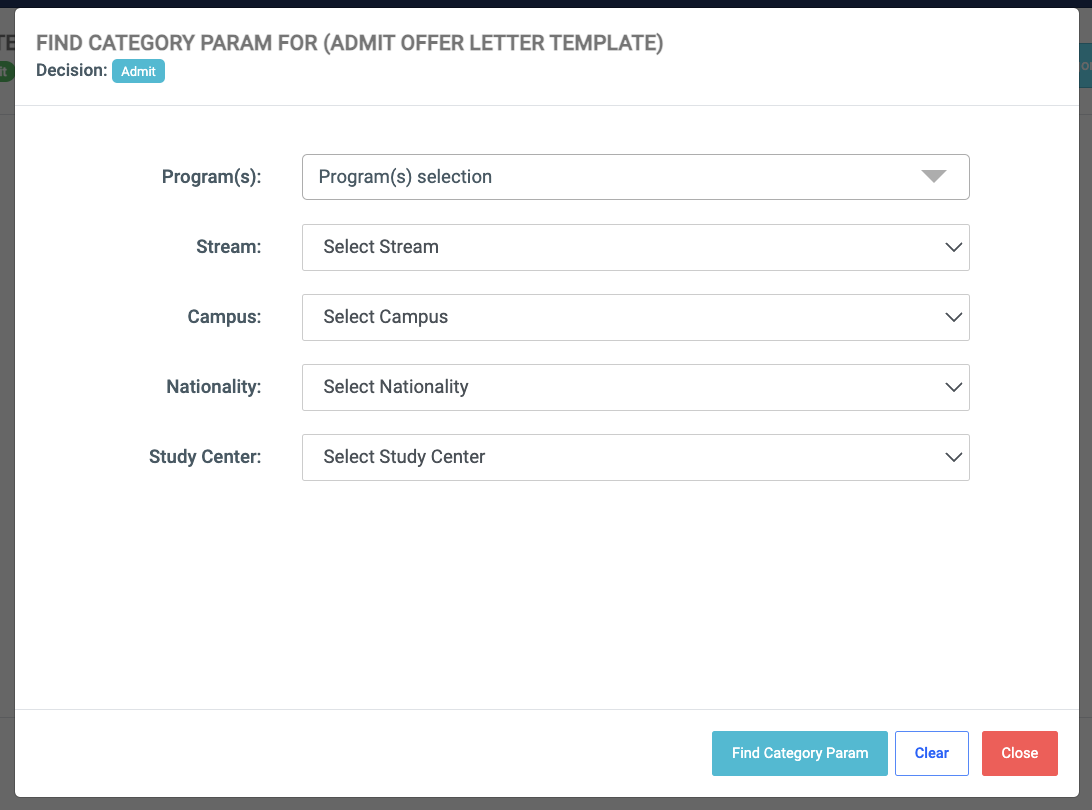
- Program(s)
- Stream
- Campus
- Nationality
- Study Center
The Email CC feature allows the user to attach staff to an offer letter template. The staff will be kept in copy of the offer letter(s) sent out to applicants.
To set up attach staff to an offer letter, click on the Email CC button. A modal comes up with an option;
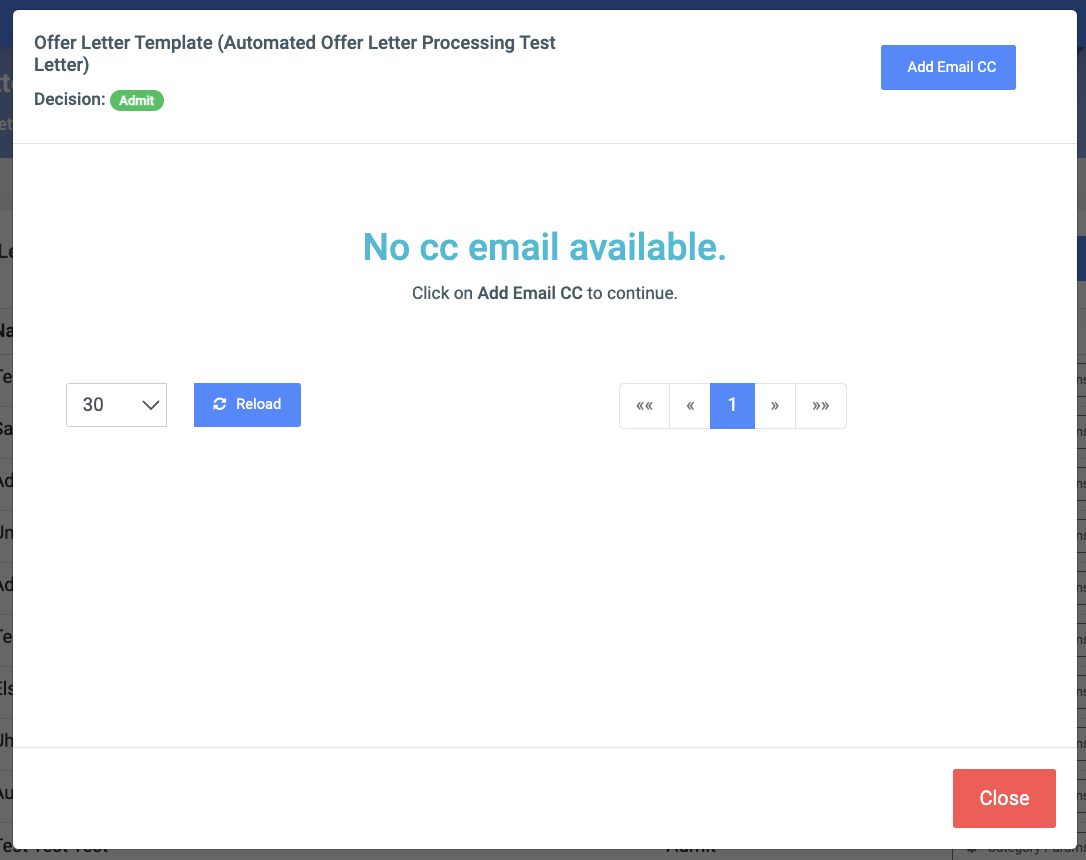
- Add Email CC: When clicked on, allow the user to enter the name of the staff and automatically generates the email tied to the staff account.
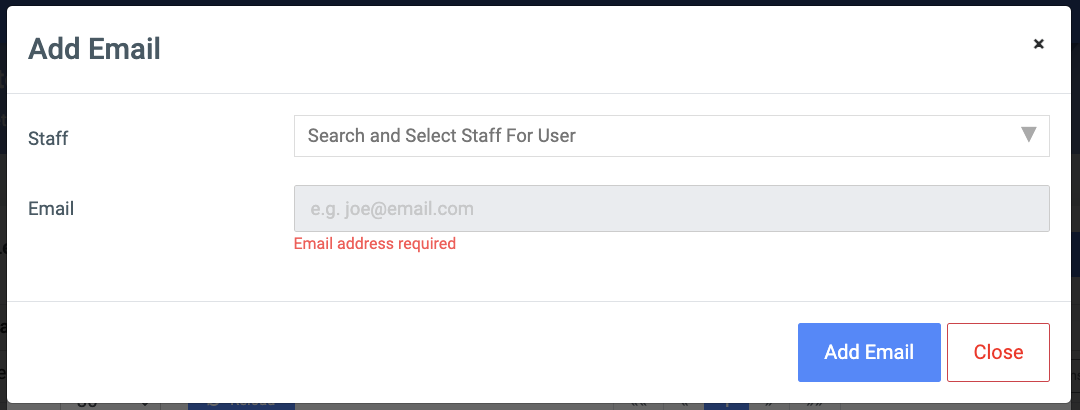
✑ Click on the Add Email button to confirm actions, or on Close to revert actions.
To Preview a letter’s content, click on the Preview button.
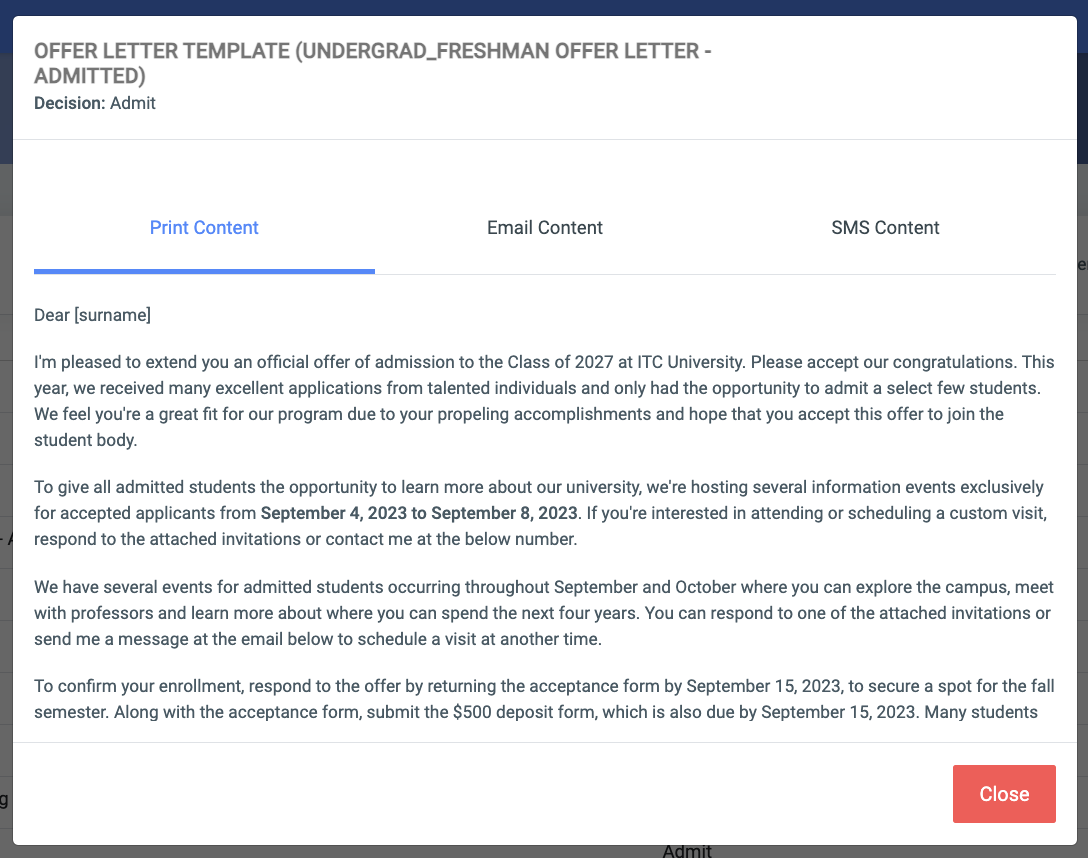
This opens a modal window showing all three(3) forms of letters ie. Print Content, Email Content, and SMS Content. Click on any of the tabs to show its content.
☛ To insert an image of the letter’s signatory;
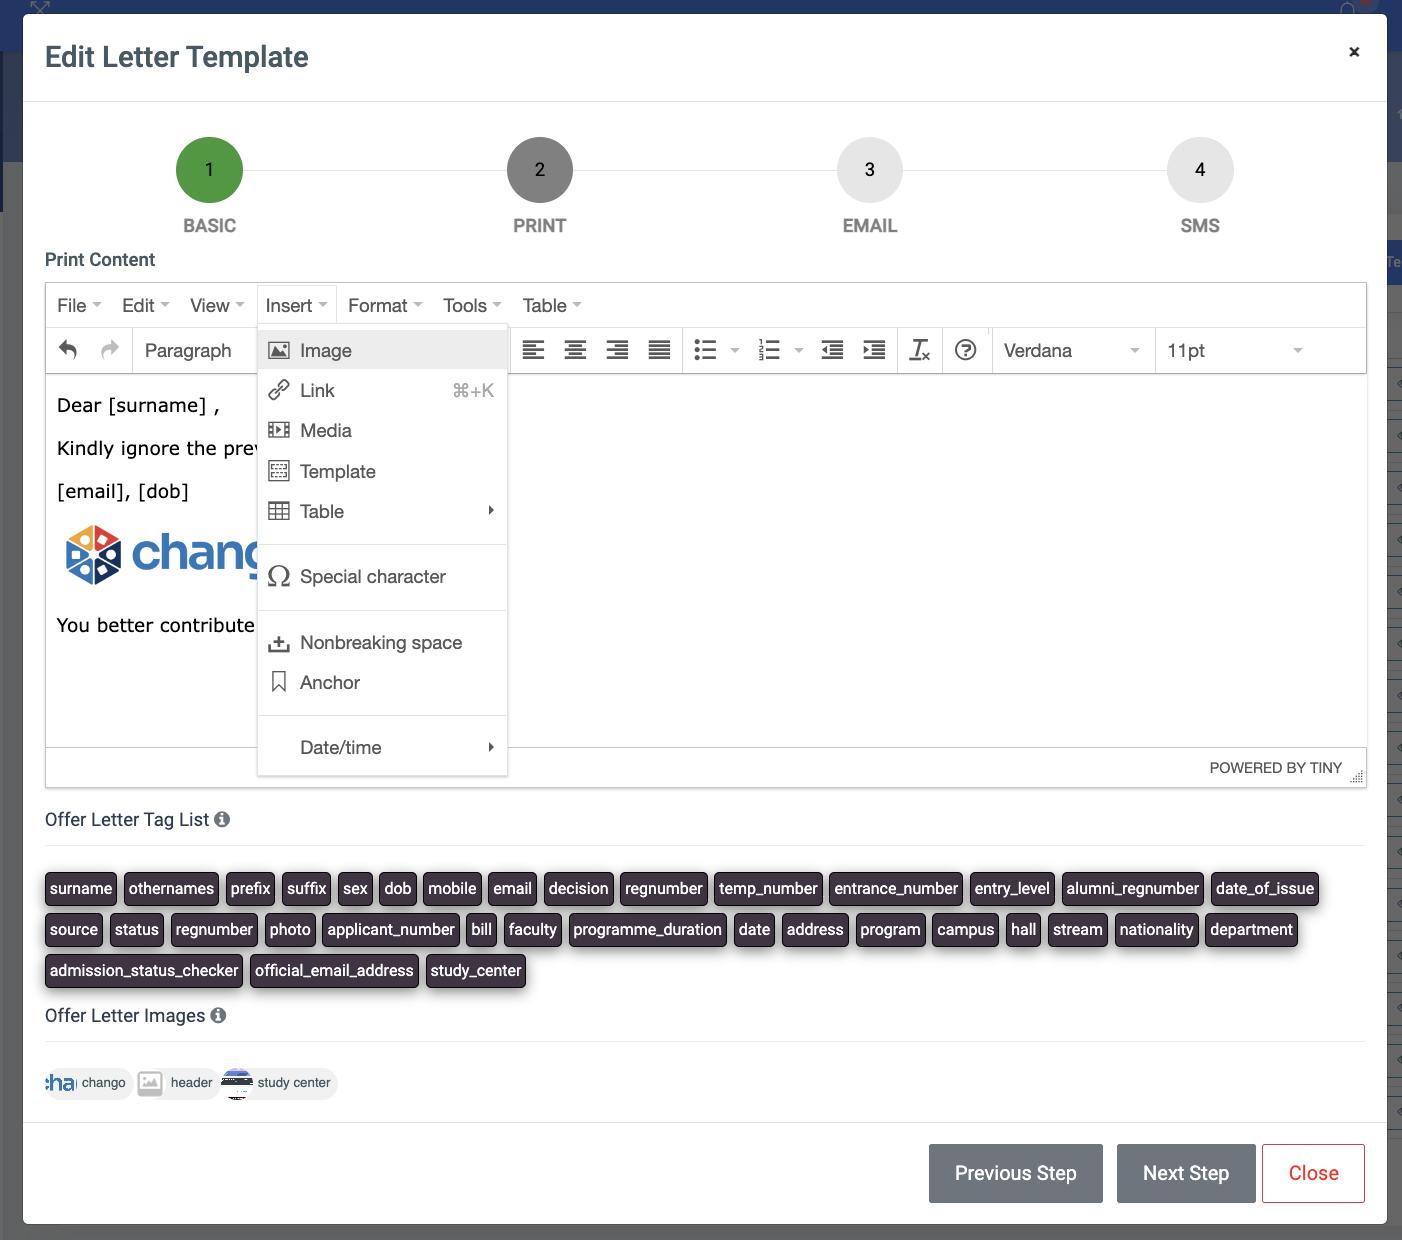
- Click and keep the cursor where you’d like to situate the signature
- Atop the editor, locate the Insert menu, and select Image
- Choose the image
- Once added, resize as appropriate
- Save the template.
✑ Select Next Step to continue to Email
✑ Select Close to close the process
To add a new image, click on the Add Images button. This will present a modal that allows you to add images. It contains the following fields;
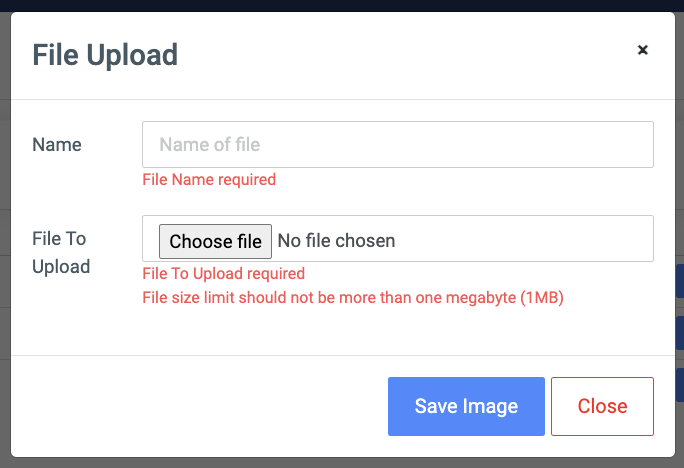
Name: Provide a name you want to identify your file with.
File To Upload: Click on the “Choose file” button to upload your image.
Click on the Save Image button to confirm actions and on the Close button to revert your actions.
For each added image there is an option to view and delete them.
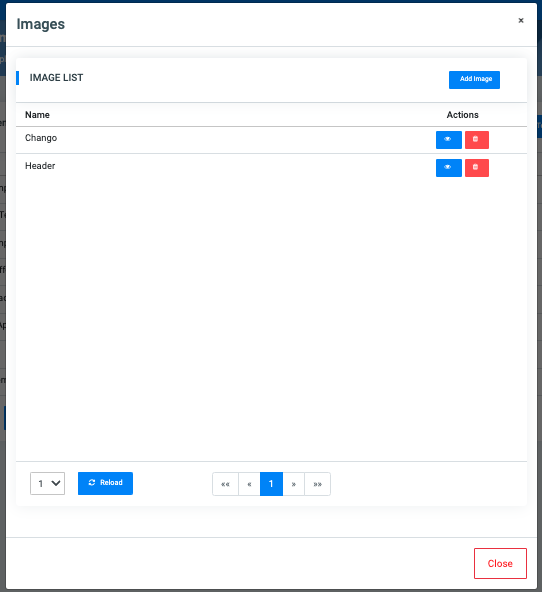
✑ Click on the “eye” icon to preview an uploaded image.
✑ Click on the “trash” icon to delete an uploaded image.
NB: Image uploads will be available in the template editor while a new template is being created or edited.
To Edit or Delete an offer letter template, click on Modify by the offer letter template you want to work with.

If you choose to edit, click on Save changes after, to confirm actions.
Opting to delete a template is irreversible after you confirm actions.