Academic Years
This feature enables the Admissions Admin to set up an academic year for admissions.
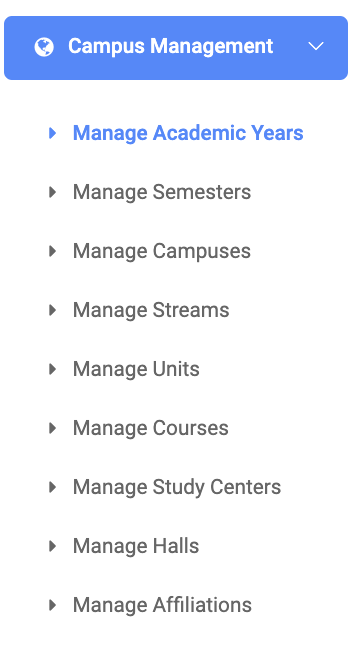
From the OSIS sidebar, Click on Campus Management to find the Setups. Click on the Academic Year link.
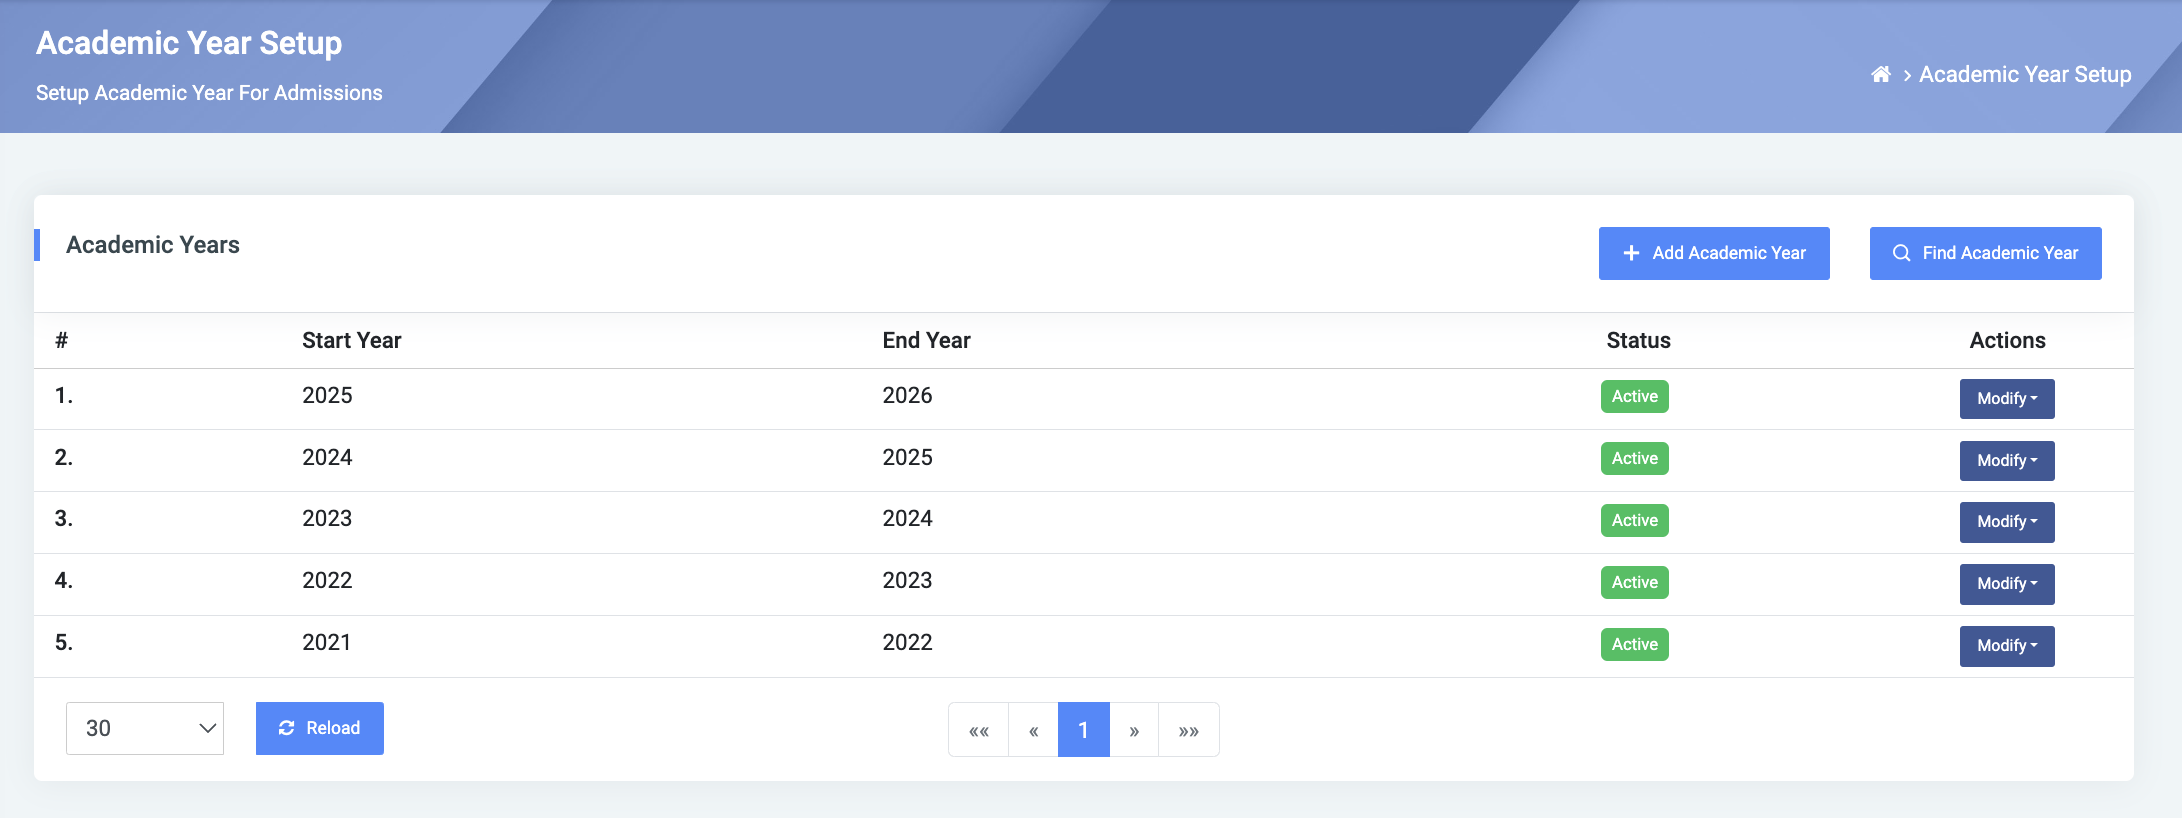
At the top right side of the Setup Academic Year page, you will see two buttons, Add Academic Year and Find Academic Year.
To add a new academic year, click on the Add Academic Year button, which comes with three(3) fields namely;
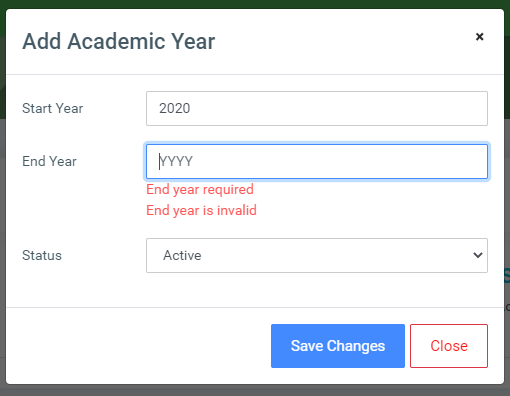
- Start Year: Enter the beginning of the academic year. Eg. 2018.
- End Year: Enter the end of the academic year. Eg. 2019.
- Status: A dropdown to select whether the academic year is Active or Inactive.
Click on Save Changes to confirm actions.
To search for a particular academic year, click on the Find Academic Year button and fill in the details for that academic year by;
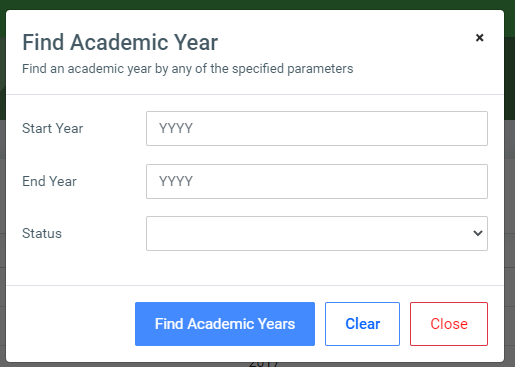
- Start Year.
- End Year.
- Status
Click on Find Academic Year at the bottom of the search form to confirm your actions.
You may click on Clear to clear all fields, or on Close to close the modal.
NB: The Find Academic Year fields are optional. Simply click the Find Academic Year button to show all added academic years.
For each added academic year, the user can Edit or Delete them.
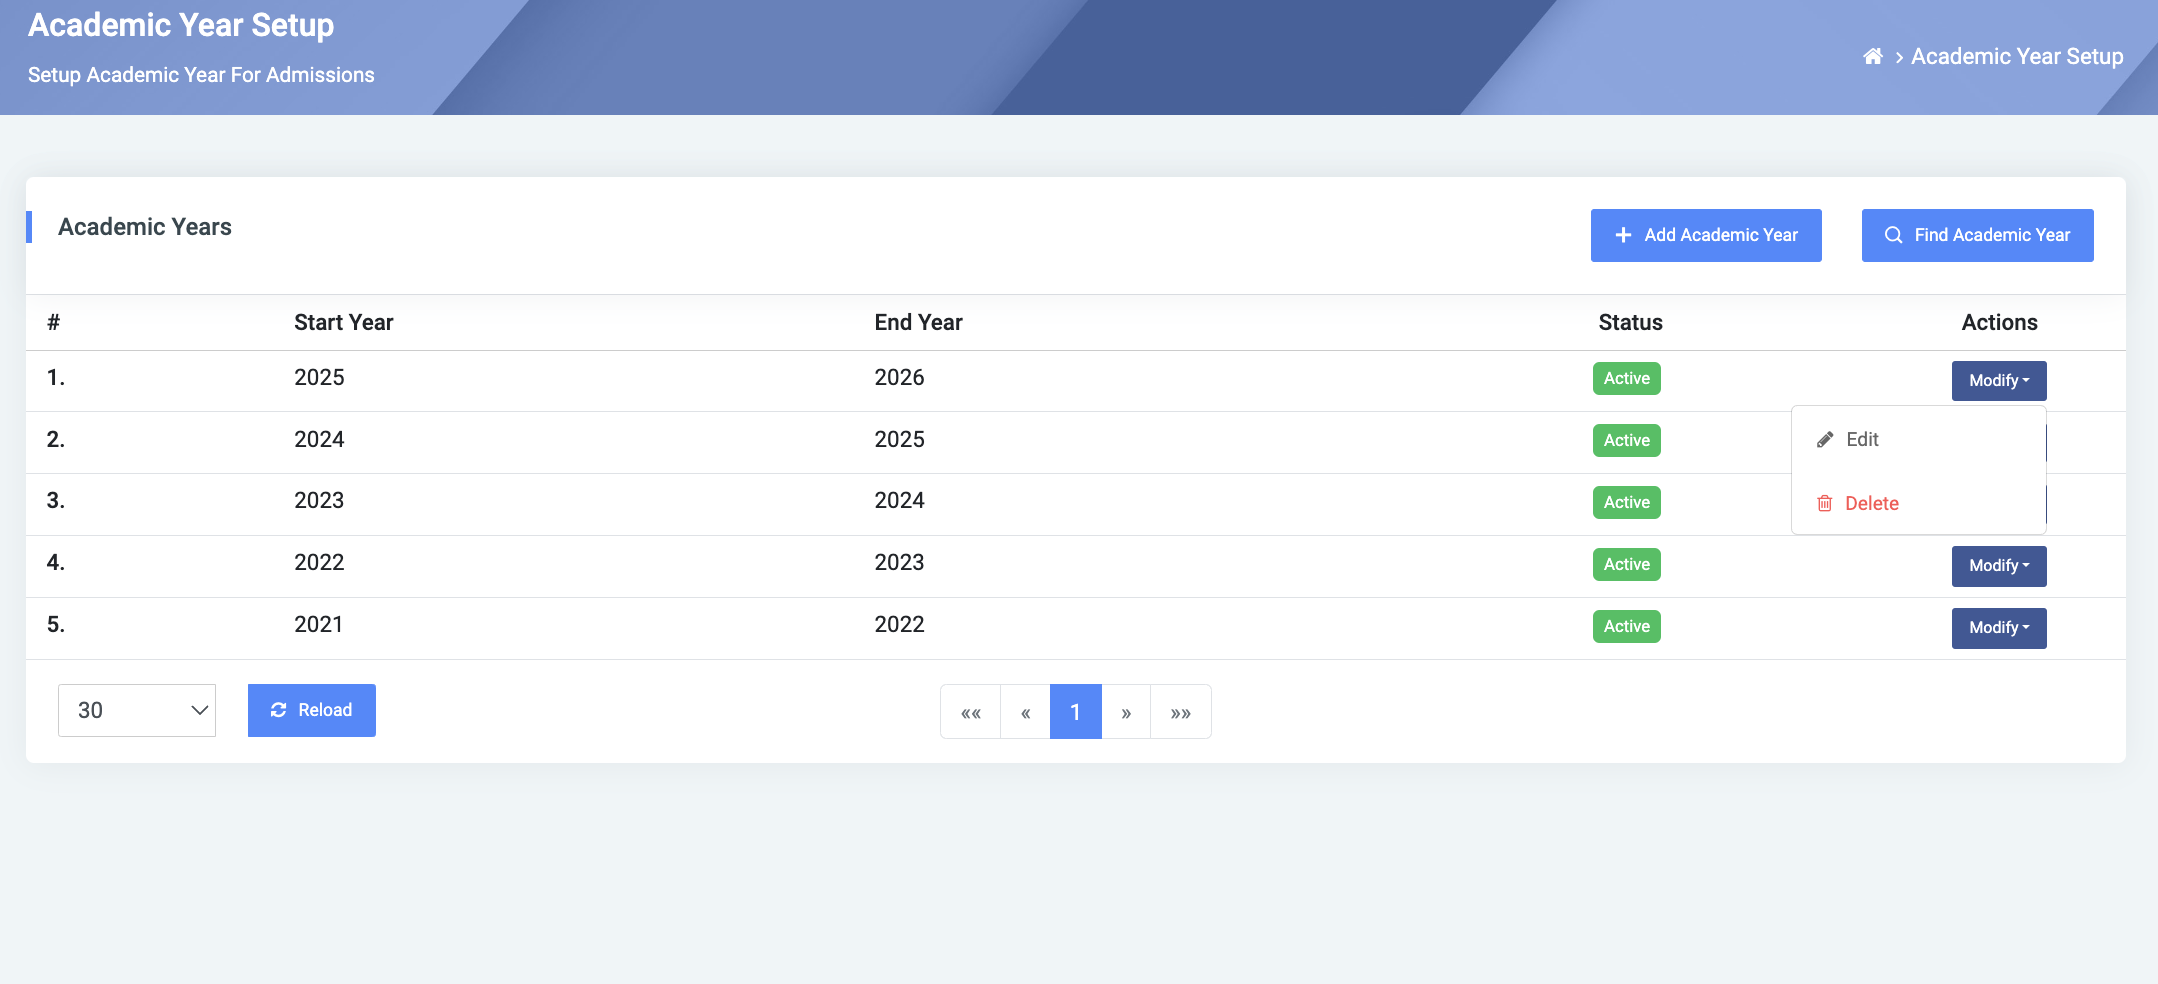
To edit an academic year, click on the Edit button.
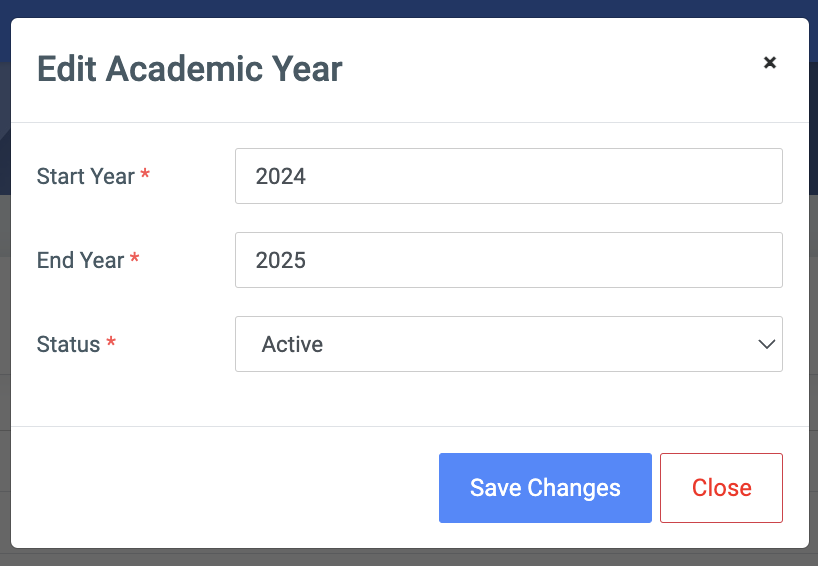
Change the old entries from the Edit Academic Year form and click on the Save Changes button.
To delete an academic year, click on the Delete button icon.
Click on the Delete Academic Year button from the modal popup to confirm your actions.

NB: An academic year will fail to delete if that year has been used in an admission batch.
